

[ad_1]
Medium is a platform the place readers can learn inspirational ideas and forward-thinking concepts from passionate content material creators. There’s an incredible chance that you simply may need learn articles from this standard platform and in addition printed compositions there. Nevertheless, though Medium has its execs, one of many cons is its centralized nature. That’s not simply the case for Medium however many different standard platforms. Thus, programmers are beginning to create decentralized choices, equivalent to a Web3 various to Medium, a Web3 Twitter clone, and so on. If you want to discover the way to construct a Web3 Medium clone, you’ll discover this information vastly useful!
This tutorial on making a Web3 Medium clone will profit those that resolve to get their arms soiled by taking actionable steps. If you find yourself constructing a Web3 Medium clone, you’ll learn to publish weblog articles to the blockchain. The printed articles can be within the type of NFTs (non-fungible tokens), which can be minted utilizing a wise contract. Therefore, you’ll be taught Solidity fundamentals. Additionally, we are going to present you the way to use Hardhat to compile, deploy, and confirm sensible contracts simply. Additionally, you will learn to add NFT metadata to IPFS. Plus, you’ll see the way to take advantage of out of your JavaScript abilities and create a neat Web3 UI utilizing React. Lastly, you’ll learn to make the most of Moralis – the last word Web3 improvement platform. So, create your free Moralis account earlier than shifting on.

Web3 Medium Demo
Like most Web3 purposes, our Web3 Medium clone additionally begins with Web3 authentication:
By clicking on the “Join Pockets” button, customers get to pick out their favourite Web3 pockets to finish their Web3 login. Since MetaMask continues to be the most well-liked crypto pockets, our instance consumer determined to authenticate with MetaMask. So, after clicking on “Metamask”, this pockets’s browser extension pops up asking to pick out an account:
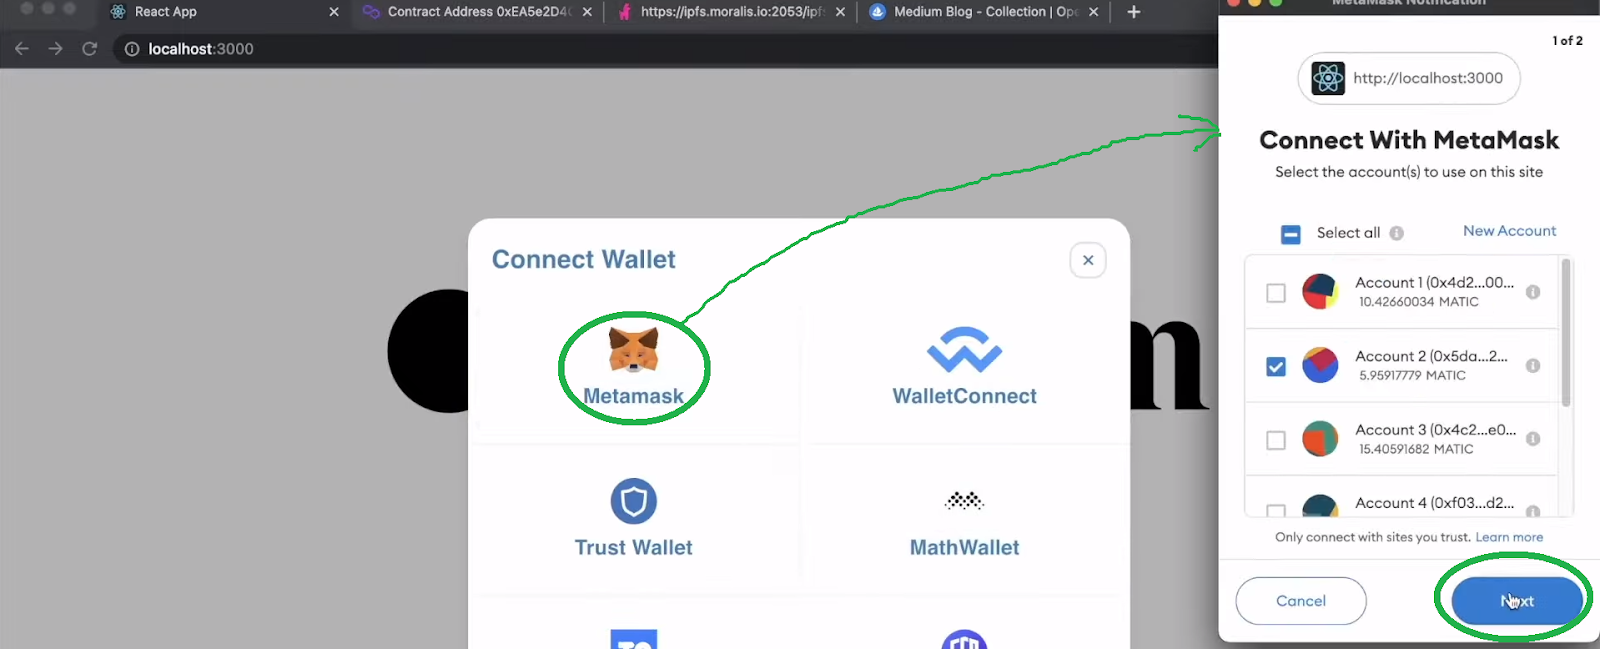
As soon as the consumer selects an account and clicks on “Subsequent”, they should full the authentication by clicking on the “Join” button:

Then, the consumer lands on the homepage of our Web3 Medium clone:
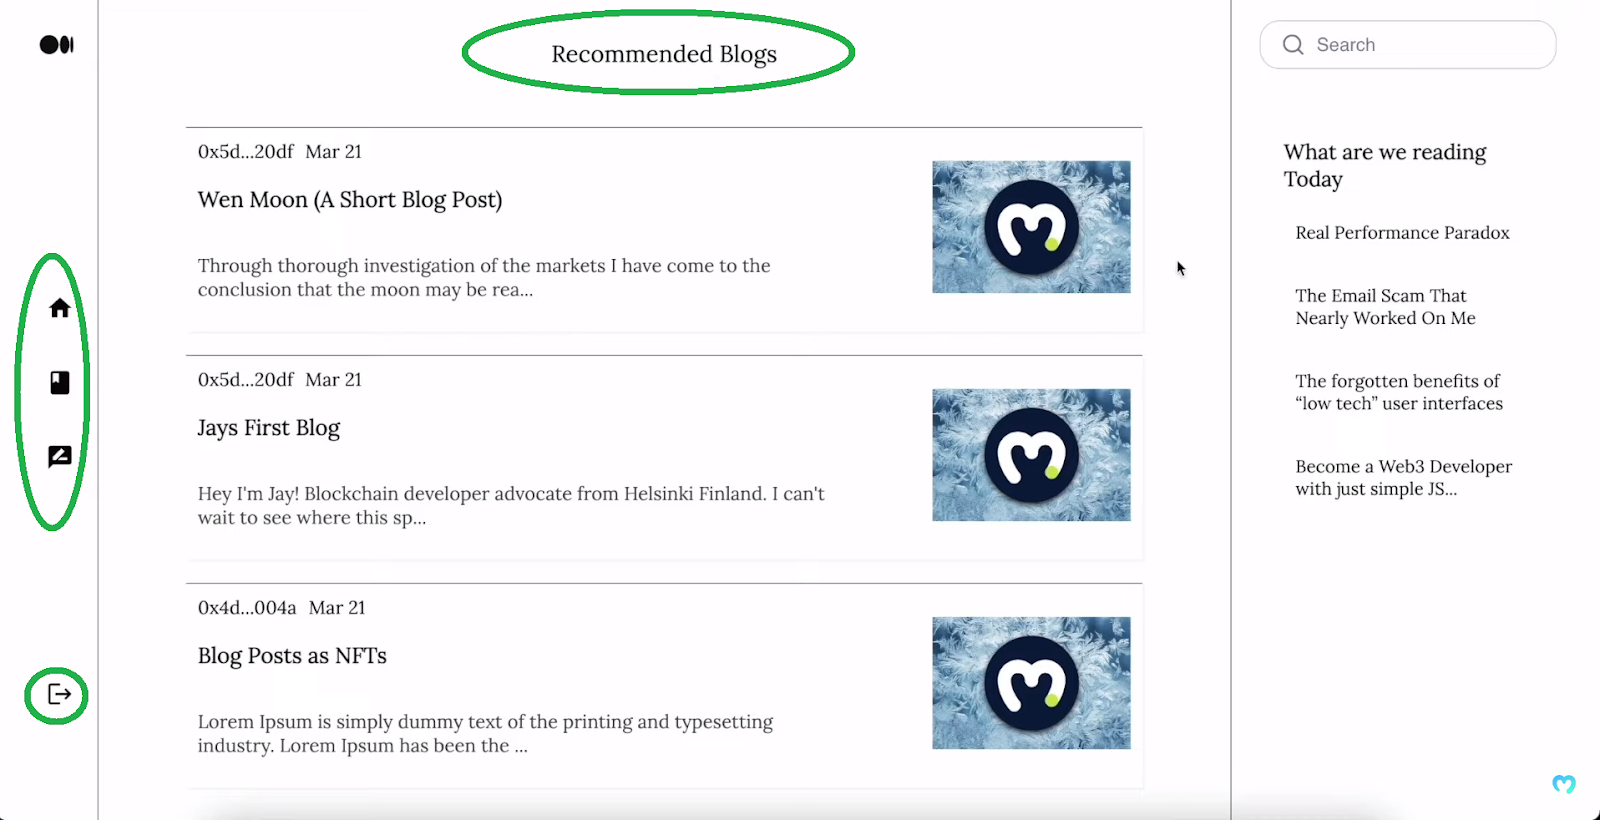
Wanting on the screenshot above, you’ll be able to see that our Medium clone for Web3 has three sections. On the perimeters, there are sidebars, and within the center is the “Really helpful Blogs” part (homepage). That is the place the most recent blogs are displayed. These blogs are NFTs saved on the Polygon testnet (Mumbai). So, if the customers resolve to learn one of many blogs, they should click on on it. By doing so, the Web3 Medium clone shows the chosen publish within the central part:
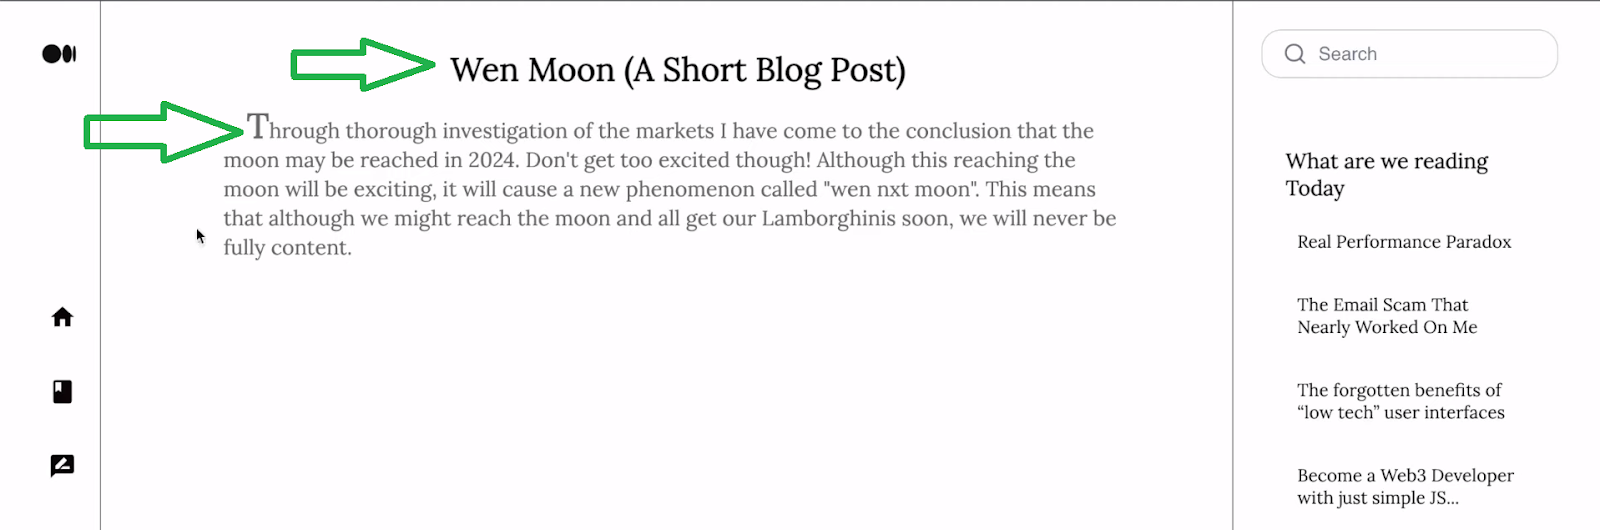
As you’ll be able to see within the picture above, every weblog publish accommodates a title and content material. To return to the homepage (the place all weblog posts are listed), customers have to click on on the “dwelling” icon within the left sidebar. The icon under “dwelling” takes customers to the web page that shows their weblog posts:
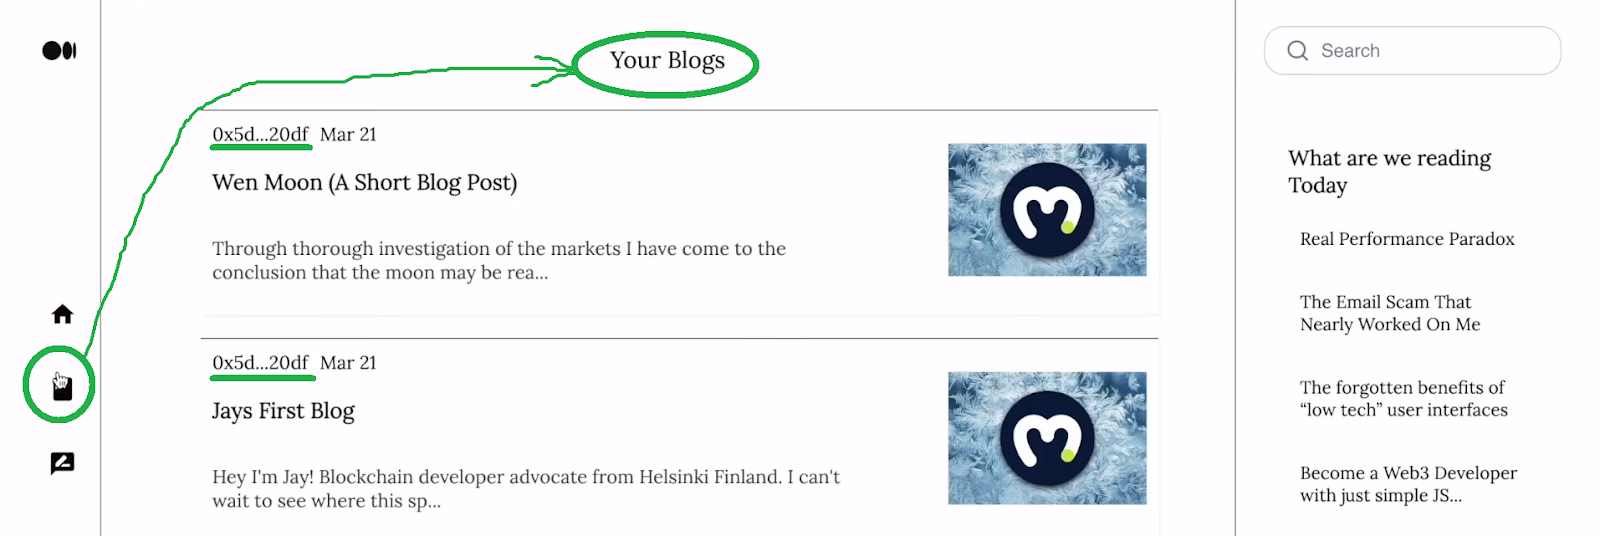
To create new weblog posts, customers have to click on on the “write” icon:
Now, let’s check out what publishing a weblog publish utilizing our Web3 Medium clone seems like.
Publishing Posts with Web3 Medium – Demo Continuation
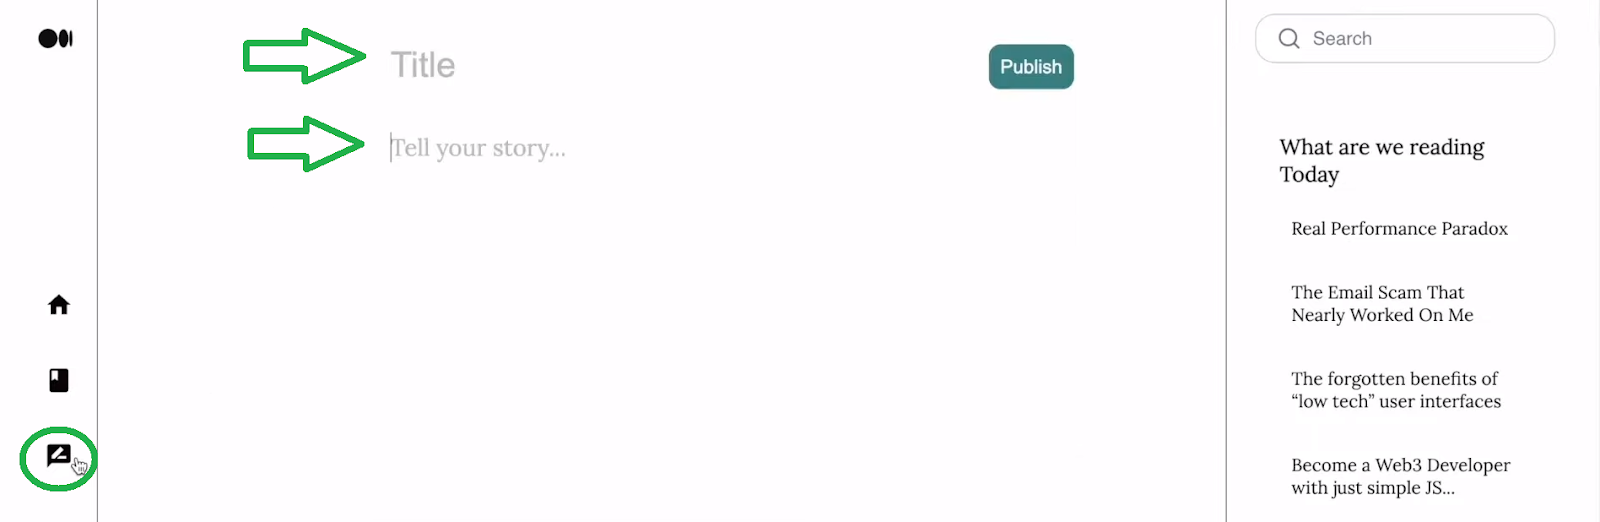
As soon as customers are on the “write publish” web page, they’ll kind their publish’s title and content material. Then, they’ll publish it by clicking on the “Publish” button:
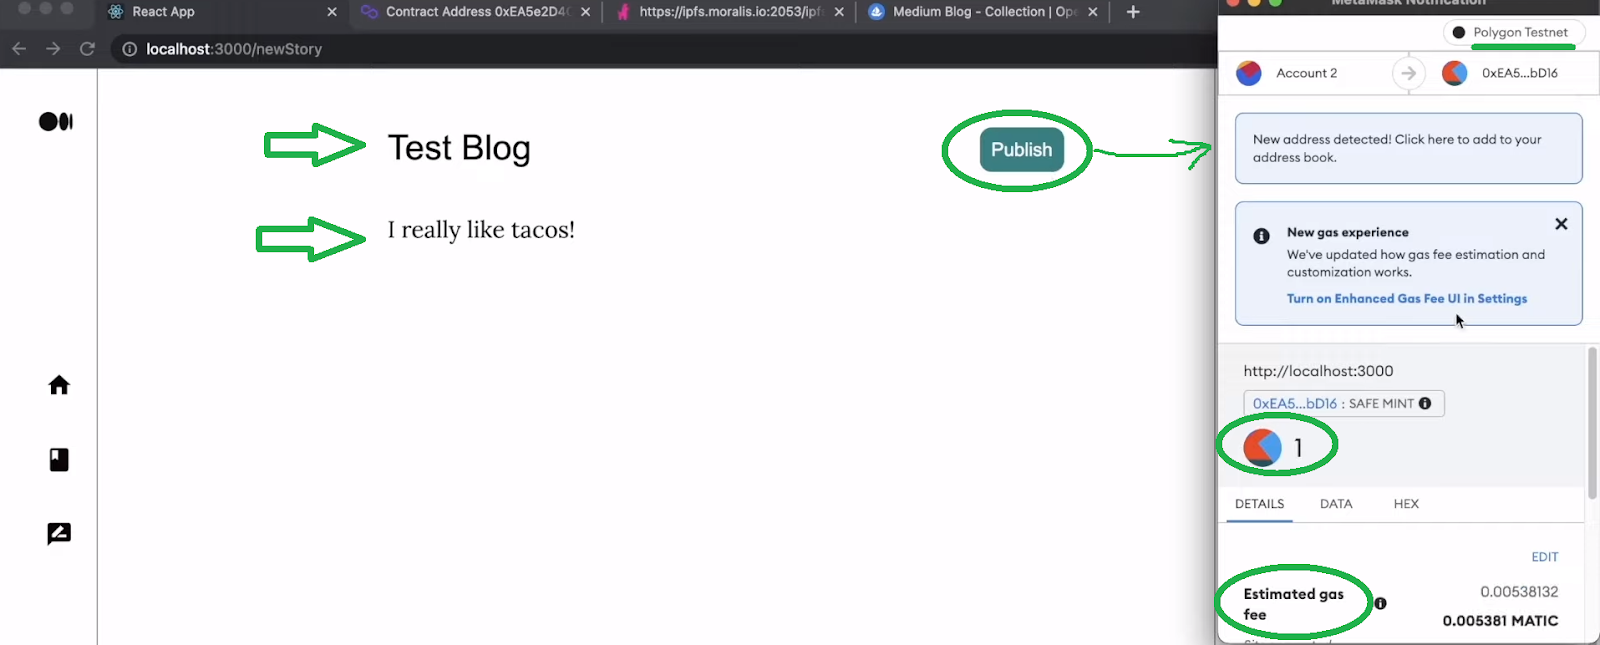
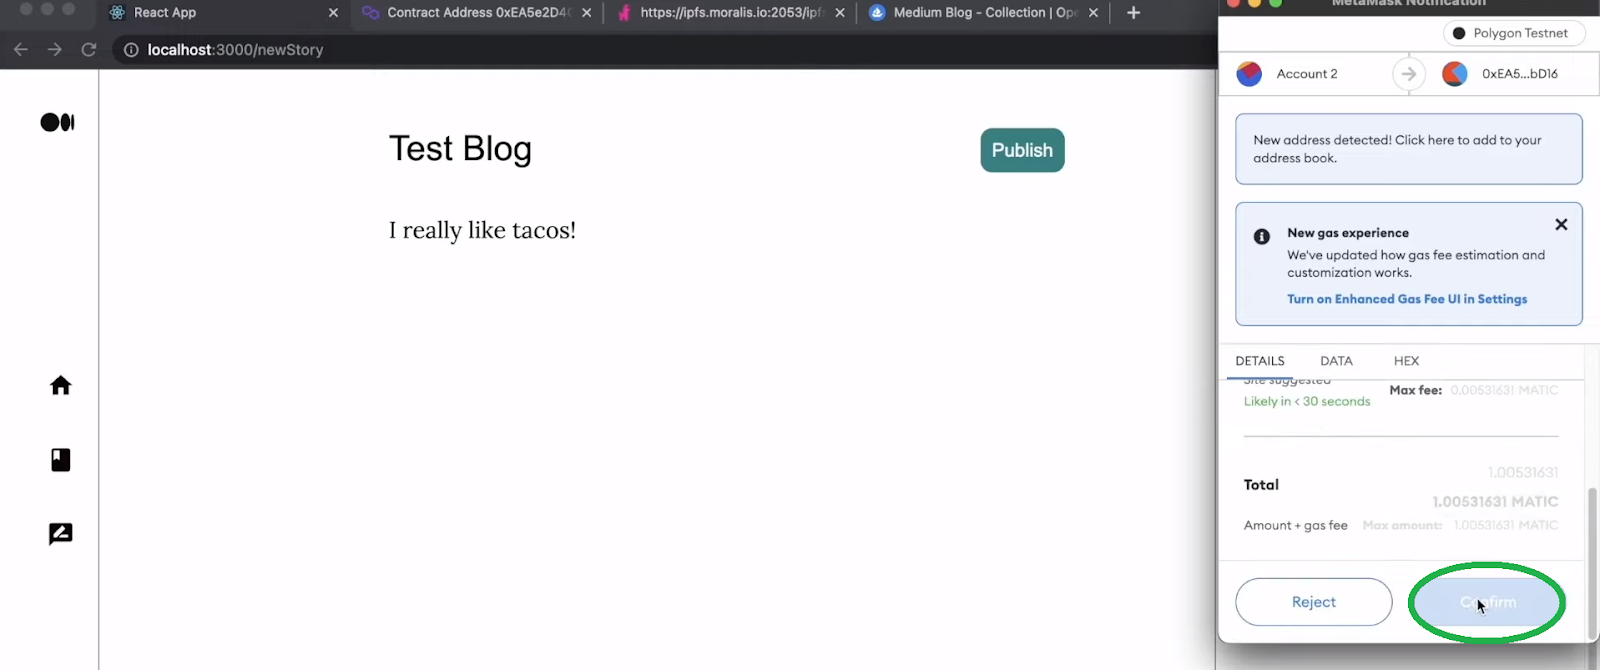
Nevertheless, since our Web3 Medium posts blogs within the type of NFTs, customers additionally want to substantiate the associated on-chain transaction. As such, a MetaMask immediate will present the main points (see the screenshot above). Thus, customers can see that they might want to pay one MATIC plus the gasoline payment to publish their posts. Furthermore, in the event that they agree with the required particulars, they should scroll down their MetaMask extension and click on on “Verify”:
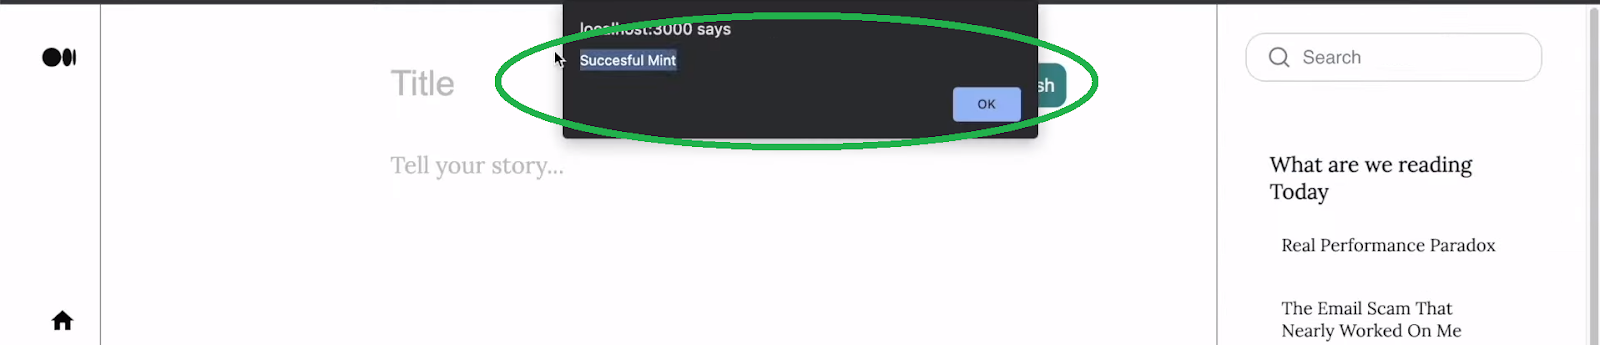
As soon as the transaction goes by means of, our Medium clone returns the next message:
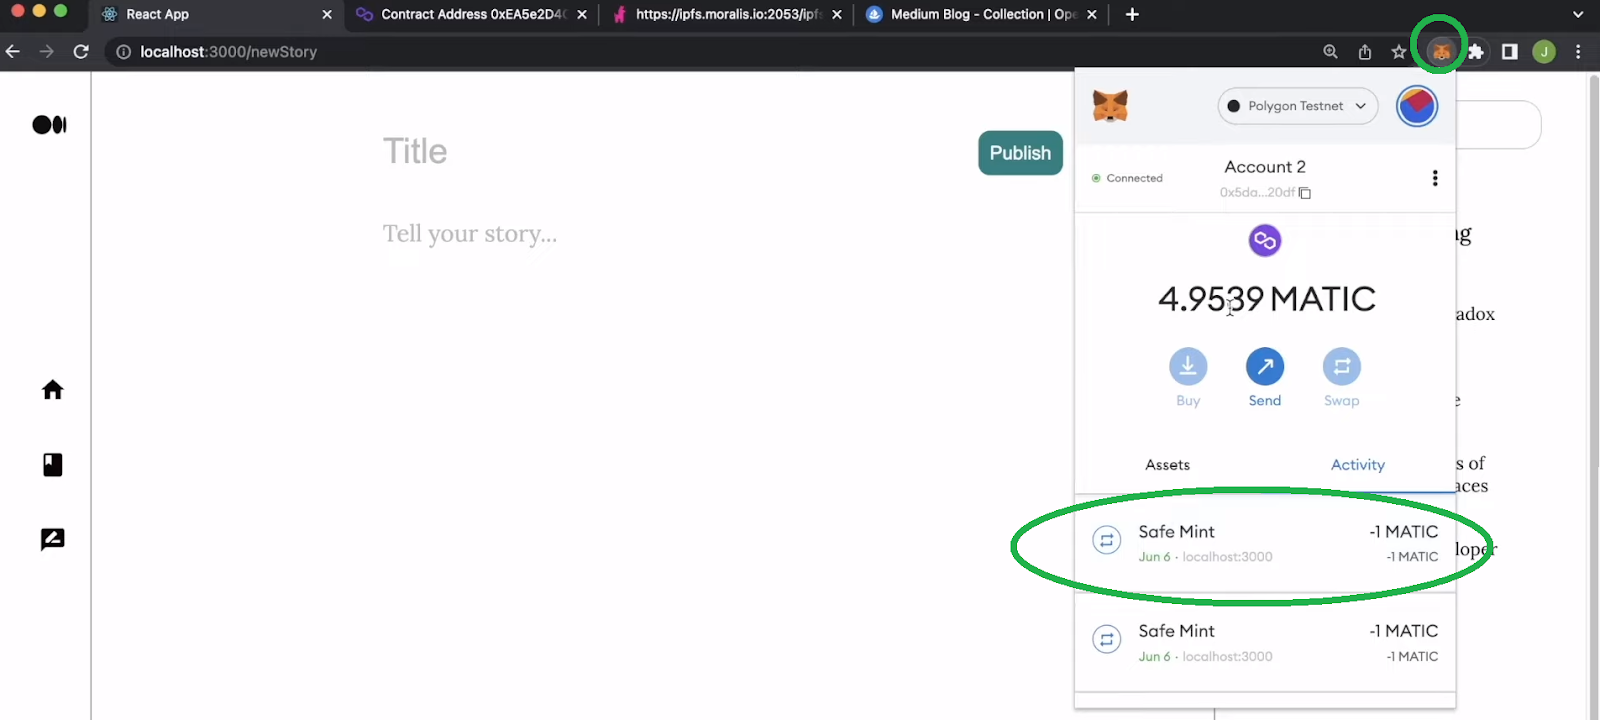
We are able to additionally verify that the above transaction was executed correctly in a number of methods. As an example, customers can make the most of their MetaMask to see their newest transactions:
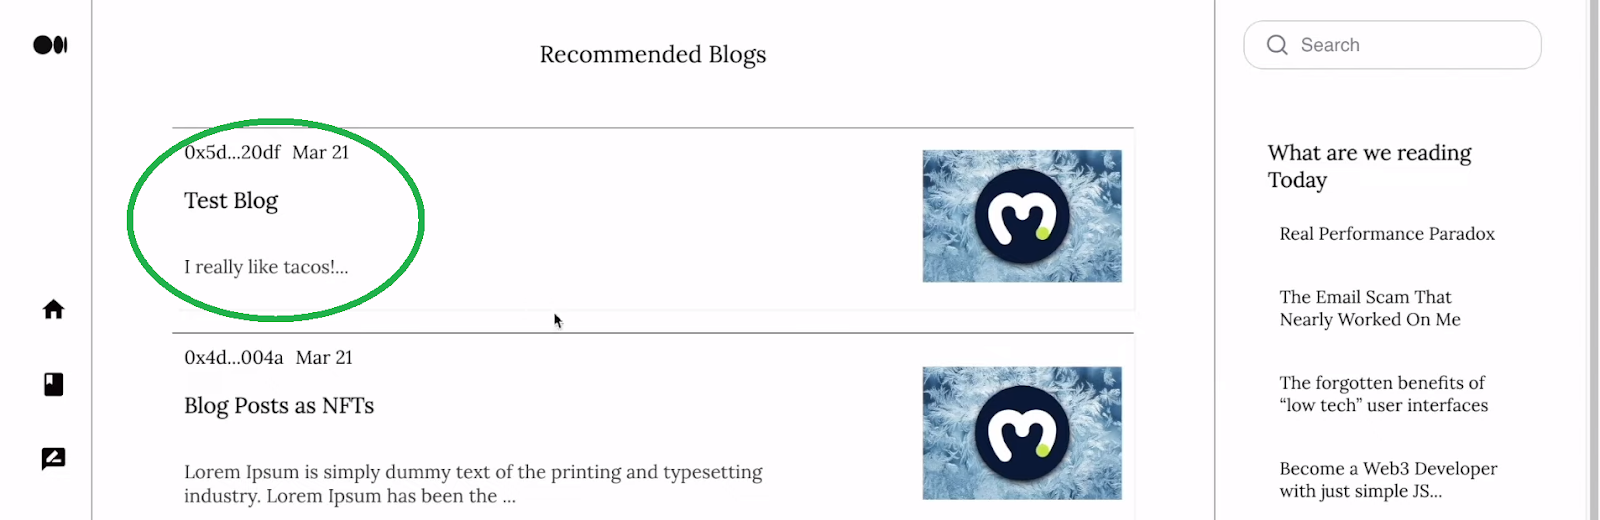
In fact, they’ll additionally see their newest publish on the homepage:
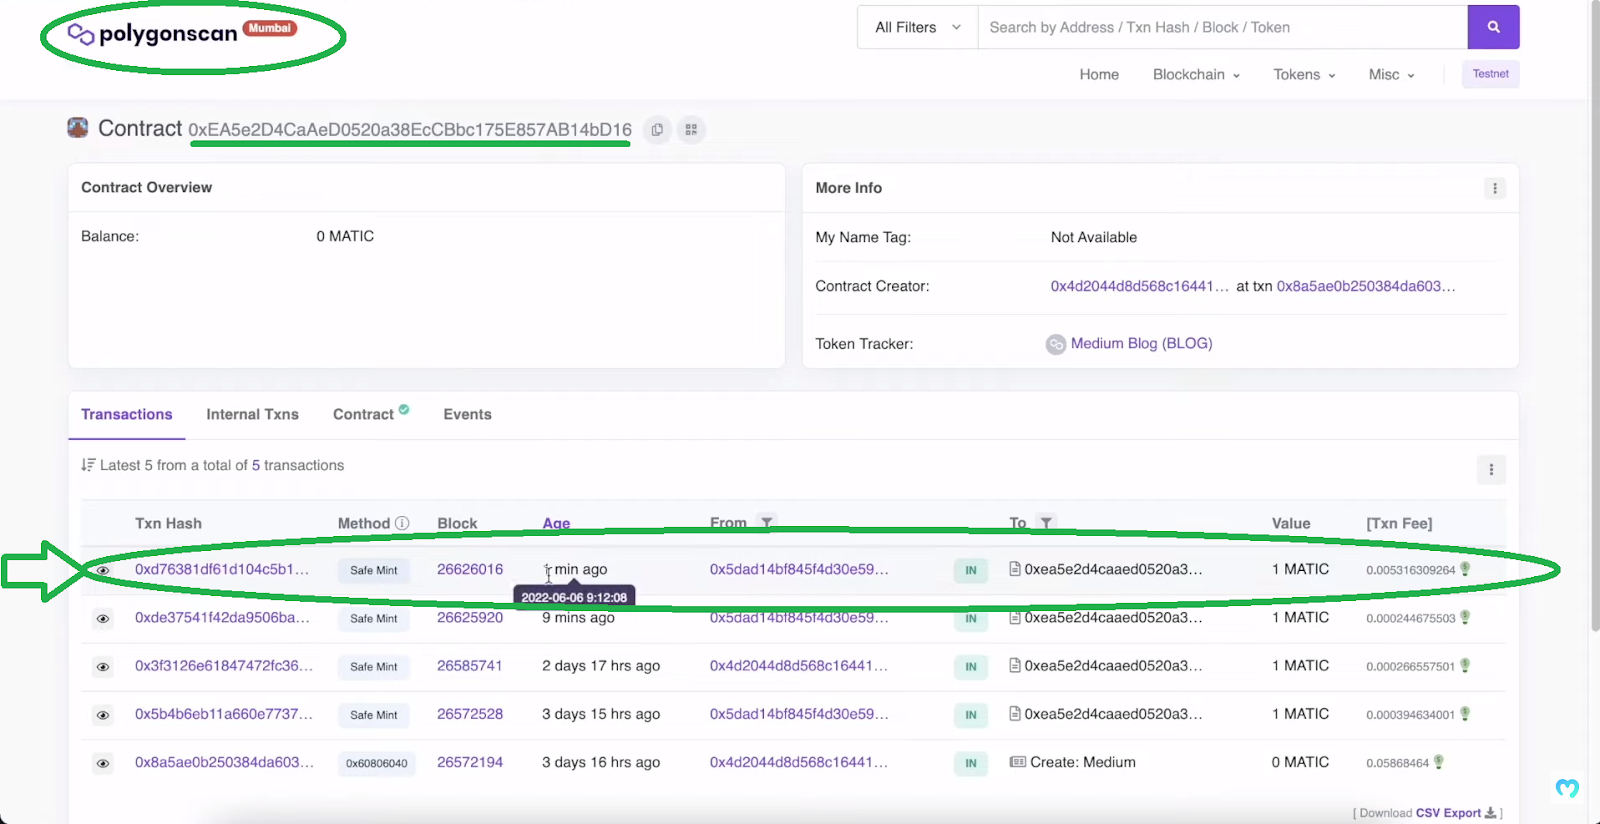
Moreover, for these of you who need further affirmation, you can even use blockchain scanners (PolygonScan in our case):
Nonetheless, since our Web3 Medium’s weblog posts come within the type of NFTs, you can even view them on OpenSea:
Construct a Web3 Medium Clone with Hardhat, React, and Moralis
After seeing what a wonderful dapp we constructed, you most likely can’t wait to create your personal occasion of a Web3 Medium clone. If that’s the case, it’s best to put aside about 70 minutes. Furthermore, along with our directions and screenshots, make the most of the video on the backside of this text. That is additionally the place our timestamps all through this text level to. Nonetheless, listed below are the steps you will want to finish if you wish to construct a Web3 Medium clone rapidly and simply:
- Arrange Hardhat
- Create, compile, and deploy your NFT-minting sensible contract
- Initialize a React venture and connect with Moralis’ SDK
- Arrange Web3 authentication
- Use React to construct the Web3 frontend of your dapp:
- Create sidebars
- Create a listing of blogs (your homepage)
- Create a weblog web page
- Create a publishing web page
- Add to IPFS (storing NFTs’ metadata in a decentralized method)
- Arrange the minting performance of your Web3 Medium clone
- Querying NFTs utilizing the last word Web3 API
In fact, you don’t have to start out from scratch. You may entry our “starter” code and our “closing” code on GitHub.
Notice: The next directions and the video tutorial assume you begin with the “starter” code. In spite of everything, that is the trail it’s best to take if you wish to get essentially the most out of this instance venture.
Set Up Hardhat
Notice: If you’re used to working with Remix, you’ll be able to take that route as an alternative of deploying your sensible contract with Hardhat.
Use your favourite code editor (we use Visible Studio Code [VSC]) and open a brand new folder. Then, use VSC’s terminal to put in Hardhat utilizing the “npm i -D hardhat” command:

Subsequent, use the “npx hardhat” command to create a brand new Hardhat venture. Then, use the terminal and choose the plain choices to finish the Hardhat setup. Primarily, it’s worthwhile to click on on “enter” 4 instances. Lastly, you’ll additionally need to set up all dependencies:
- “npm i @openzeppelin/contracts” to make use of Web3 contract templates from OpenZeppelin
- “npm i -D dotenv” to work with the “.env” file that may maintain the setting keys
- “npm i -D @nomiclabs/hardhat-etherscan” to confirm your sensible contract
Web3 Medium Sensible Contract
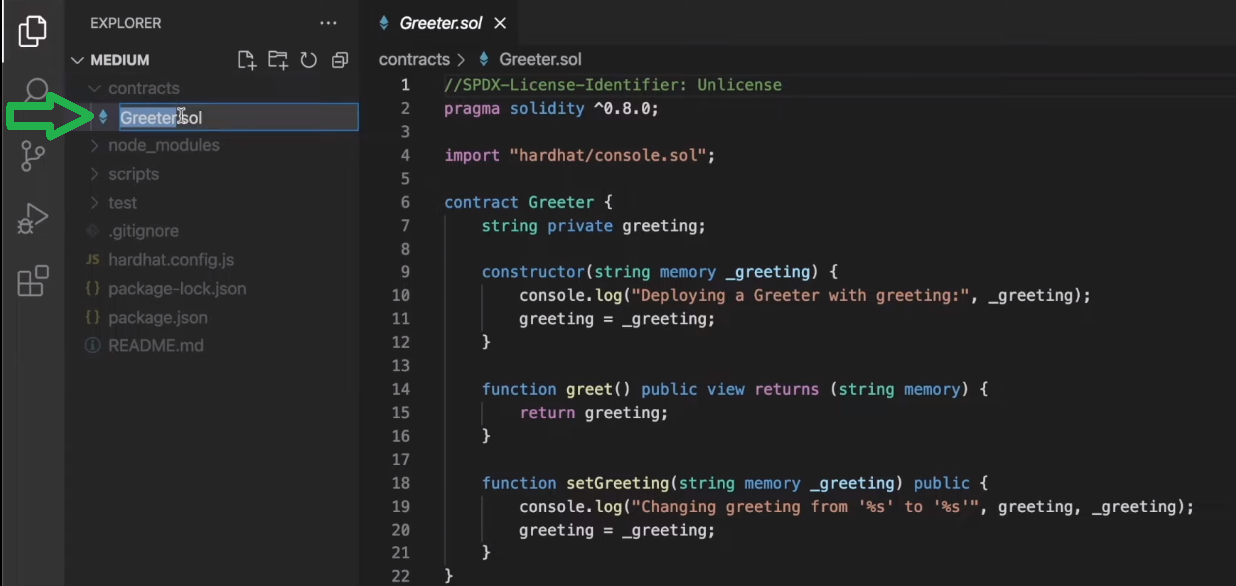
When you’ve put in all dependencies, you might be able to create your Web3 Medium sensible contract (4:17). You’ll begin by renaming the sensible contract template (“Greeter.sol”):
Subsequent, you’ll write the right strains of code. In case you aren’t able to be taught the fundamentals of Solidity, you can even copy the code from GitHub (“Medium.sol“). At this level, you already know that our Web3 Medium clone wants to have the ability to take the metadata and convert it into NFTs. As such, your sensible contract can be minting ERC-721 tokens utilizing an ERC-721 contract.
Compile and Deploy Your ERC-721 Contract
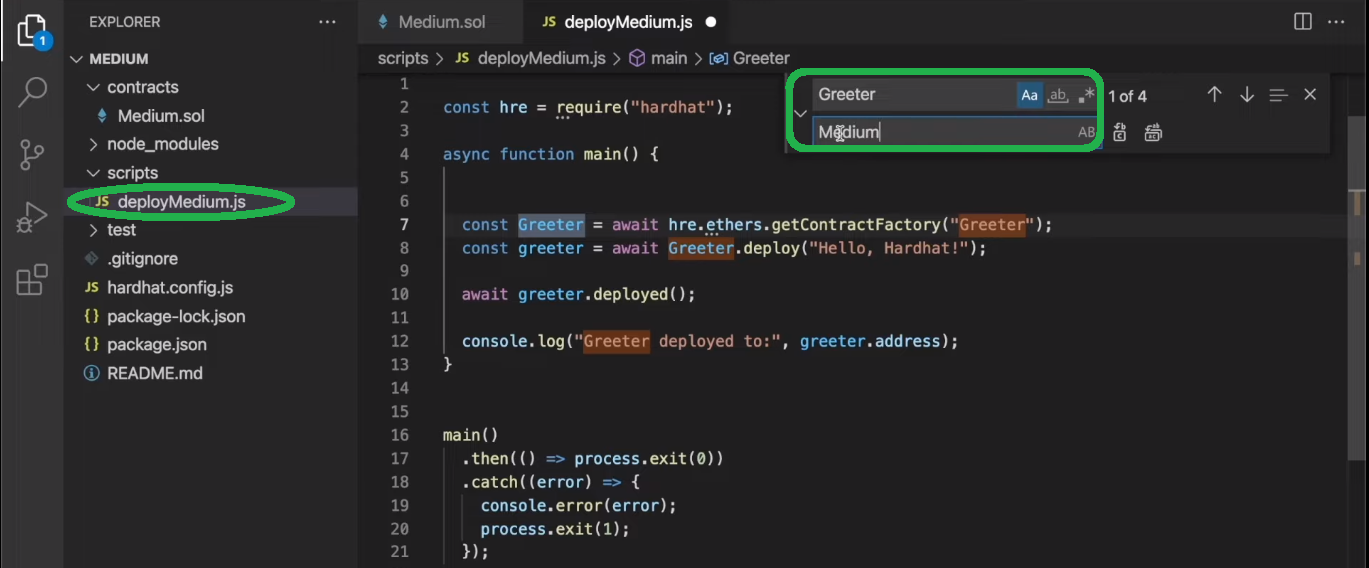
Along with your occasion of our “Medium” sensible contract prepared, it’s essential to make the most of Hardhat to compile, deploy, and confirm it (11:04). That is the place the “sample-script.js” file will make issues lots easier for you. You’ll rename it to “deployMedium.js” and substitute “Greeter” and “greeter” with “Medium” and “medium”:
Additionally, you will add correct parameters inside “.deploy”:

Then, you’ll make the mandatory tweaks to the “hardhat.config.js” file (12:31). You’ll use this file to compile and confirm your sensible contract. On the prime of the file, you’ll add the next strains of code:
require(“@nomiclabs/hardhat-etherscan”);
	const dotenv=require(“dotenv”);

	dotenv.config();
Additionally, you will have to tweak “module.exports” on the backside of the file:
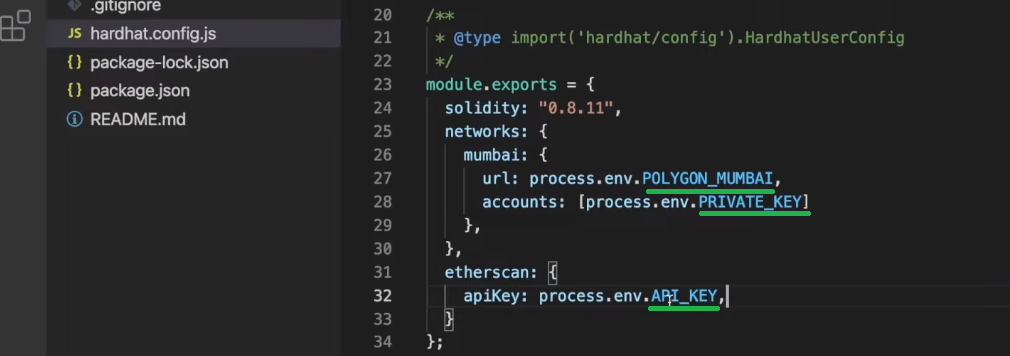
The above-market variables are those you’ll retailer in your “.env” file:
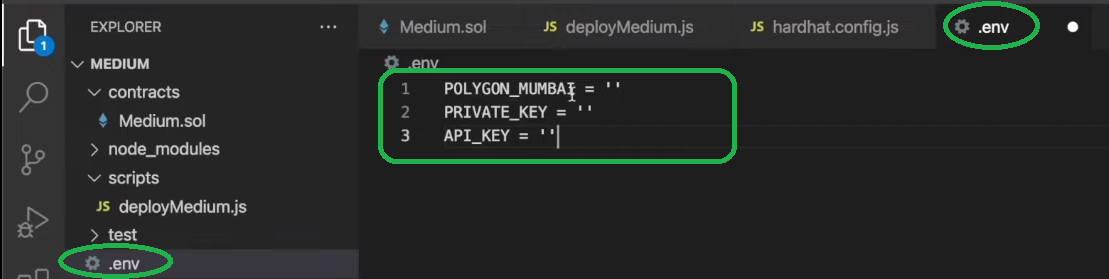
In fact, additionally, you will have to populate the above variables with acceptable values. For detailed steering on discovering these values, use the video under, beginning at 14:48. So far as “Polygon_Mumbai” goes, you employ the “Beginning with Moralis – New Admin UI” part under. With these values in place, you’ll be able to compile, deploy, and confirm your sensible contract (16:40). As soon as your sensible contract is dwell, you can begin interacting with it utilizing PolygonScan (18:47). Nevertheless, our objective is to create a neat UI for that goal. As such, it’s time you create the frontend to your Web3 Medium clone.
Web3 Medium Clone Frontend
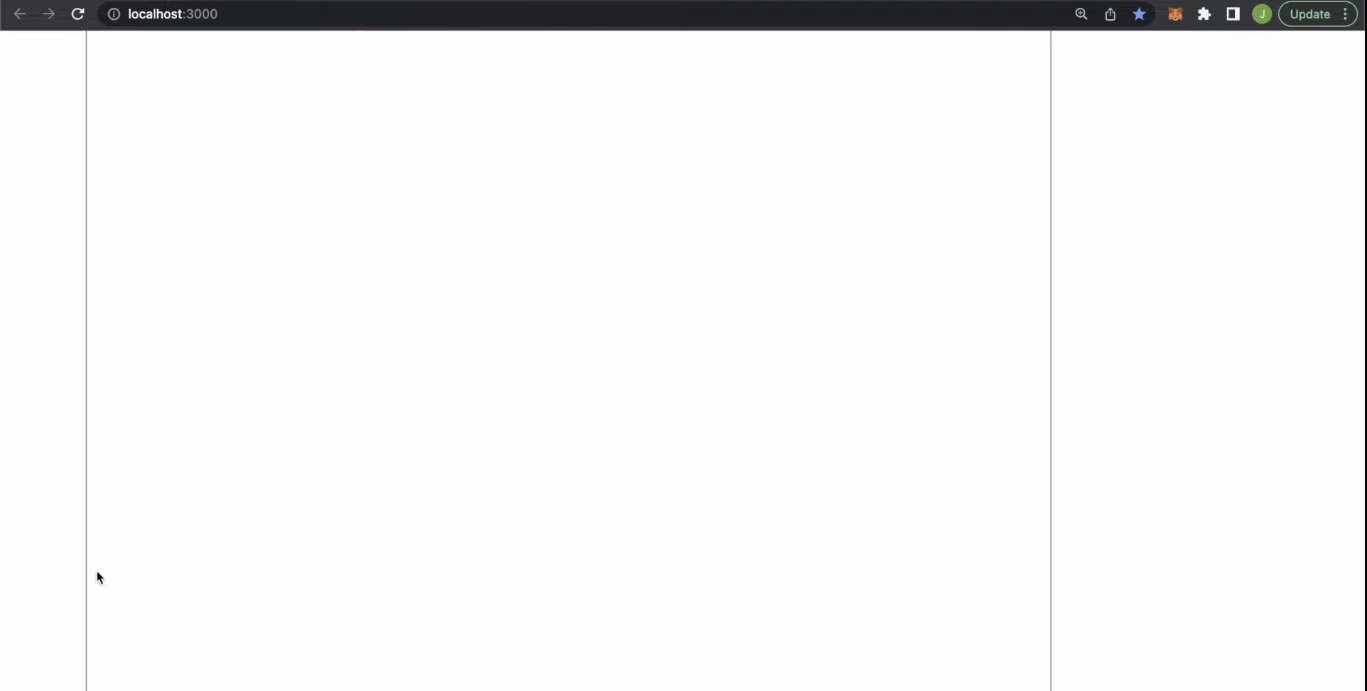
In relation to constructing the Web3 frontend, issues are fairly just like Web2. Once you give attention to utilizing React, you begin by initializing a React venture (22:04). That is the place it’s best to clone the “starter” code should you haven’t carried out so but. Moreover, earlier than you progress one, make sure that to stick your Moralis dapp’s particulars into the “index.js” file. Use the “Beginning with Moralis – New Admin UI” part for assist with the brand new admin UI. Then, utilizing the “yarn begin” command, try to be trying on the clean canvas with our Web3 Medium construction set in place:
Beginning at 23:39, you’ll first deal with Web3 authentication. Utilizing Moralis’ web3uikit, you’ll have a totally practical “Join Pockets” button prepared in beneath two minutes. Subsequent, you’ll create each sidebars (25:24), the checklist of blogs (29:36), a weblog web page (38:41), and the “publish weblog” web page (44:53).
Web3 Medium Clone Backend
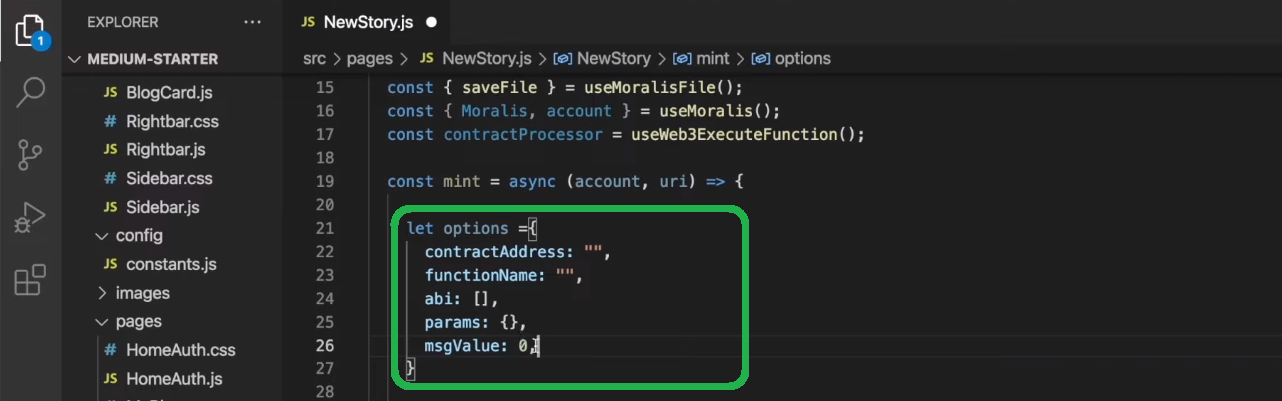
One of many key facets of your Web3 Medium’s backend is your ERC-721 sensible contract, which is already dwell. Nevertheless, to make sure that your dapp runs as introduced within the demo above, it’s worthwhile to implement the suitable code. As such, make sure that to make use of the video tutorial under to automate the importing of metadata to IPFS (48:05). That is the place you’ll use the “NewStory.js” file. Due to the facility of the Moralis SDK, which incorporates IPFS integration, “saveFile” will do a lot of the heavy lifting. Furthermore, with the metadata in place, you should utilize your sensible contract to mint net Medium posts as NFTs (53:35). That is the place our in-house professional will present you the way to use PolygonScan to acquire your contract’s particulars:
Lastly, you’ll additionally learn to use Moralis’ Web3 API to question on-chain information (58:57). That is how you’ll populate your Medium clone’s homepage and the “Your Blogs” web page. You’ll use the “homeAuth.js” and the “MyBlogs.js” information. Due to the “fetchAllNfts” perform and the “getNFTOwners” hook, you’ll effortlessly entry all of the on-chain information you want.
Beginning with Moralis – New Admin UI
Notice: Our in-house professional within the video tutorial under makes use of the Moralis admin legacy UI. As such, you’ll be able to comply with his lead and swap to the previous UI:

Nevertheless, under are additionally the directions that will help you navigate the up to date UI:
- Log in to your Moralis admin space. In case you haven’t created your free Moralis account but, use the hyperlink acknowledged at the start of this text.
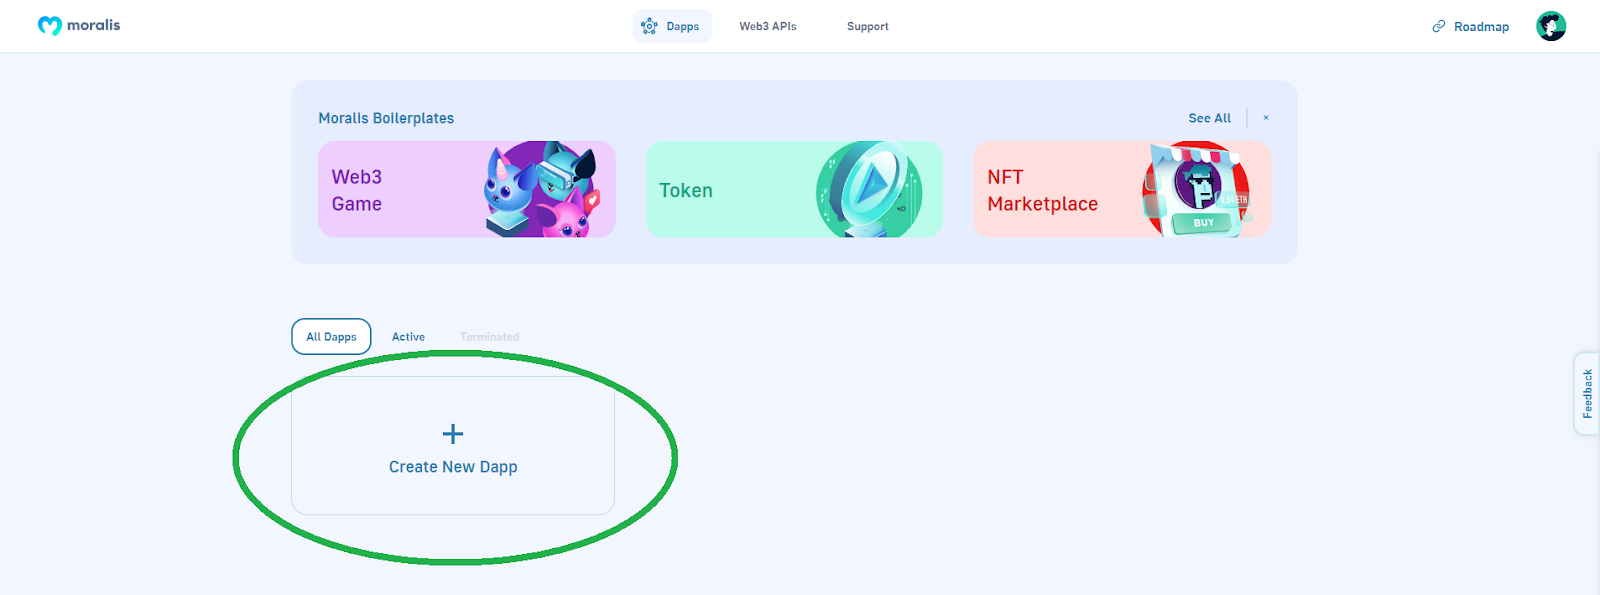
- Inside your Moralis admin panel, create a brand new dapp:
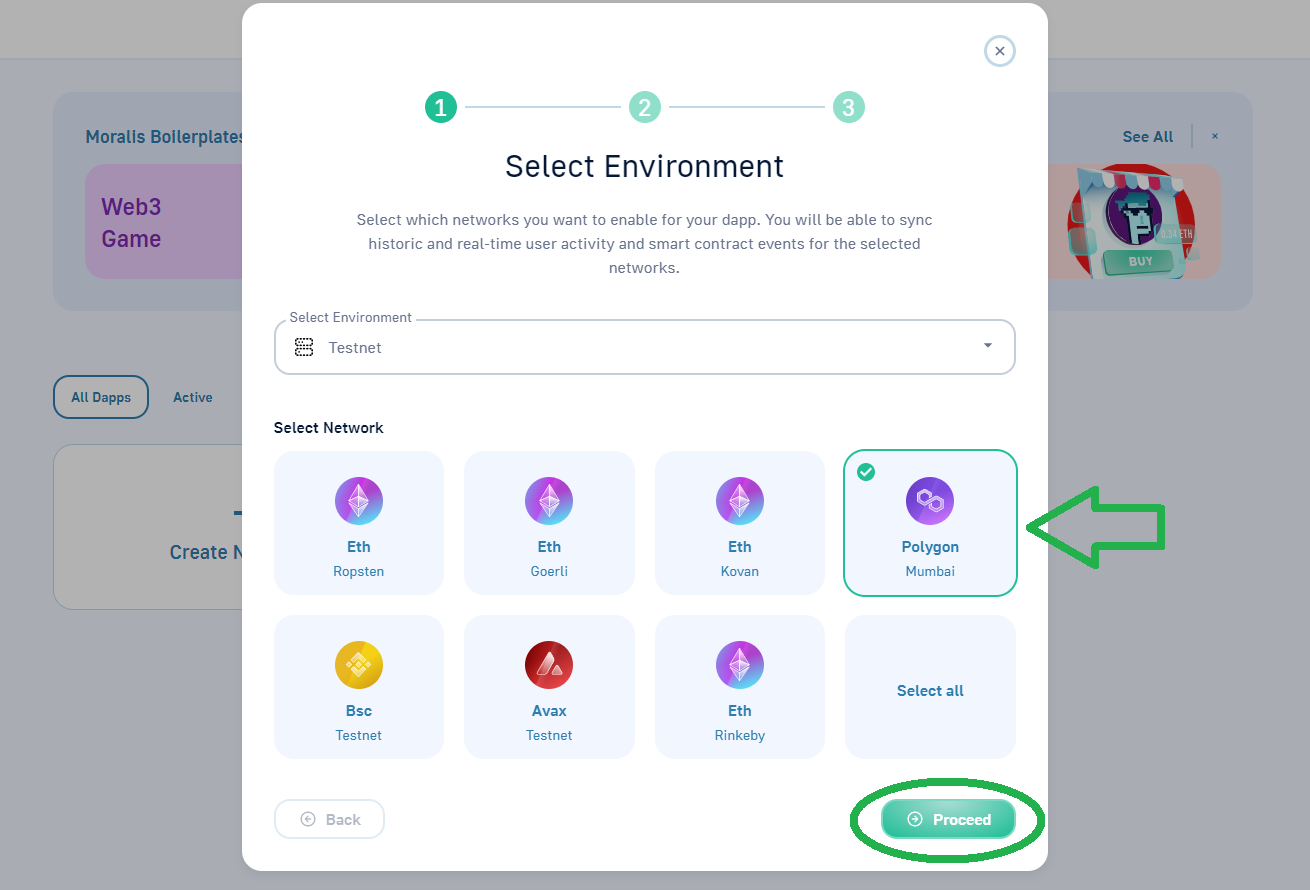
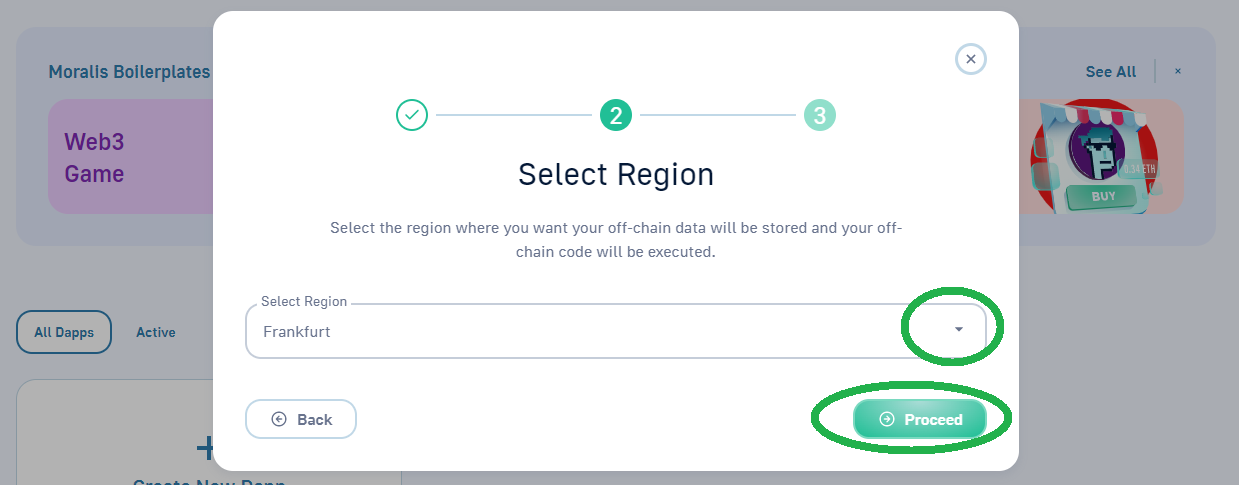
- Choose your setting – go together with “Testnet”:

- Select “Polygon Mumbai” and click on on “Proceed”:
- Choose town closest to you:
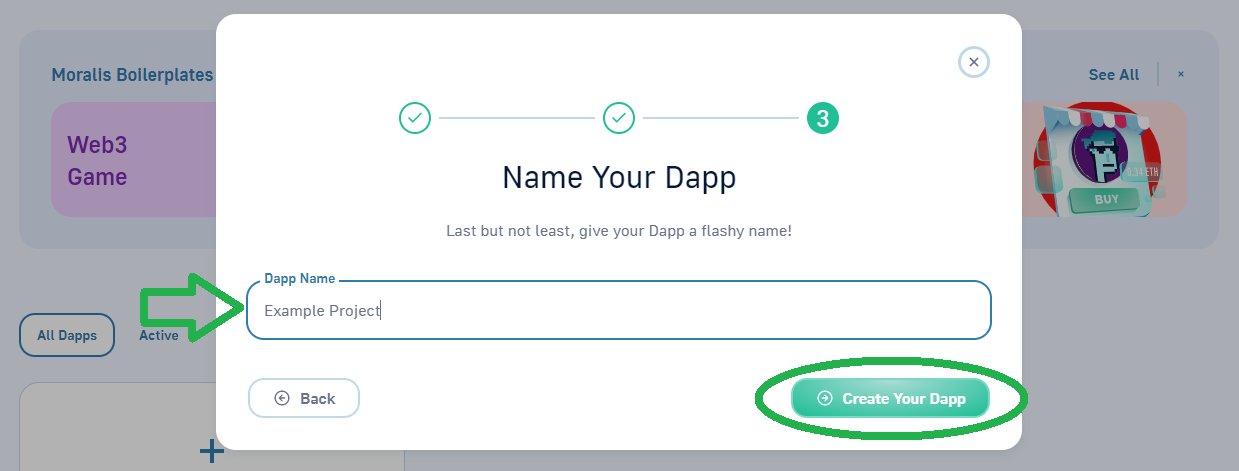
- Title your dapp and full the method by clicking on the “Create Your Dapp” button:
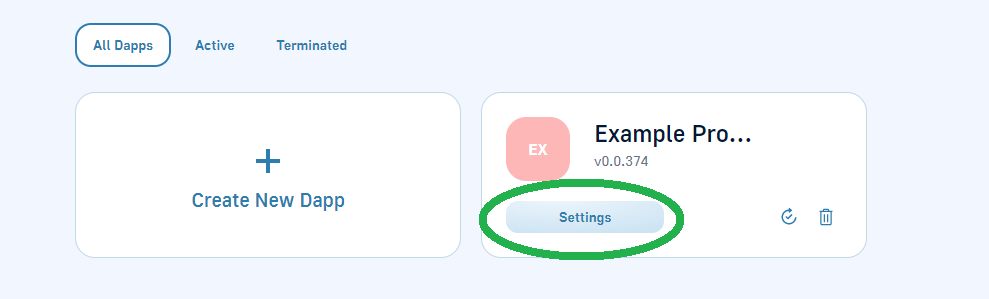
As soon as your dapp is up and operating, you’ll be able to acquire the Mumbai testnet’s endpoints and your dapp’s particulars (URL and ID):
- Click on on “Setting” to your newly created dapp:
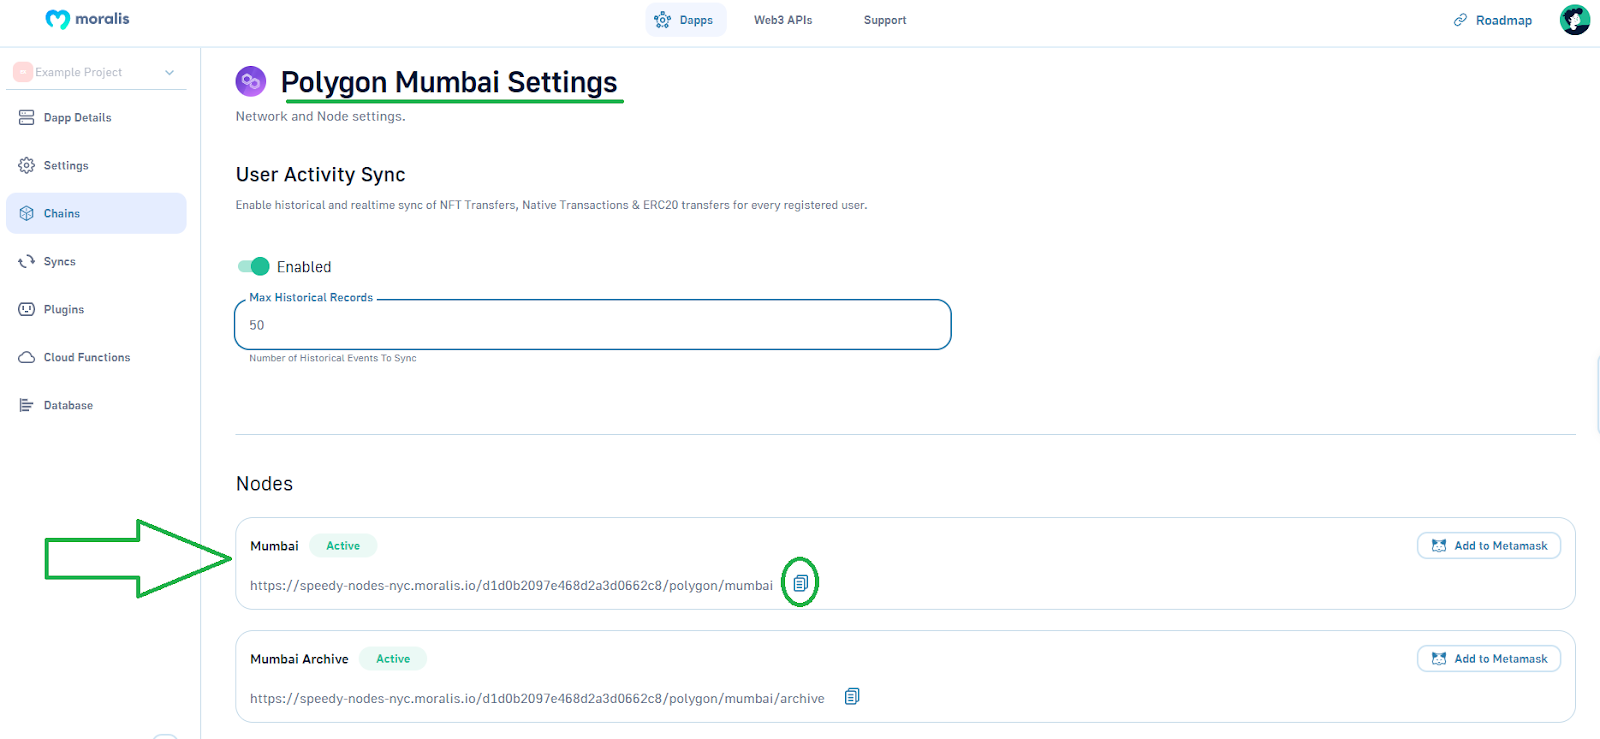
- Choose “Chains” on the correct aspect after which click on on “Settings” subsequent to “Polygon Mumbai”:

- Copy Mumbai’s endpoint:
- Accessing Dapp ID and URL:
- Click on on “Settings” to your newly created dapp:
- Copy your dapp’s URL and ID:

Right here’s the video tutorial we’ve been referencing above:
The right way to Construct a Web3 Medium Clone – Abstract
By following our lead and the above video tutorial, you had an opportunity to construct your personal Web3 Medium clone. You additionally discovered the way to create, compile, deploy, and confirm an ERC-721 sensible contract. Additionally, you had an opportunity to refresh your React abilities by making a user-friendly frontend. Most significantly, you discovered the way to make the most of the top of the present Web3 tech stack – Moralis. Because of this, you now have the power to make use of this final Web3 backend platform for all of your future Web3 endeavors.
In case you loved right now’s instance venture, we encourage you to take a look at our different “clone” tutorials:
Ensure that to discover different blockchain improvement subjects on the Moralis YouTube channel and the Moralis weblog. A few of our newest articles embrace constructing a Web3 role-playing recreation, making a social media dapp, exploring a Binance dapp API, the Ethereum Merge, an Ethereum NFT API, and a Polygon NFT API, and so on. Nonetheless, you may additionally need to try the Moralis Academy. In spite of everything, this is without doubt one of the greatest locations to develop into a Web3 developer quick and with confidence.
[ad_2]
Source link


