

[ad_1]
Do you know that augmented actuality was invented already in 1968? Nonetheless, it wasn’t till 1990 that the time period “augmented actuality” was coined. Although, this thrilling expertise actually began to be extra broadly used previously couple of years. Regardless of this, most augmented actuality functions are nonetheless working on centralized Web2 applied sciences. And, since we imagine in a decentralized future, we’ve determined to indicate you the right way to simply create a Web3 augmented actuality dapp (decentralized utility). With the proper Web3 tech stack, you need to use Unity on your Web3 augmented actuality feats. That’s doable because of Moralis, the last word Web3 improvement platform Moralis. This Firebase for crypto affords a extremely simple method to equip your Unity functions with Web3 functionalities. As such, you get to implement Web3 authentication in minutes. Moreover, the Moralis’ SDK additionally lets you simply deal with on-chain occasions and create an on-chain stock system.
In our opinion, Web3 augmented actuality has lots to supply. There’s one thing fairly cool about implementing digital objects into the actual world. And, in fact, the true possession that Web3 introduces, provides numerous worth to customers. The latter will be fairly simply accomplished by incorporating non-fungible tokens (NFTs). Positive, if you’re new to dapp improvement, creating your individual Web3 augmented actuality (AR) dapp could sound tremendous difficult. Nonetheless, herein you’ll have an opportunity to construct your individual AR NFT loot field in about one hour. Furthermore, even if you’re comparatively new to Unity, you should not have any downside finishing this instance challenge. Moreover, alongside the best way, you’ll discover ways to make the most of the most effective Web3 backend platform. As well as, additionally, you will get accustomed to the Solidity fundamentals and Hardhat. So, simply ensure that to create your free Moralis account and observe our lead.

Web3 Augmented Actuality Unity Dapp – Demo
Earlier than we invite you to roll up your sleeves and construct your individual occasion of our Web3 augmented actuality dapp, we need to be sure to know what to anticipate shifting ahead. As such, let’s begin with a fast demo of our instance AR dapp. So, right here’s the preliminary display screen of our Android dapp:
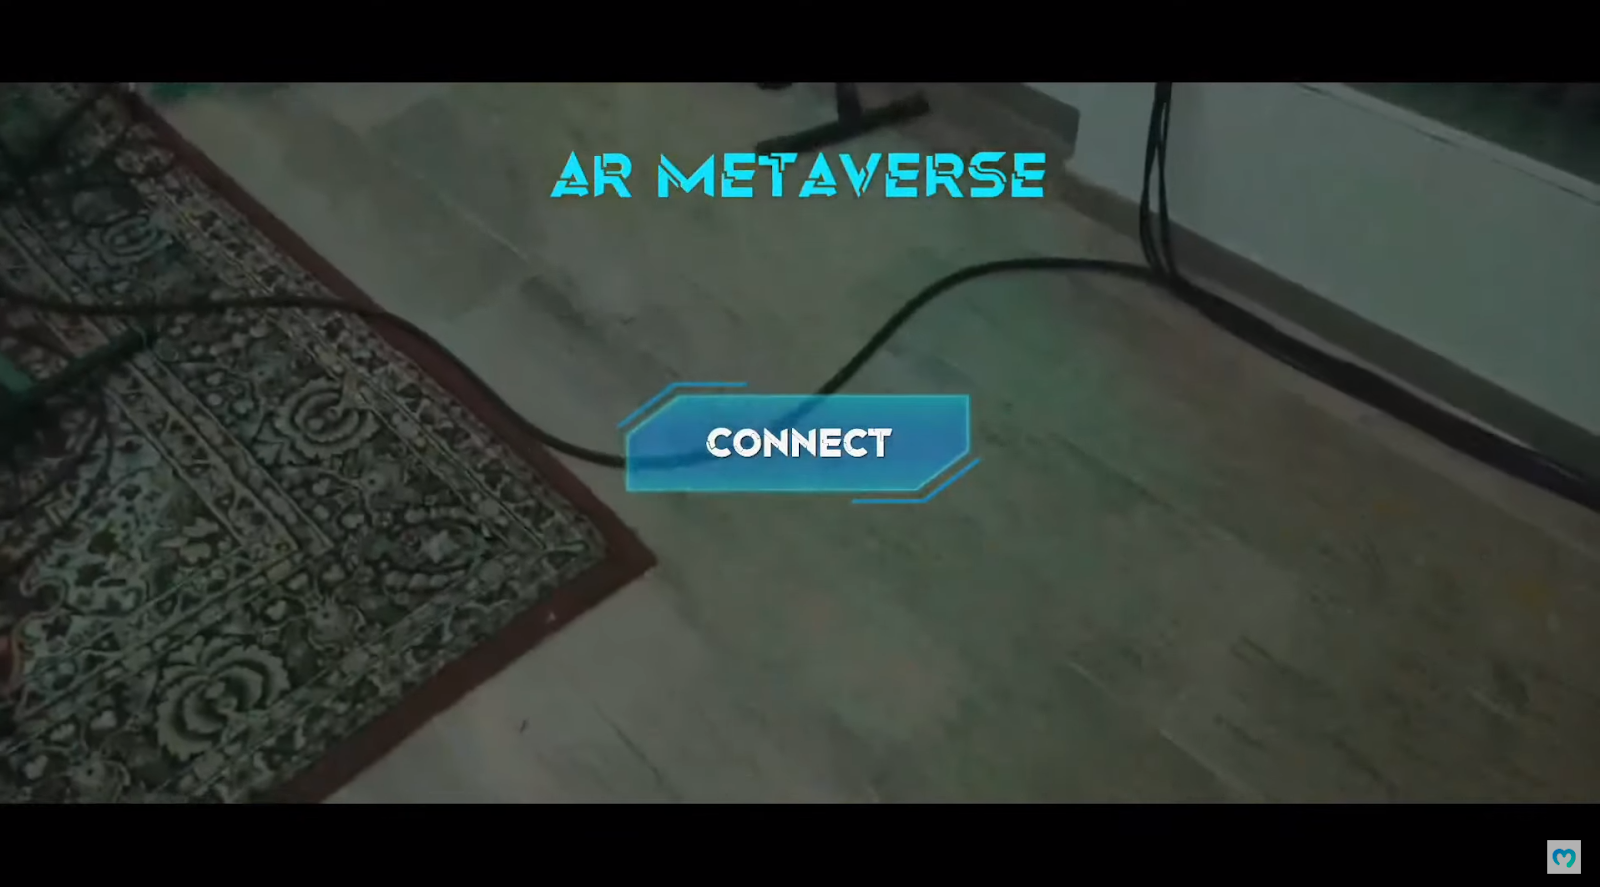
As you may see within the screenshot above, the customers must faucet the “join” button to start out. By doing so, our instance dapp mechanically connects with customers’ Web3 wallets:
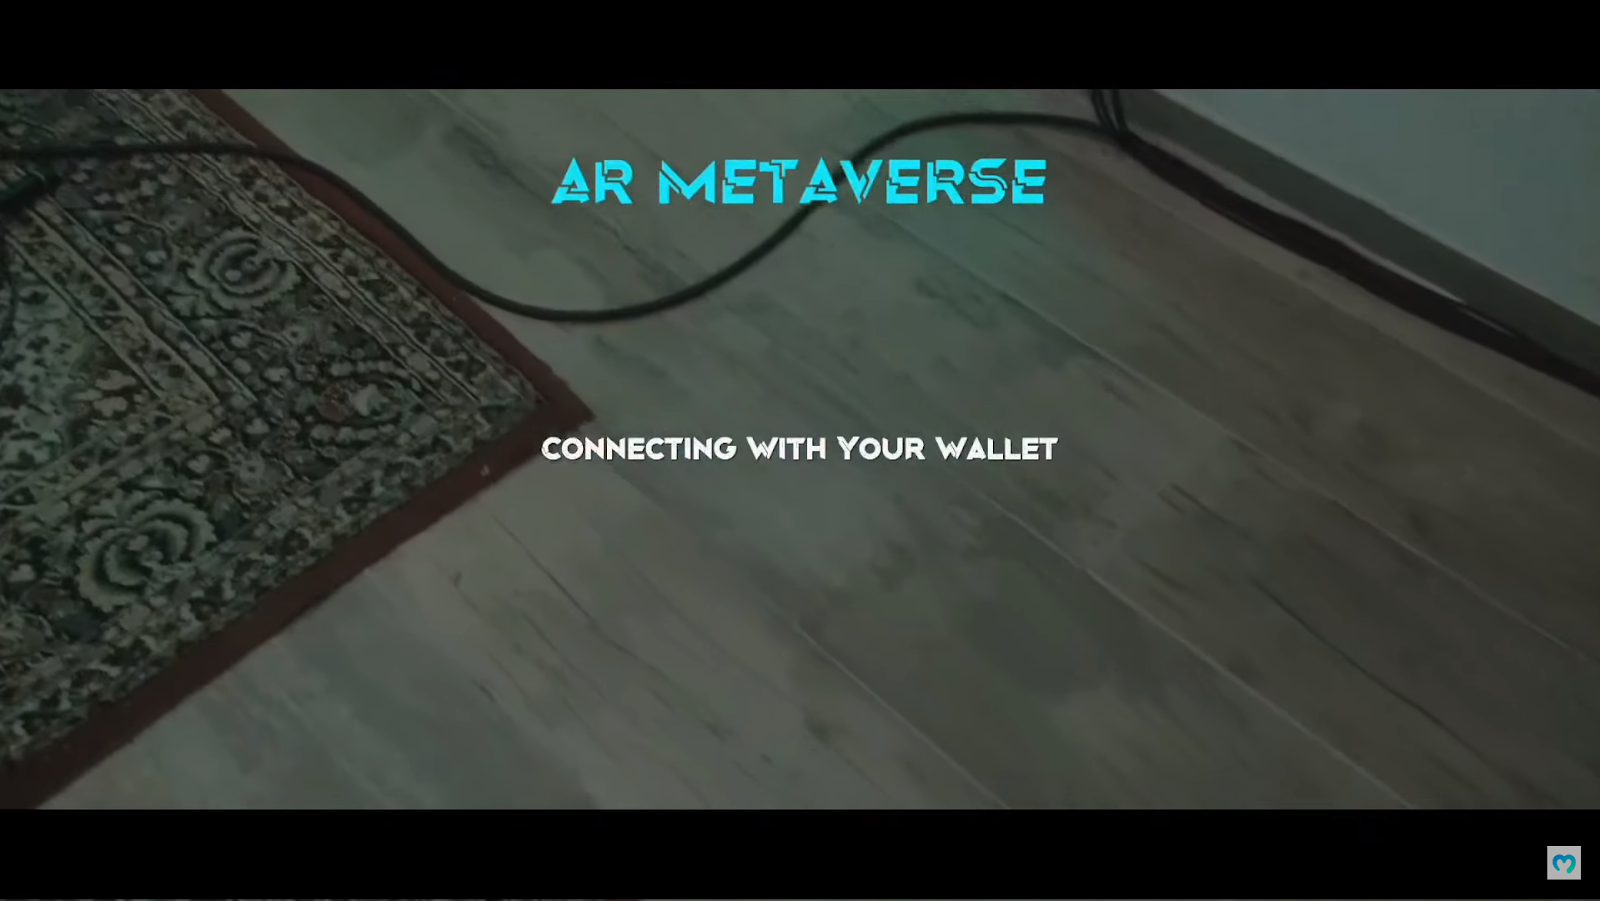
After all, customers want to verify the connection inside their crypto wallets to proceed. As soon as customers full their Web3 login, they see the actual world on their screens by way of their smartphones’ cameras:
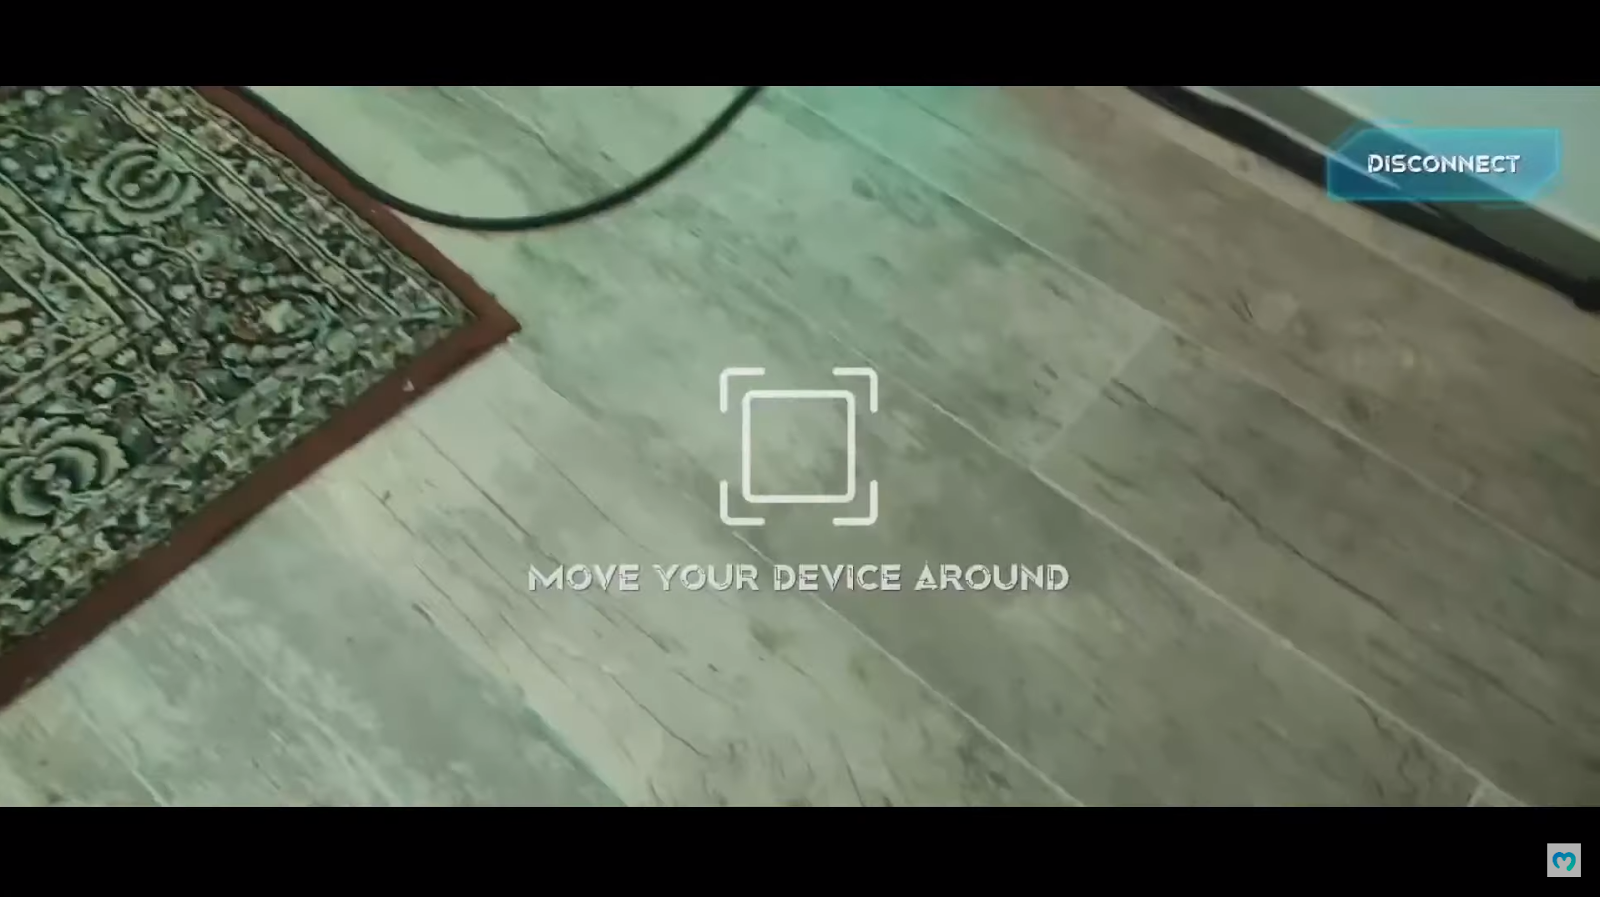
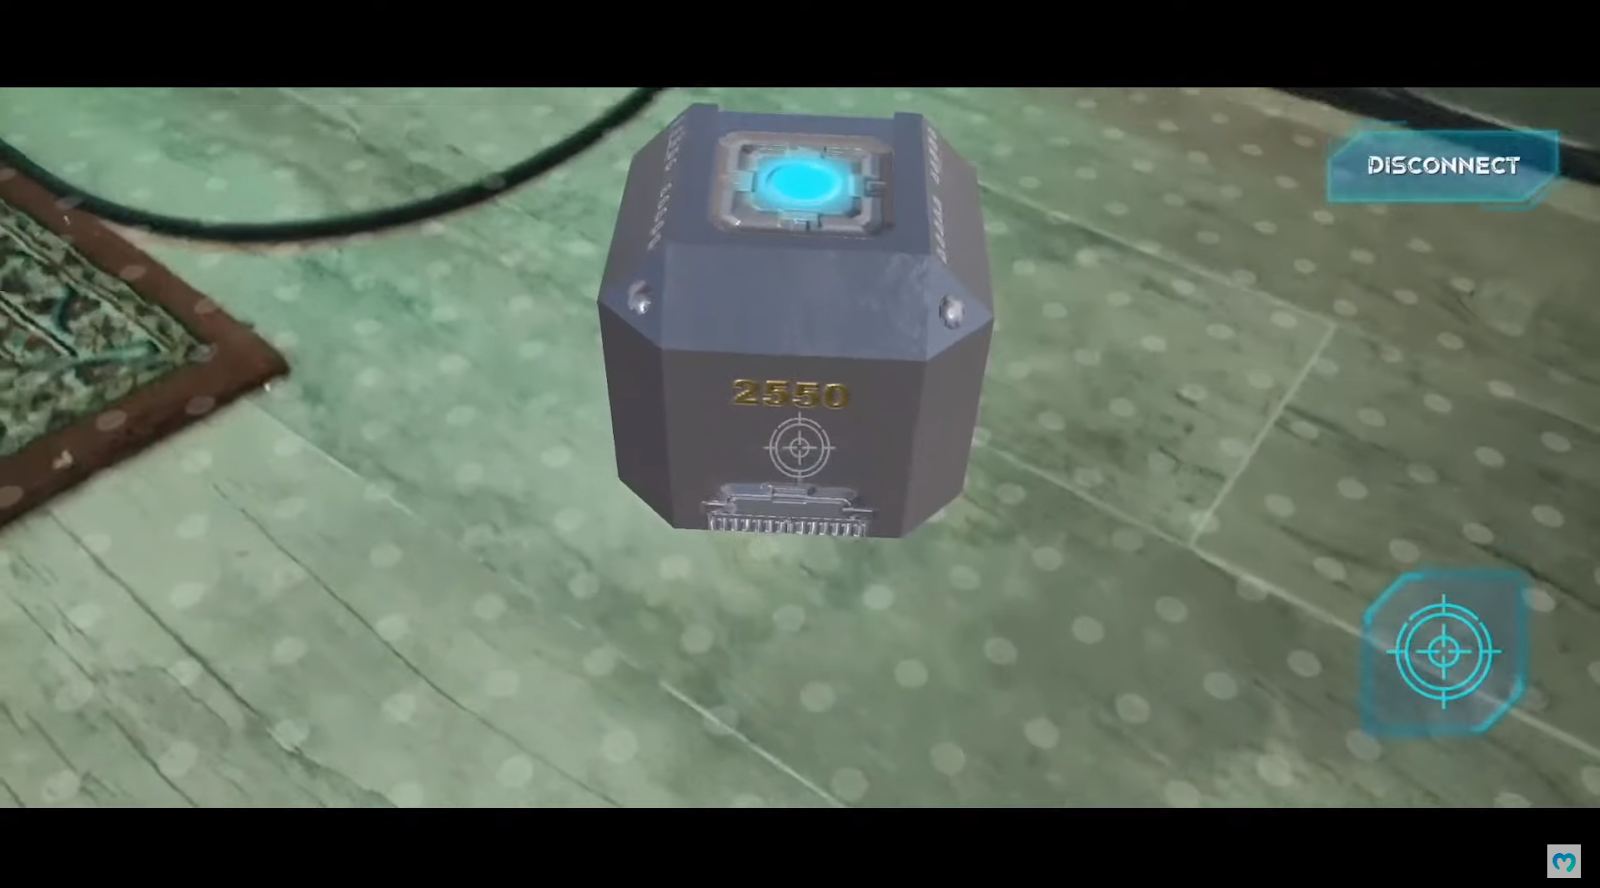
Furthermore, because the on-screen directions counsel, customers can freely transfer their smartphones round. Subsequent, customers must faucet on the display screen to position the article within the chosen spot:
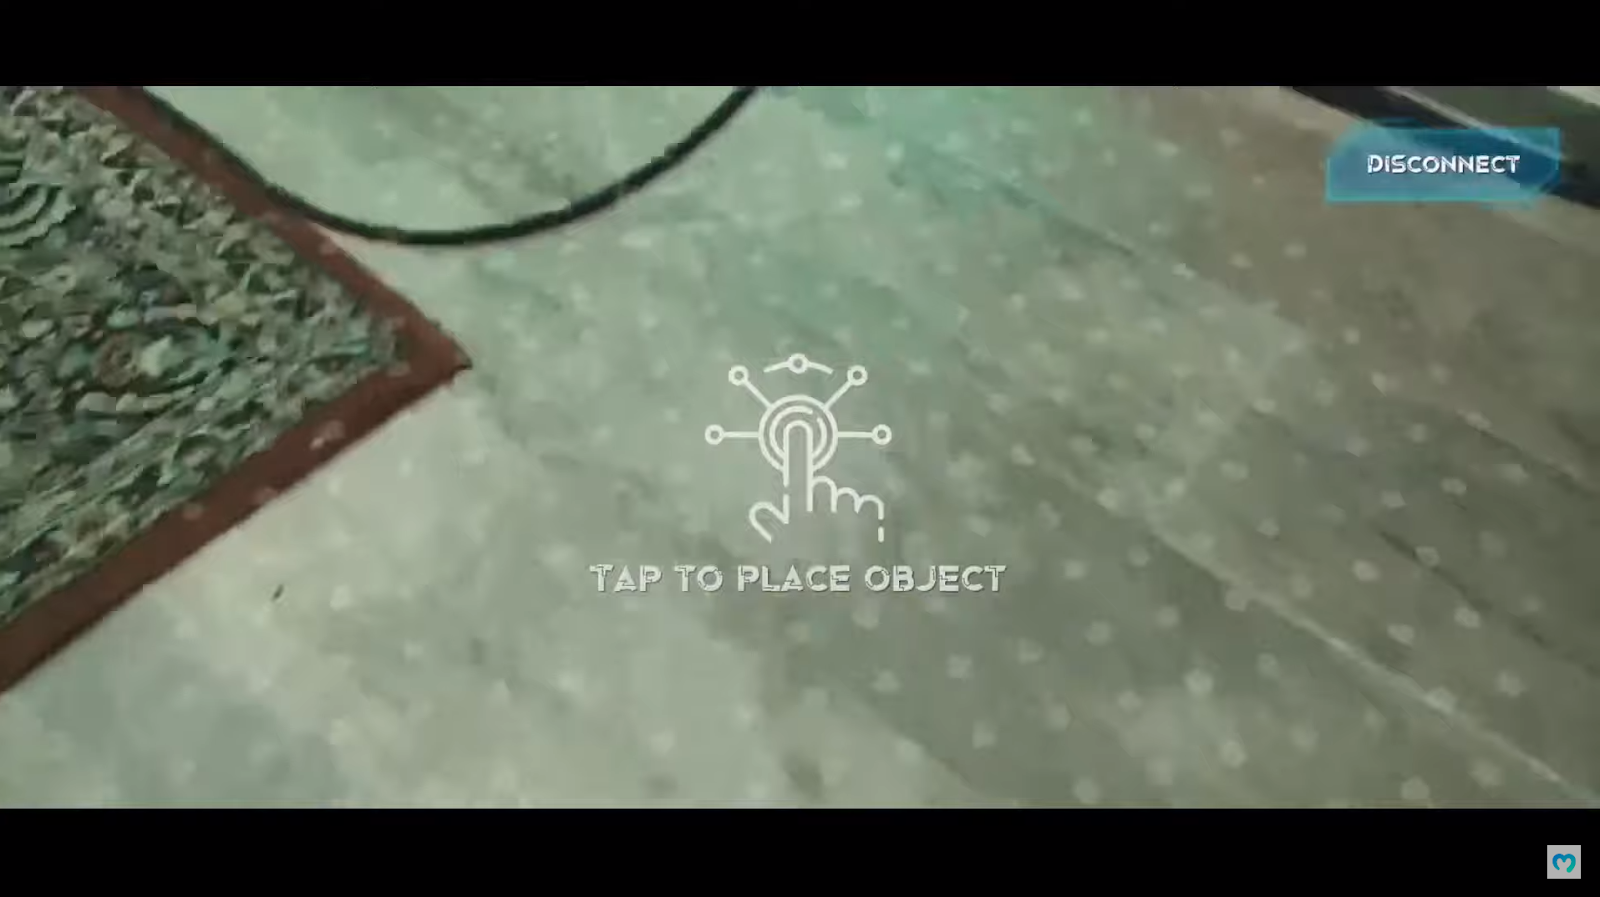
In our instance Web3 augmented actuality dapp, the article is an NFT loot field. The latter seems on the display screen after tapping it:
Trying on the screenshot above, you may see the blue mild on high of the NFT loot field. That is the spot that customers must hit to open the field:
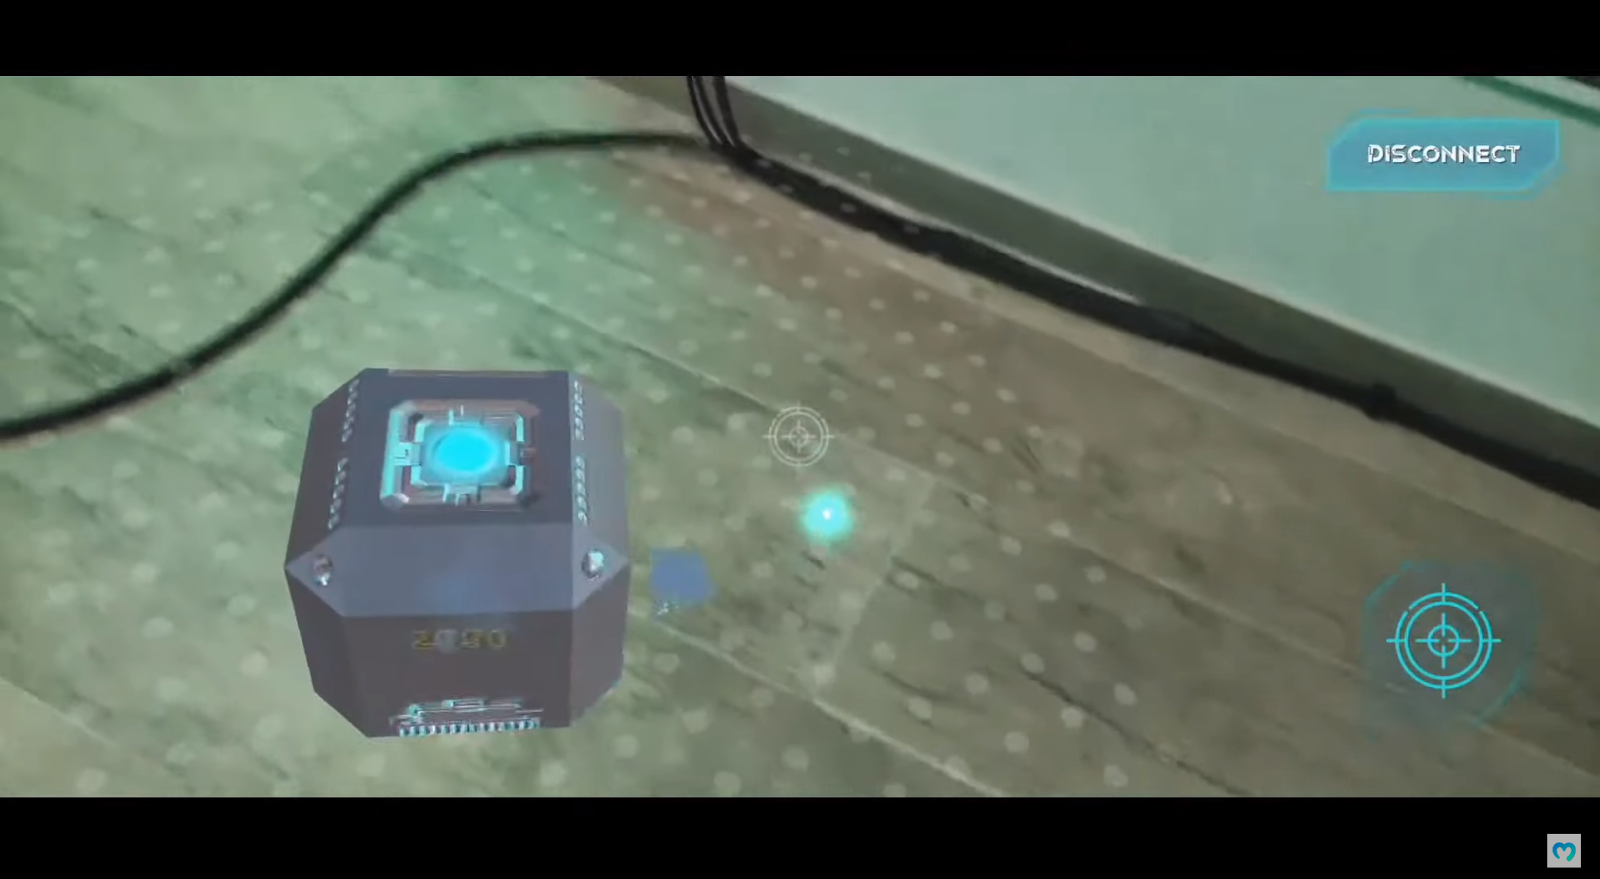
Moreover, as you may see within the above screenshot, the crosshair is fastened in the course of the display screen. Therefore, it strikes along with the gadget:
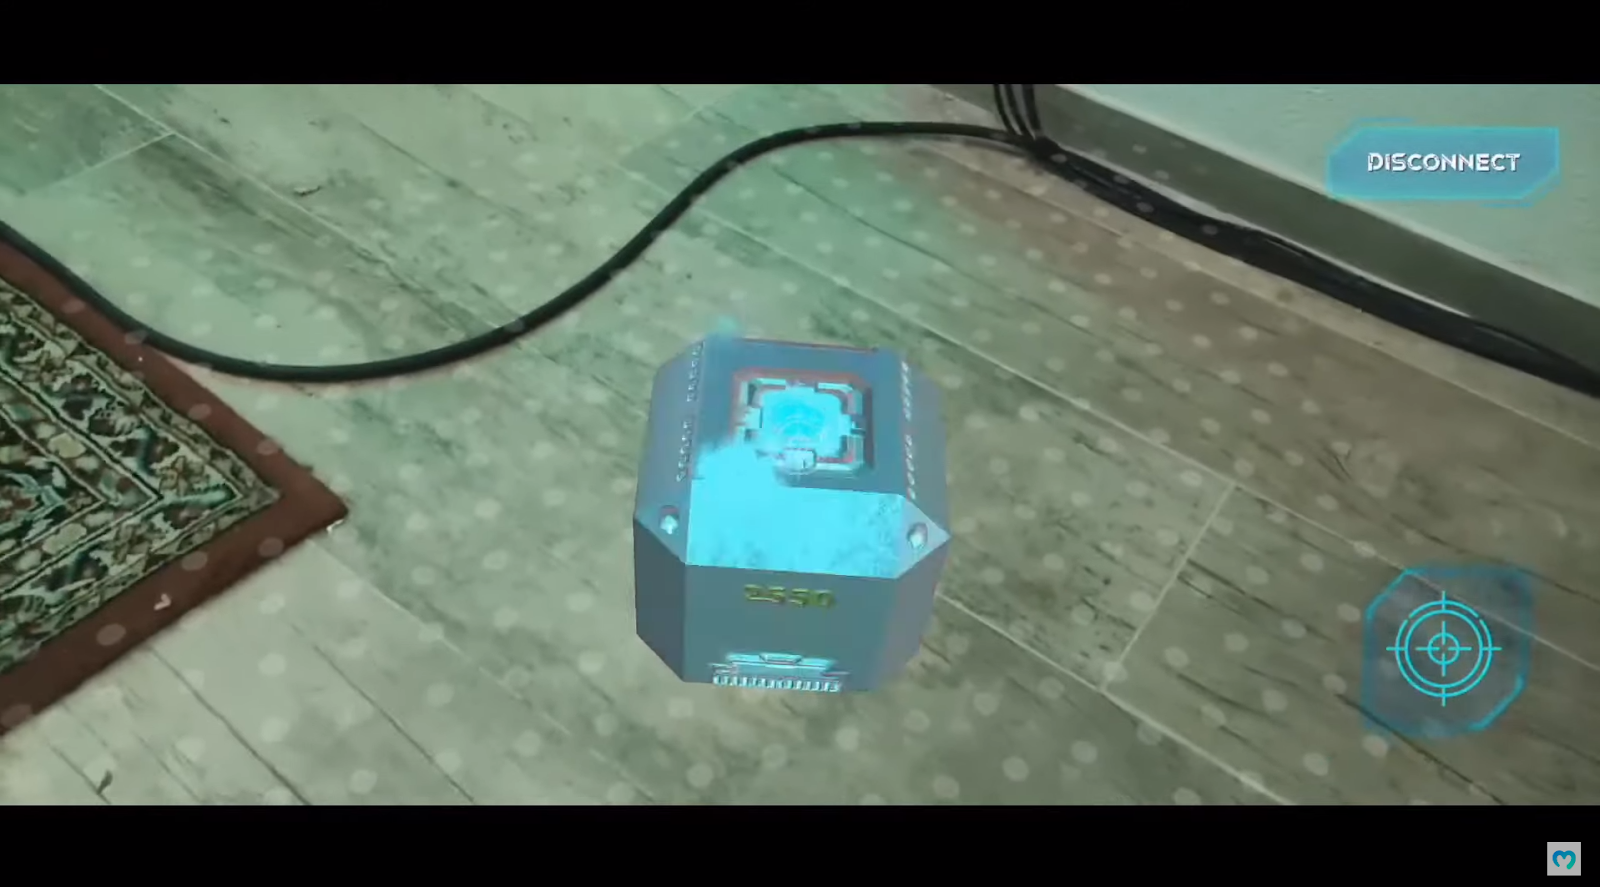
As well as, there’s a crosshair icon within the bottom-right nook indicating the “capturing” stage. Furthermore, when the customers lastly hit the blue mild on the high of the field, the field opens:
Minting in Our Web3 Augmented Actuality Dapp – Demo
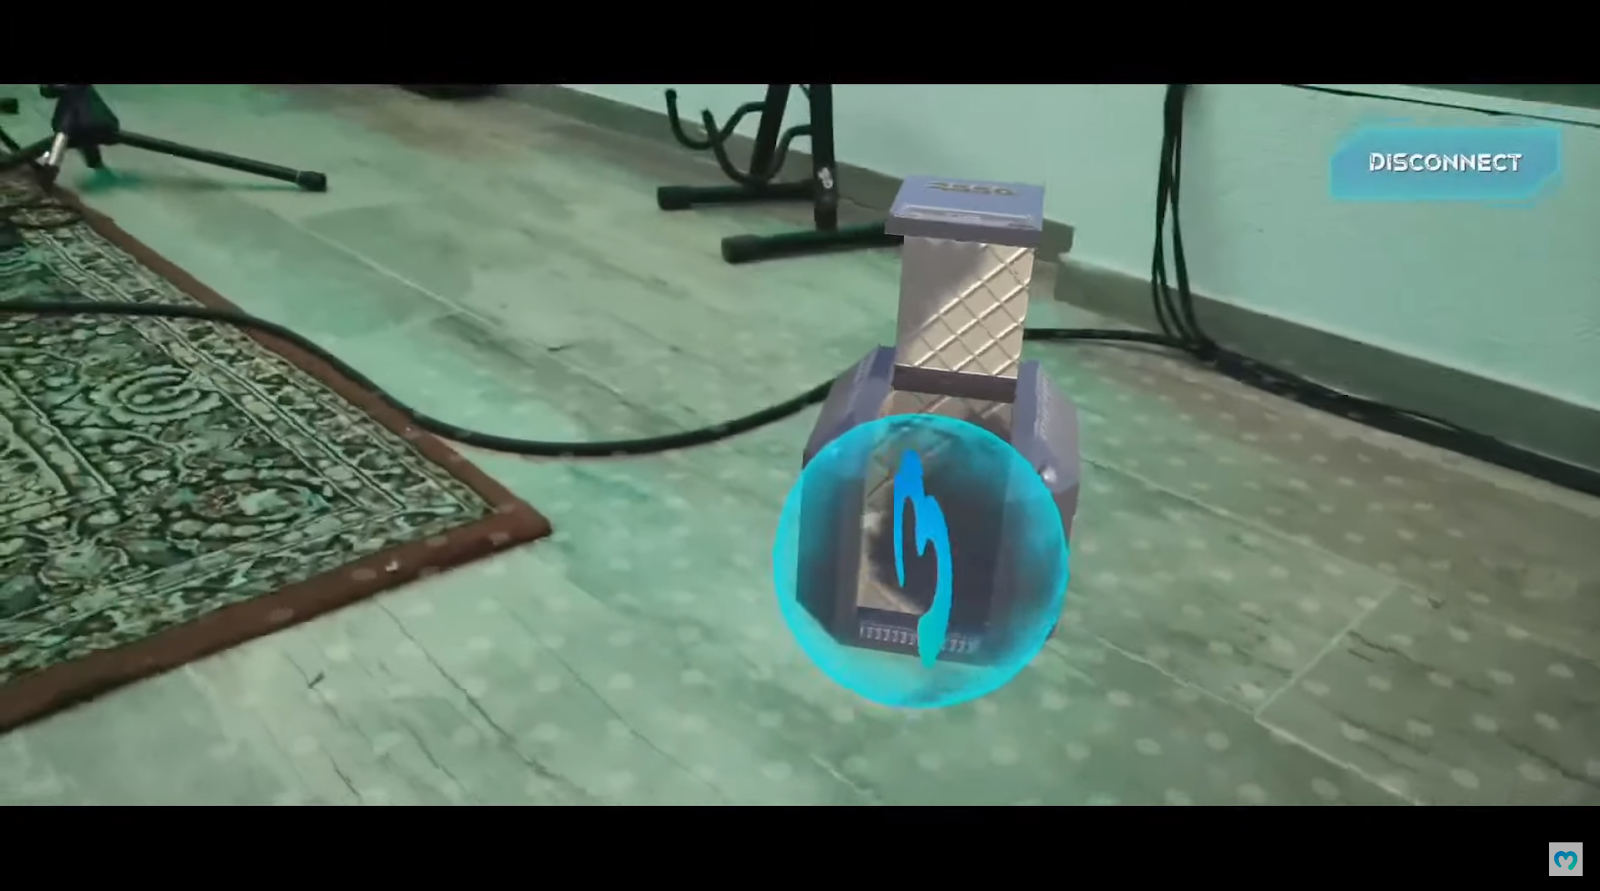
Subsequent, the gamers must faucet on the glowing merchandise that got here out of the field. This provides them an opportunity to mint this merchandise as an NFT:
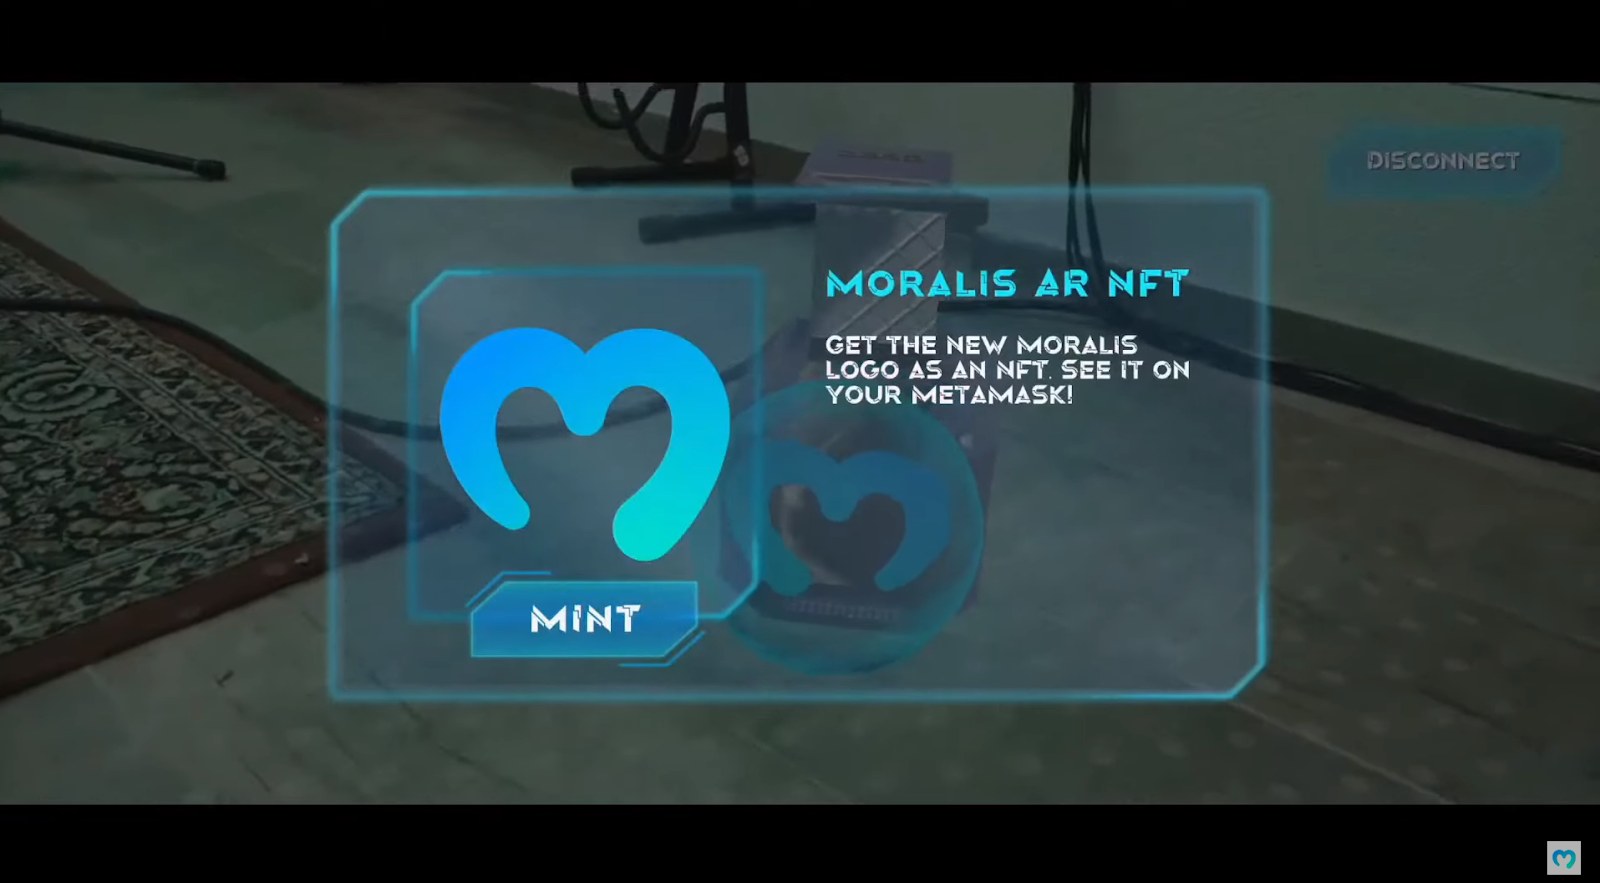
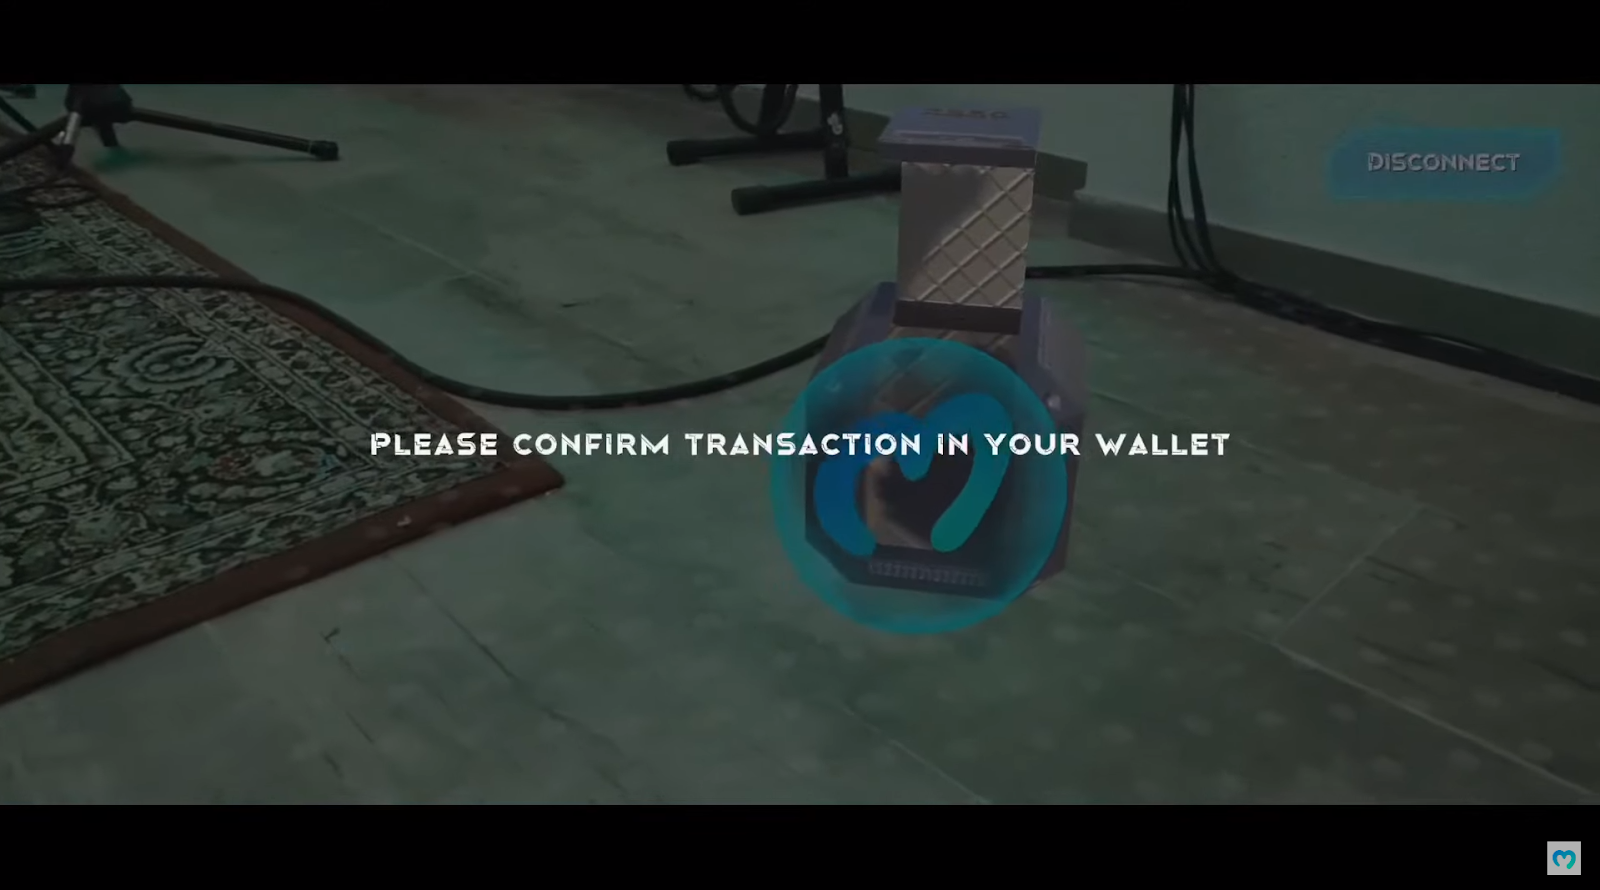
When the customers see the above display screen, they should faucet the “mint” button. Moreover, the on-screen message tells them to make use of their Web3 wallets to verify the transactions:
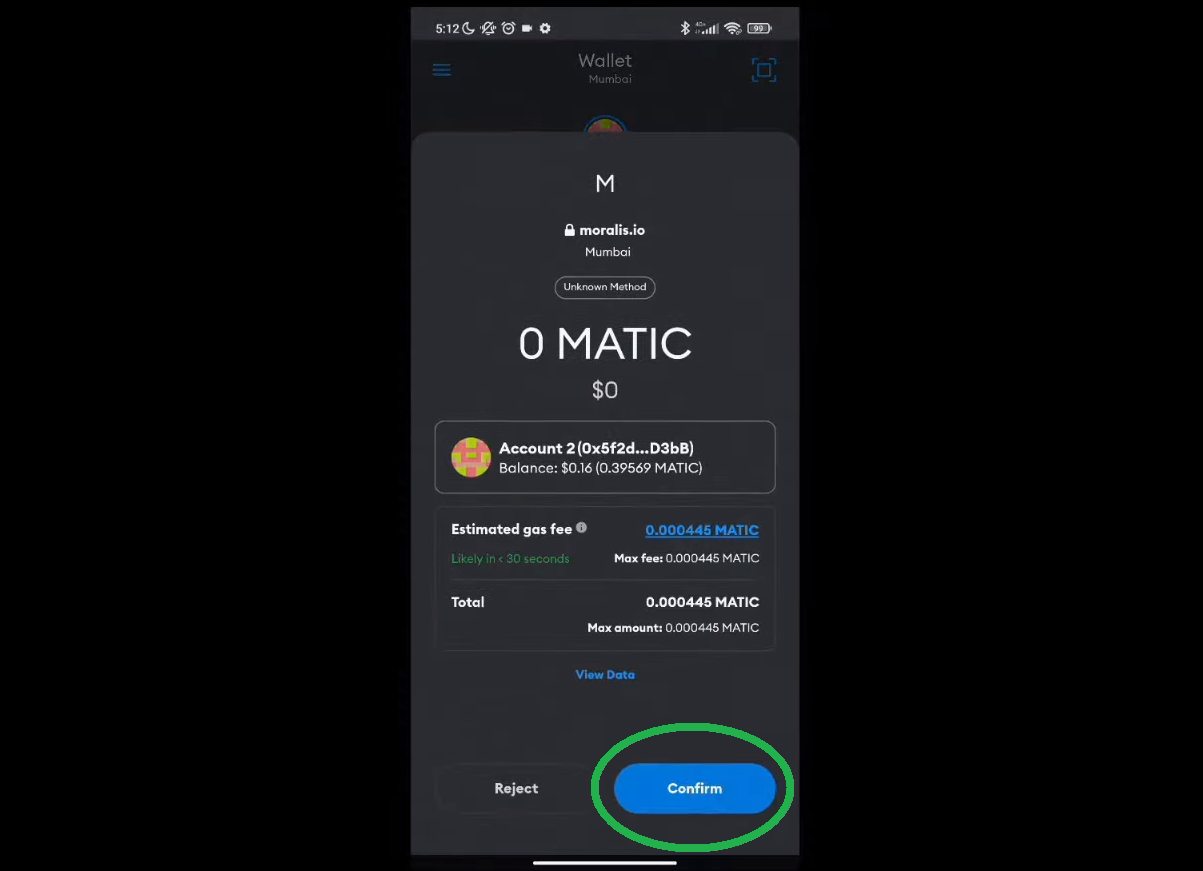
Furthermore, their wallets pop up mechanically and customers must faucet the “affirm” button:
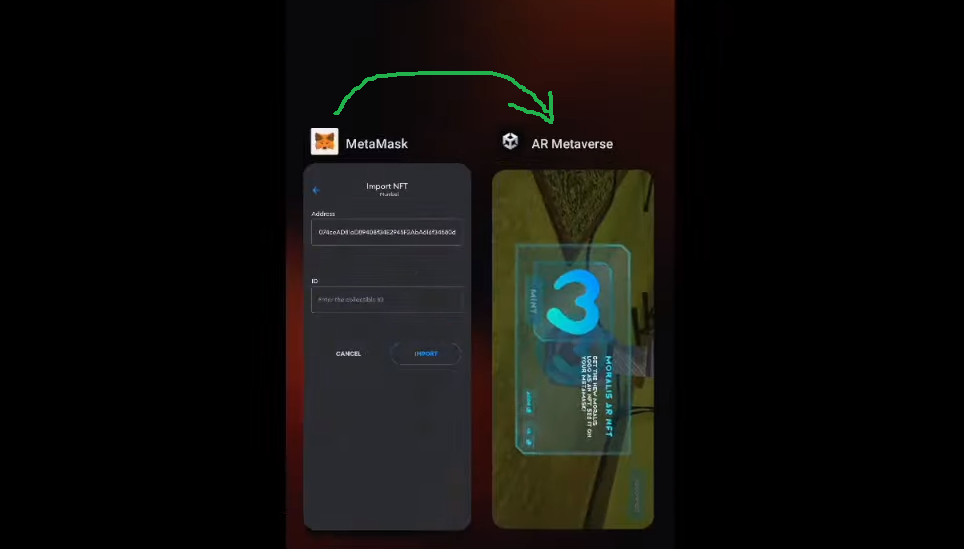
After confirming the minting transaction, the customers get to faucet the NFT once more to import it into their MetaMask wallets:
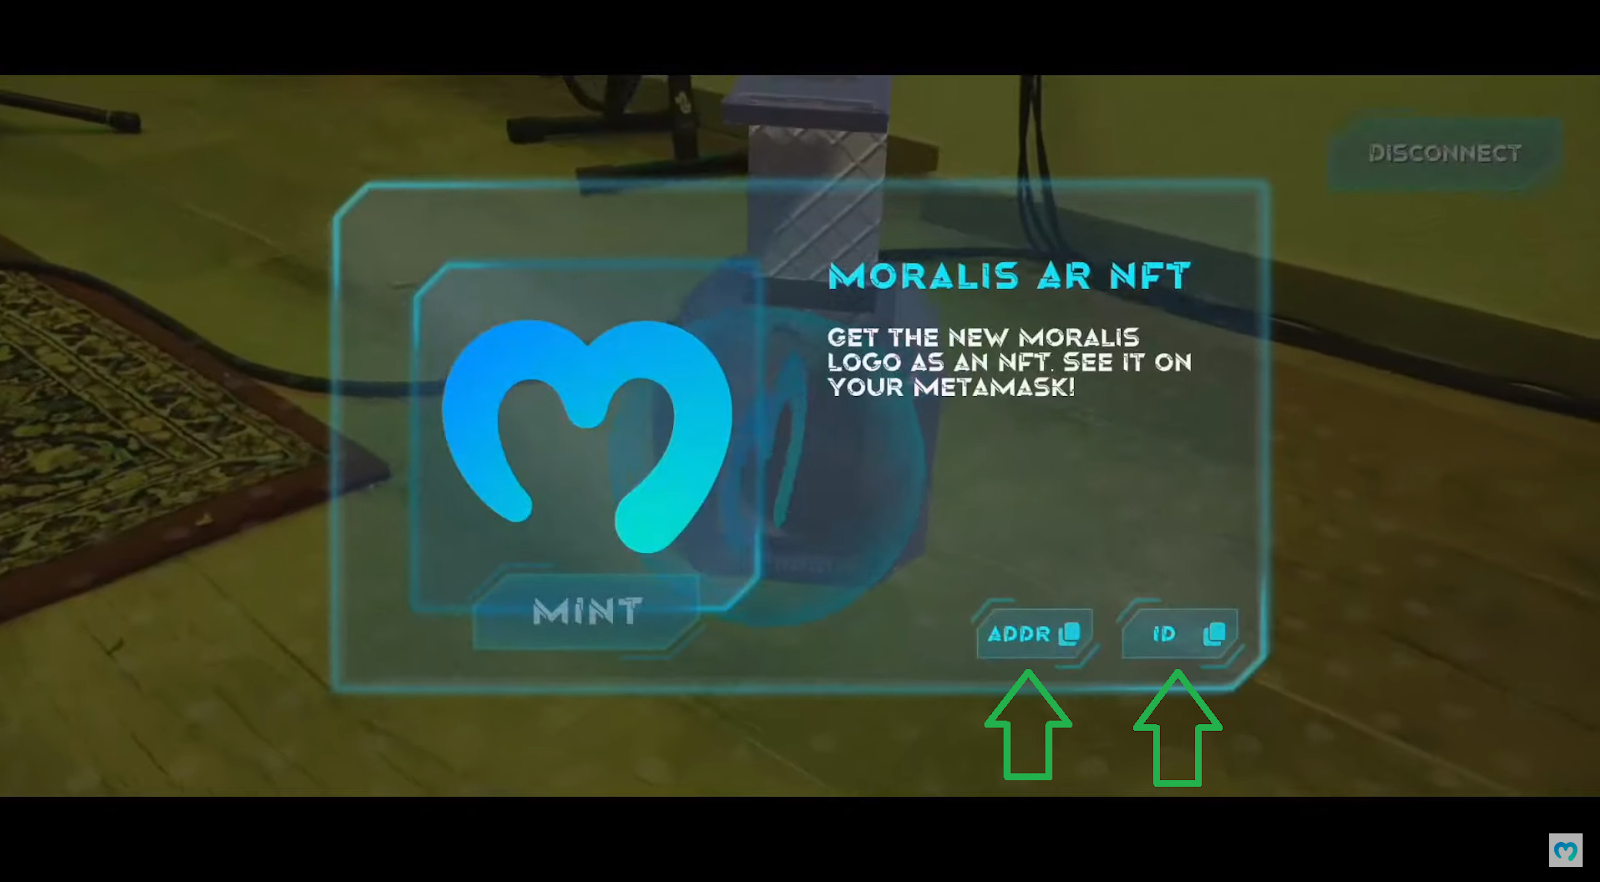
By tapping the “addr” button, their MetaMask wallets pop up once more, the place they should paste the copied handle:
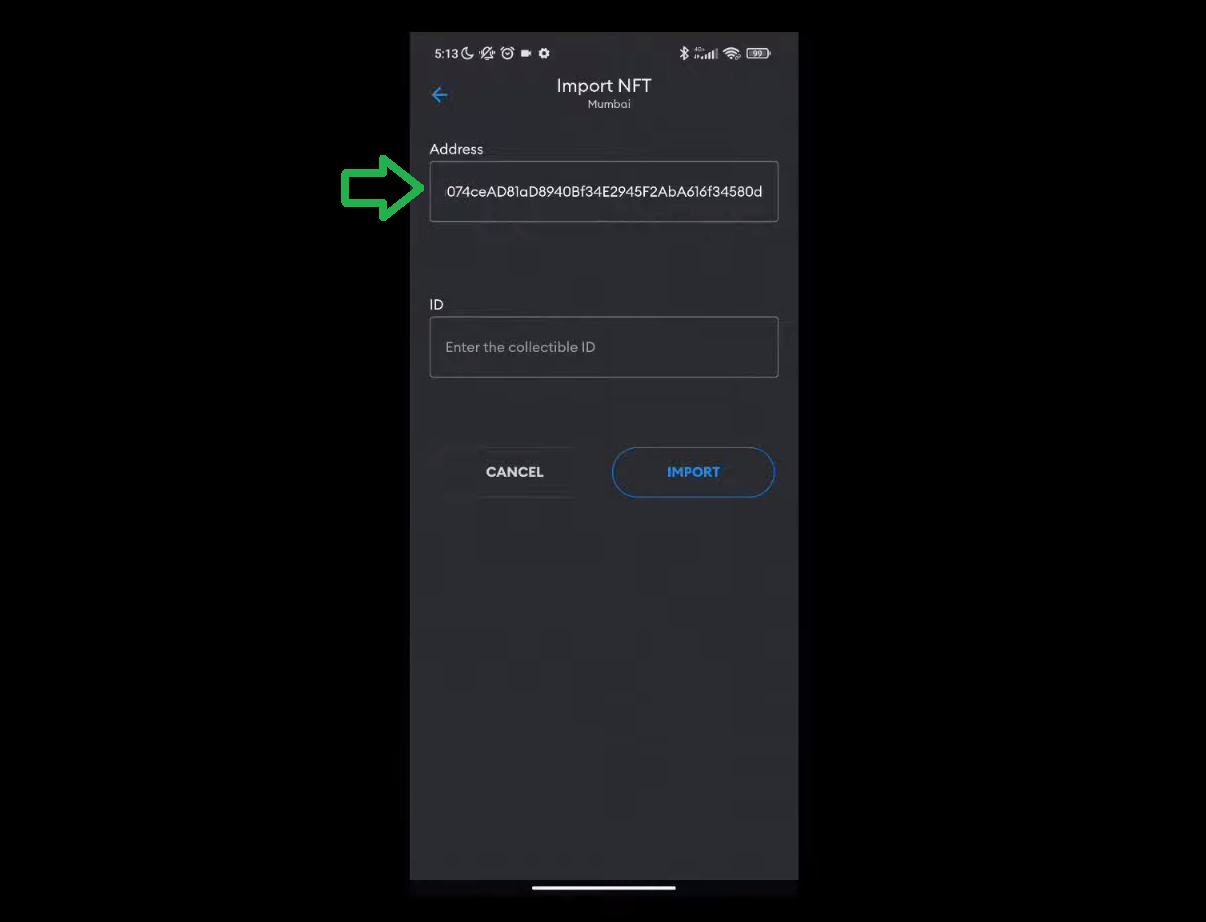
Then, customers want to return to our dapp’s display screen and faucet the “ID” button to repeat the above steps for ID:
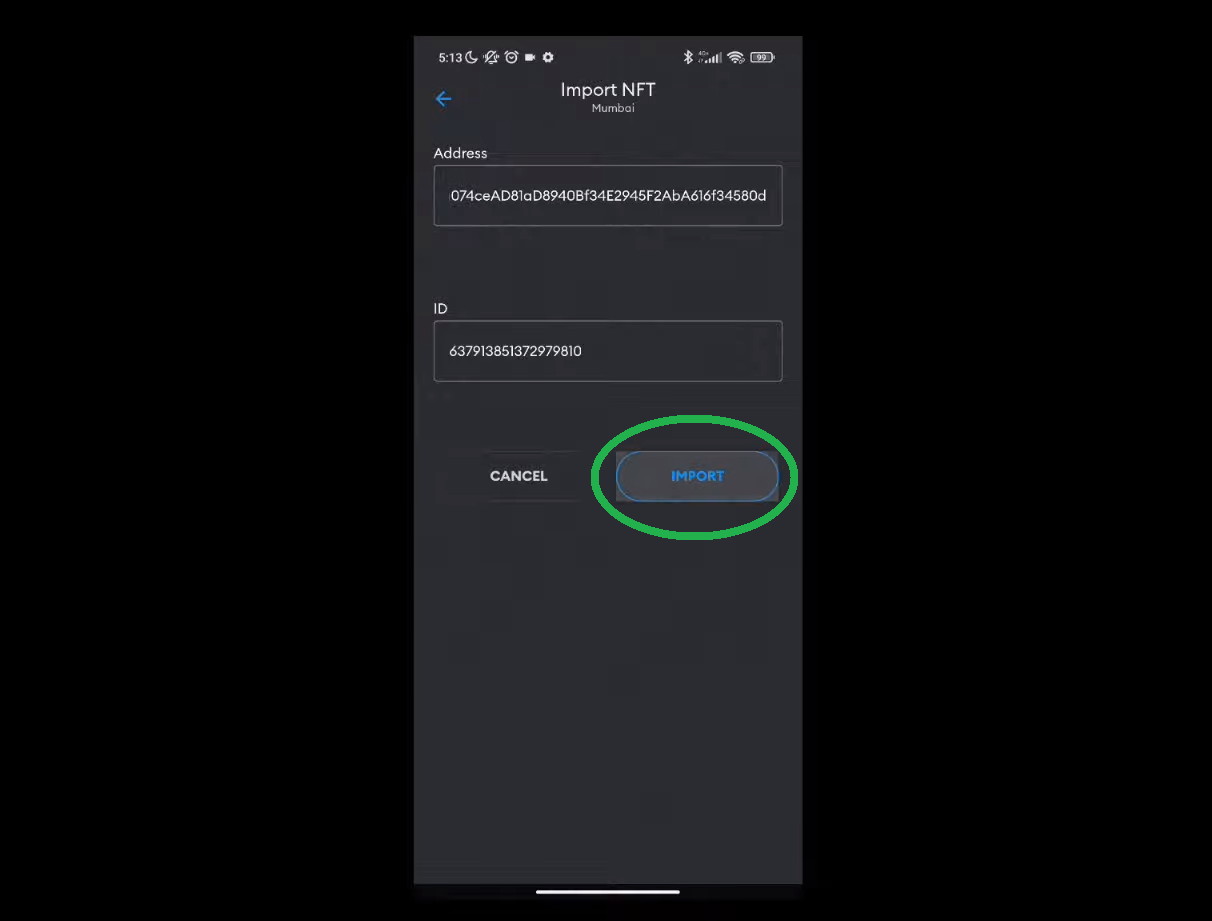
As soon as customers have the “handle” and the “ID” fields populated, they get to faucet the “import” button:
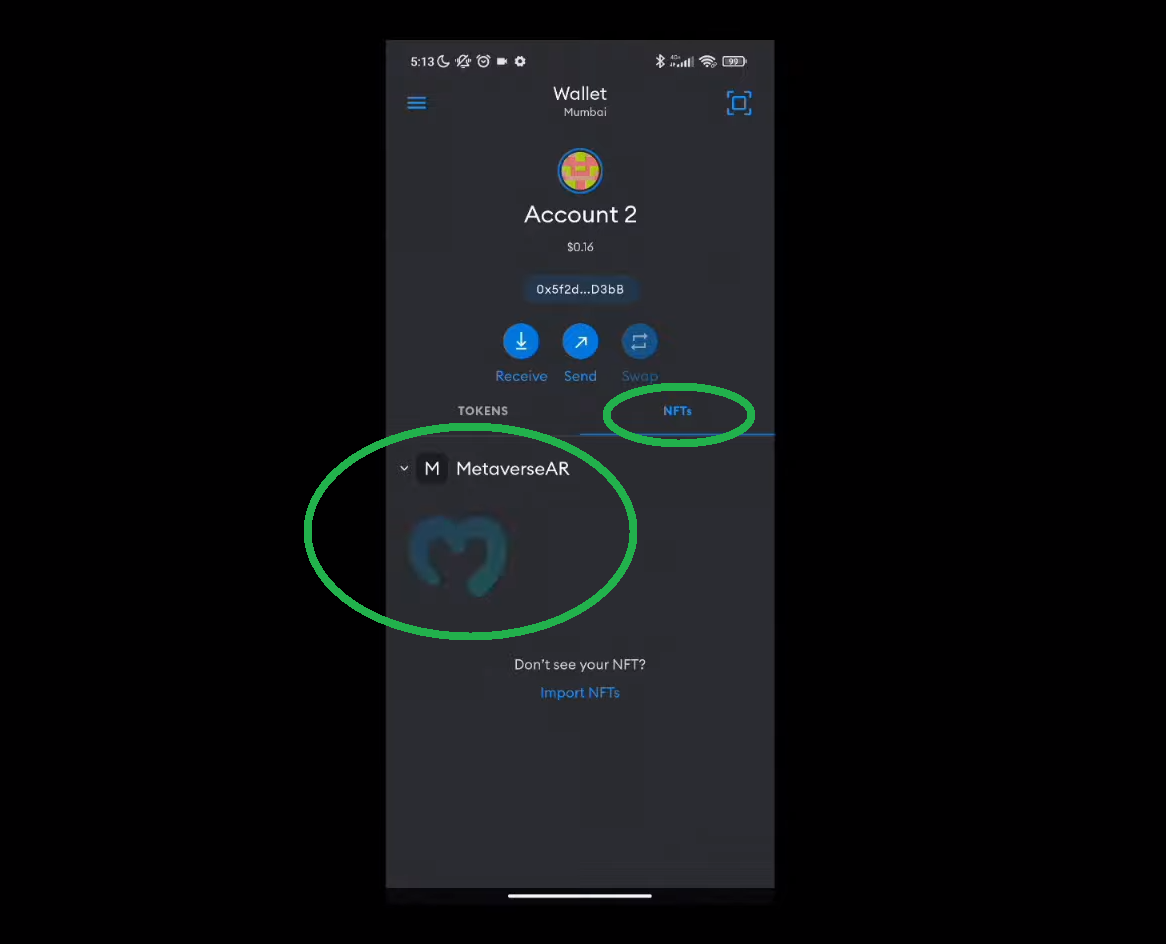
By importing the NFT that got here out of the NFT loot field, customers can now see it of their wallets:
Be aware: In the event you favor to observe our dapp’s demo in a video format, you are able to do so on the backside of the article
Now it’s time to get your fingers soiled and construct your individual Web3 augmented actuality dapp. After all, you don’t have to start out from scratch – as a substitute, you need to use our pattern challenge that awaits you on GitHub. Furthermore, as talked about within the introduction, Moralis is the powerhouse that may allow you to effortlessly do all of the Unity Web3 integration effortlessly. As such, ensure that to create your free Moralis account when you haven’t accomplished so but.

Shifting ahead, we are going to deal with right now’s instance challenge in six principal phases:
- First, we are going to concentrate on challenge settings and necessities that you just want for AR improvement with Unity.
- Second, we are going to aid you full the preliminary Moralis setup. That is the place you’ll get hold of your dapp’s credentials to attach Unity with Web3.
- Third, we are going to do our challenge overview. Together with the above demo, this may make sure that you recognize what options you’ll need to implement.
- Fourth, We are going to present you the right way to create a metaverse merchandise. That is the place you’re going to get acquainted with loading knowledge from IPFS to create the merchandise from a loot field.
- Fifth, you’re going to get to make use of our good contract and deploy it utilizing Hardhat. This stage will even cowl some preliminary Hardhat setup.
- Sixth, you’ll discover ways to allow customers to mint the gadgets from the loot field as NFTs.
Listed below are additionally some further particulars about our instance challenge:
- Which blockchain will we concentrate on? Polygon testnet (Mumbai). Understand that Moralis is cross-chain interoperable, which implies you need to use the identical code (with minor tweaks) for different blockchains.
- What system will we concentrate on? Android. Be aware that you need to use this tutorial to additionally create an iOS dapp.
Be aware: All time references discuss with the video tutorial beneath.
Stage 1: Undertaking Settings
For this challenge, we are going to use Unity’s AR basis framework, which mixes AR Core and AR Equipment. These instruments allow you to construct Unity functions for each Android and iOS. Therefore, we put in all of the required packages. Nonetheless, earlier than opening the challenge, be sure to have correct construct help put in. To do that, use your Unity Hub:

Be aware: With a view to keep away from any compatibility points, ensure that to put in the identical model as indicated above.
Contained in the “Add modules” window, just remember to have Android Construct Assist put in:
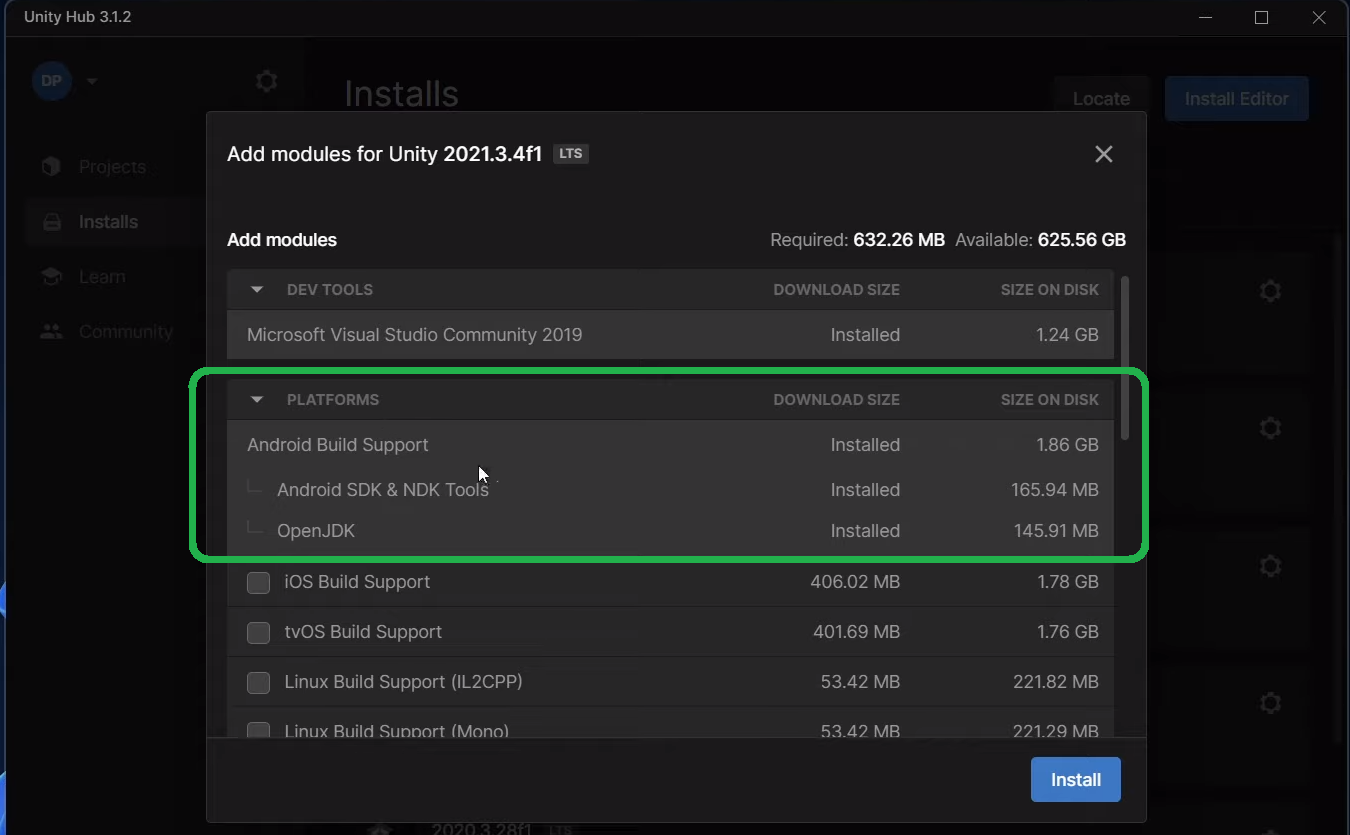
Be aware: In the event you needed to concentrate on iOS, you’d want to put in iOs Construct Assist.
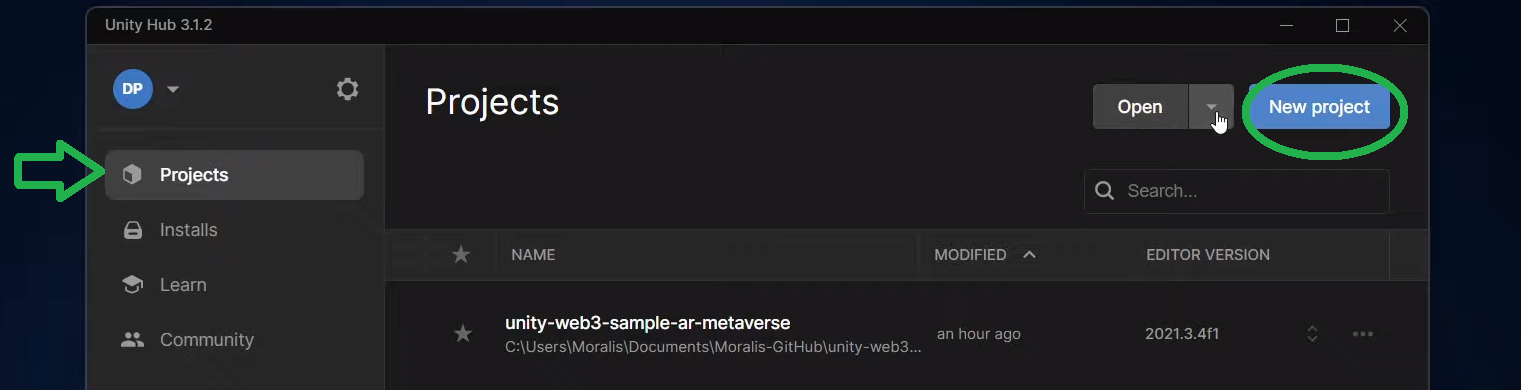
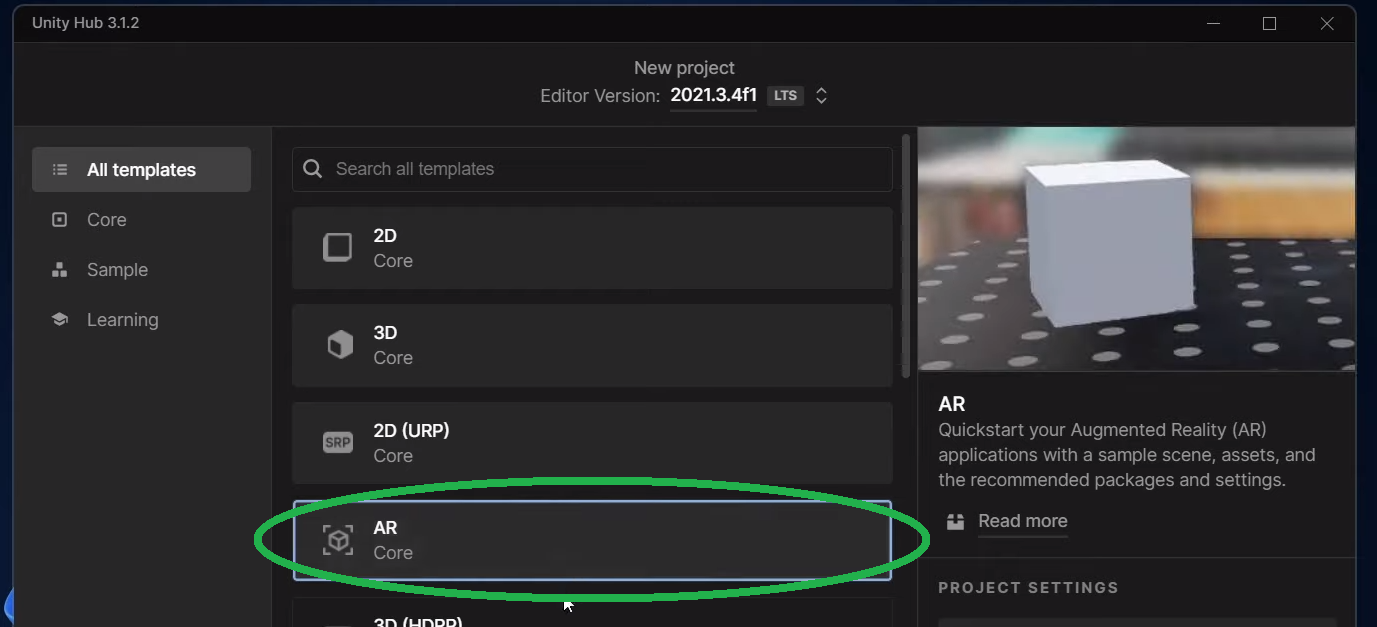
Furthermore, additionally understand that we used Unity’s AR template to construct this challenge. You entry this selection by clicking “New challenge” on the “Initiatives” tab:
The “AR” template comes with all of the required packages and dependencies put in:
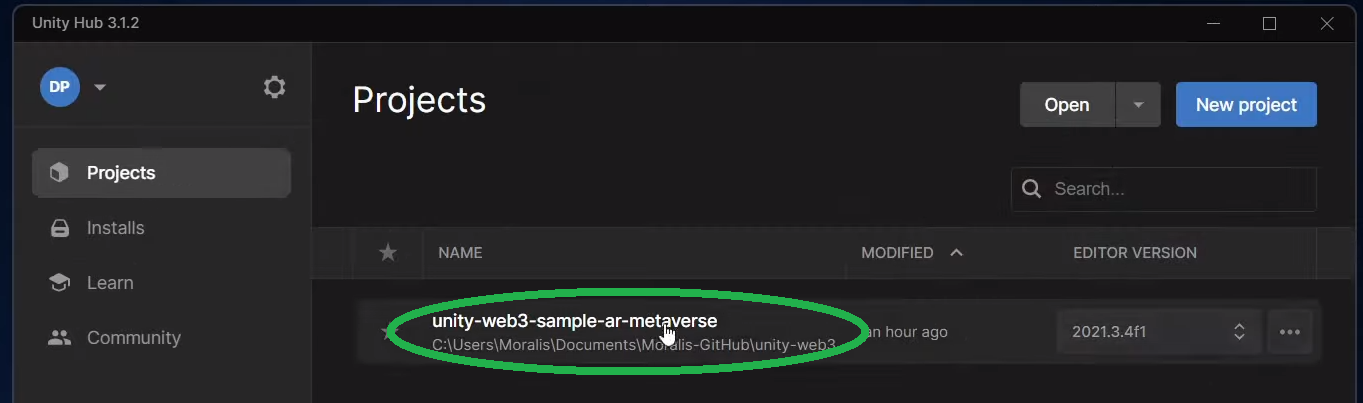
With this in thoughts, it’s time to make use of the above “GitHub” hyperlink and open right now’s challenge:
All of the settings ought to match ours; nonetheless, we encourage you to examine that manually by utilizing the video beneath (7:38).
Stage 2: Setup Your Moralis Dapp
In the event you’ve carried out the above settings examine, you’ll first must reopen the “Moralis Web3 Setup” window:

When you open the “Moralis Web3 Setup” window, you’ll see two entry fields – “Dapp URL” and “Dapp ID”:
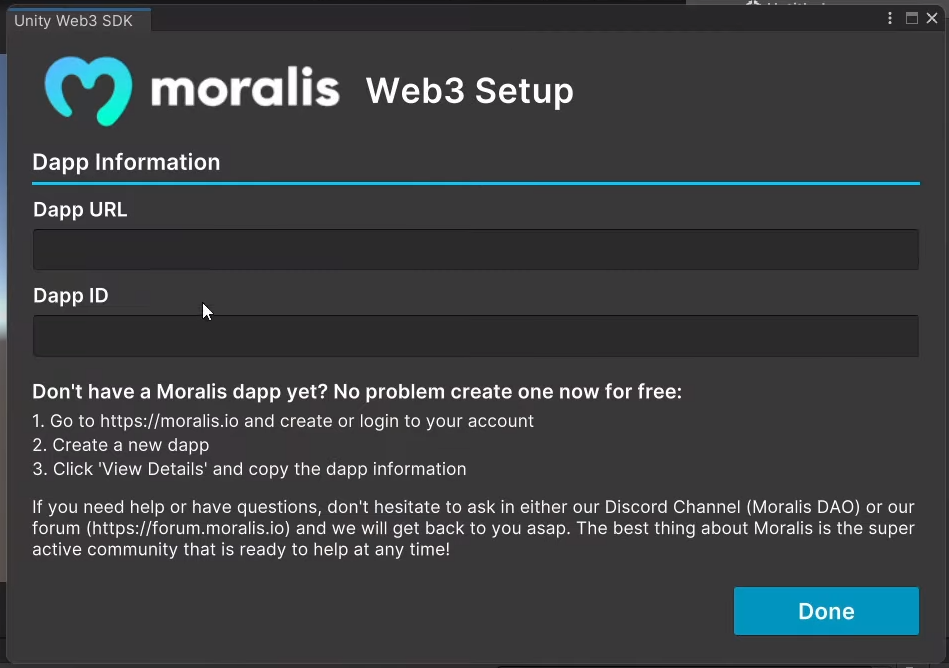
Furthermore, as you may see within the screenshot above, the window gives you with easy directions on the right way to get hold of the required credentials. Nonetheless, to help you additional, observe these steps (9:17):
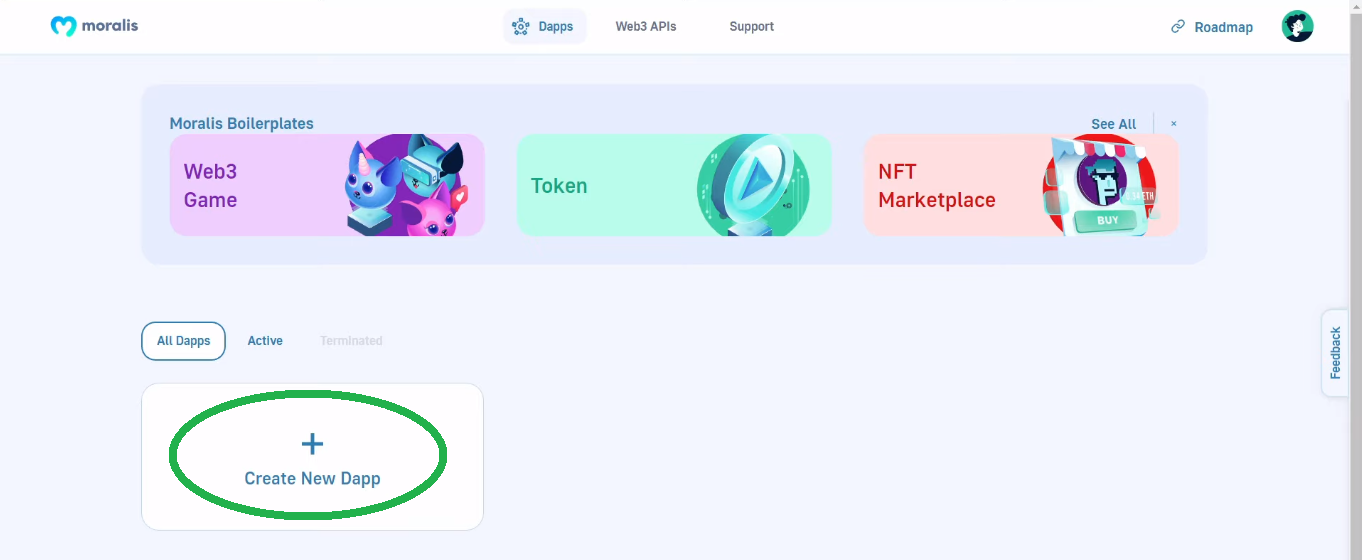
- Create your Moralis account or log in to your current account:

- Click on the “Create New Dapp” button:
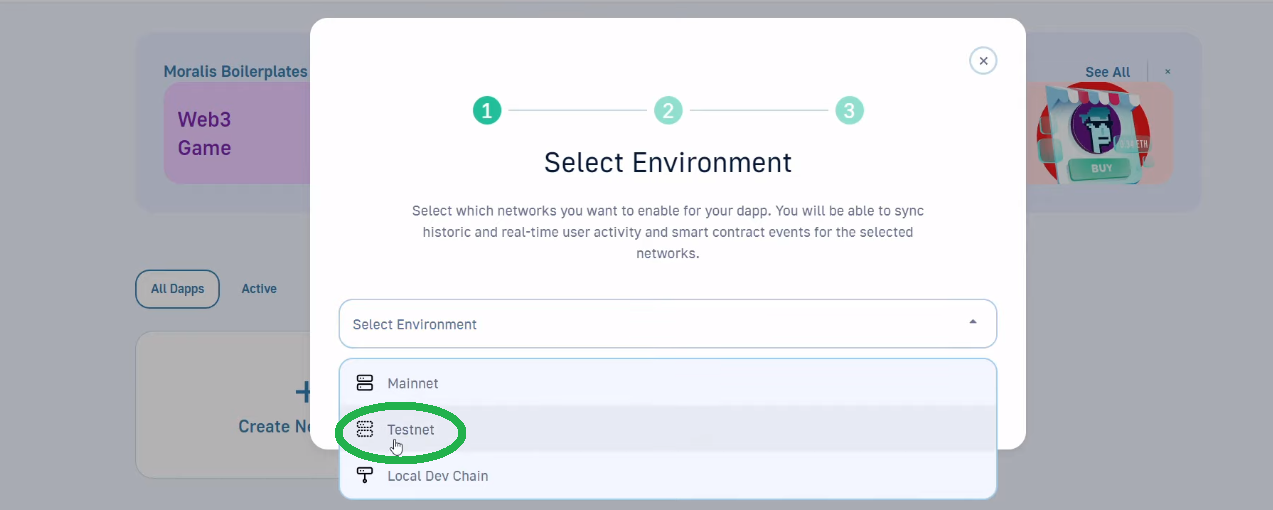
- Choose “Testnet” setting:
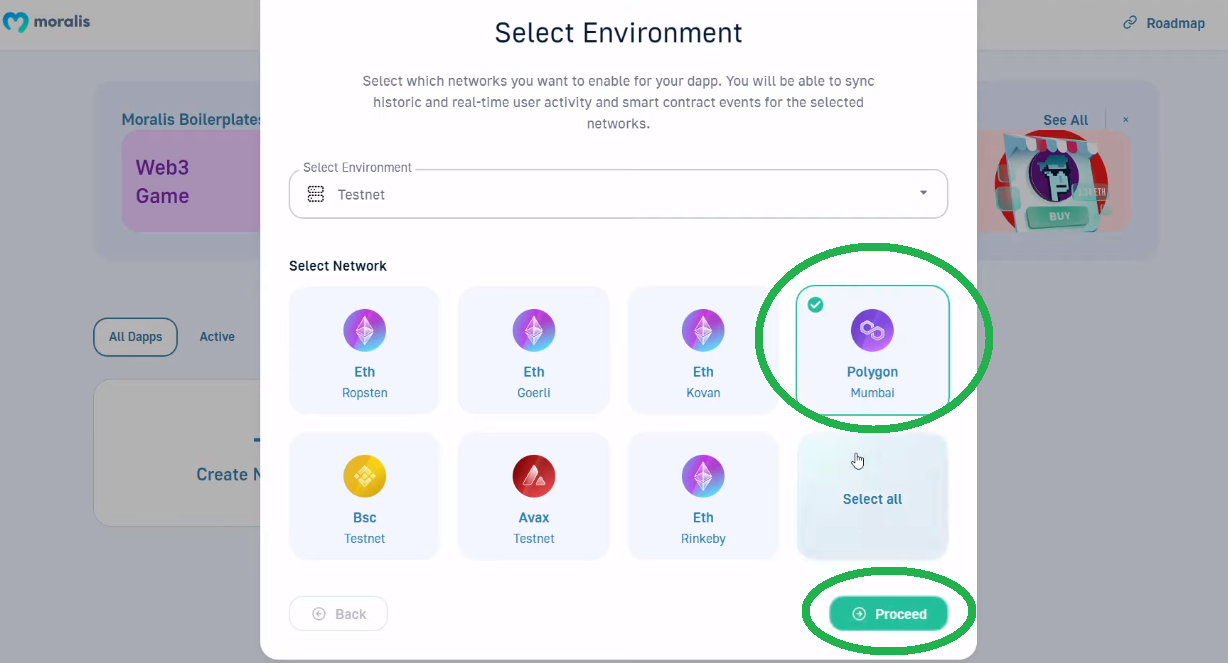
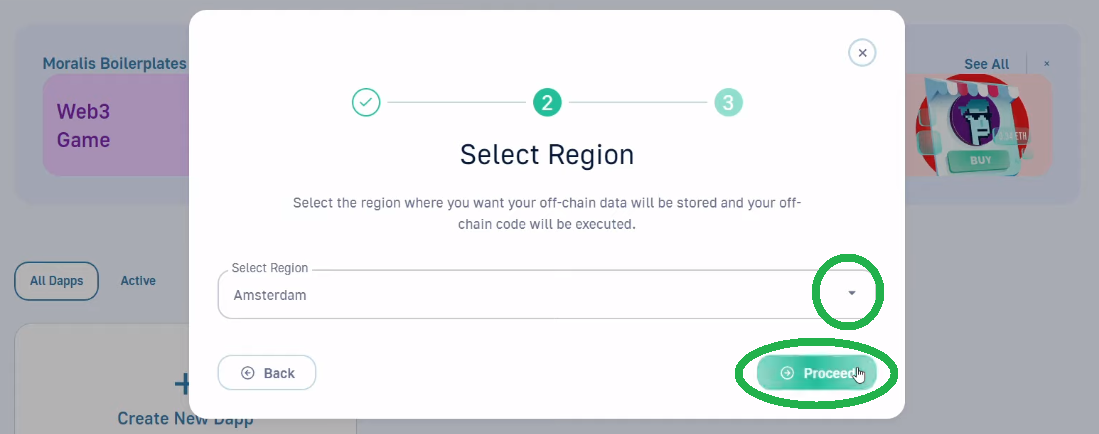
- Select “Polygon Mumbai” and click on the “Proceed” button:
- Choose the town closest to you and proceed:
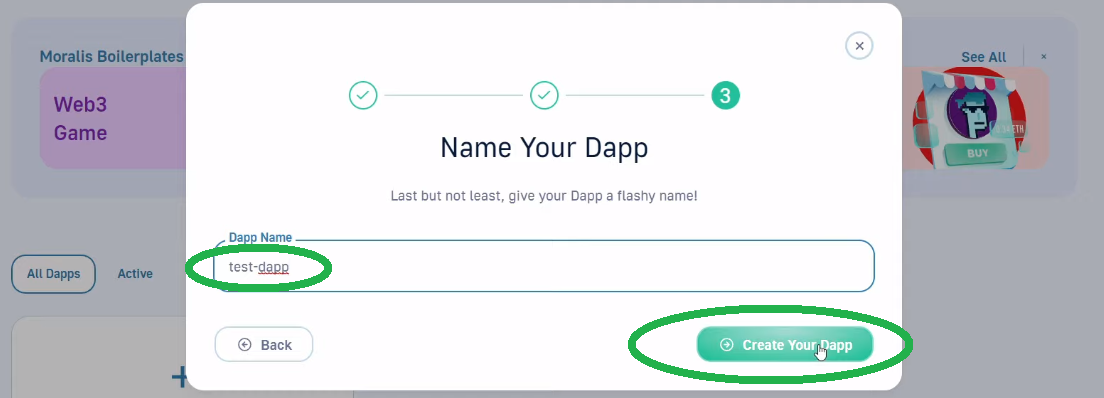
- Enter your dapp’s identify and click on the “Create Your Dapp” button:
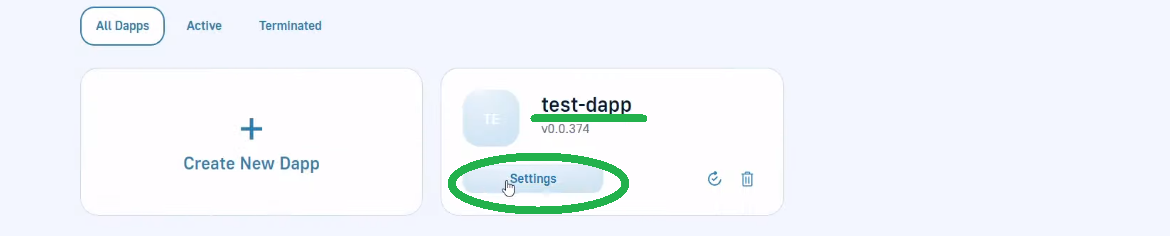
- As soon as your dapp is up and working, click on “Setting” to entry its credentials:
- Copy your dapp URL and ID:
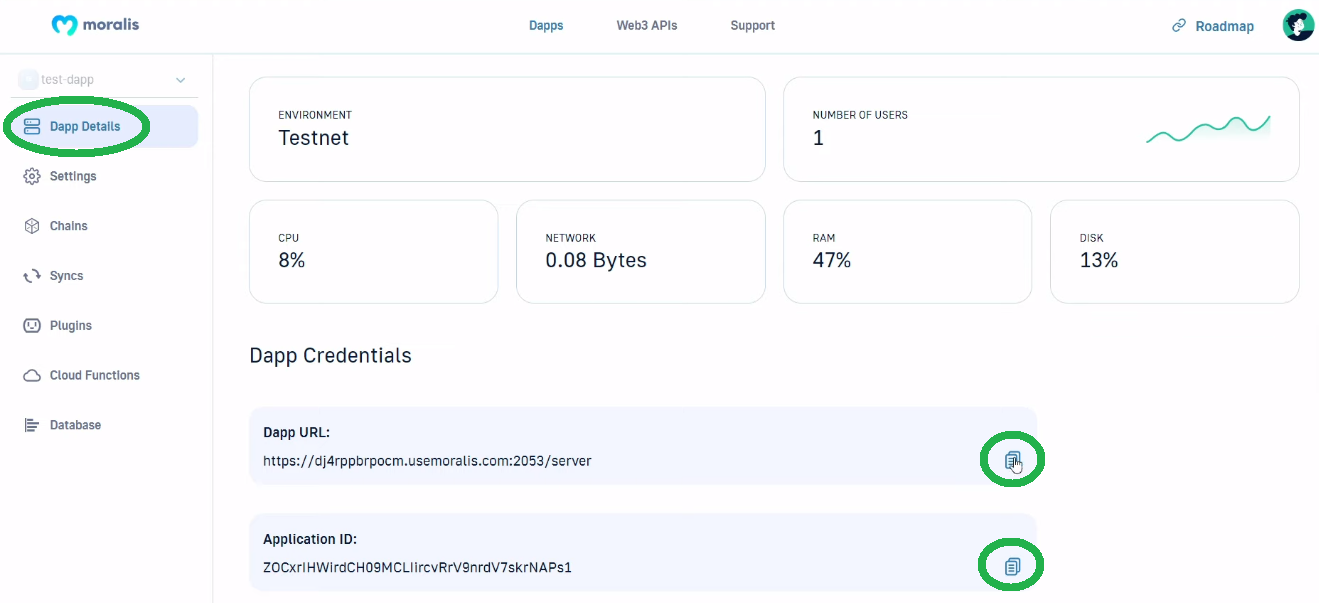
- Paste the above-copied particulars into the “Moralis Web3 Setup” window in Unity and click on “Accomplished”:
Stage 3: Unity Undertaking Construction Overview – Our Web3 Augmented Actuality Dapp
With a view to open the “Principal” scene, navigate to the “Scenes” folder:
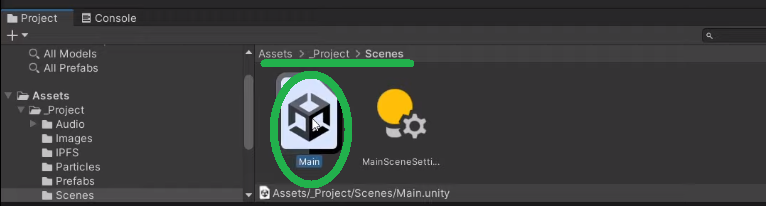
As such, you need to have the “Principal” scene within the “Hierarchy” window:

Therefore, you may see that the scene already consists of the “AuthenticationKit”, which takes care of Web3 authentication. Nonetheless, your principal focus needs to be on “GameManager”, which is the state machine. It’s the “GameManager” that may guarantee your Web3 augmented actuality dapp features as introduced within the above demo. Moreover, “GameManage” does so by way of its a number of states (sport objects):
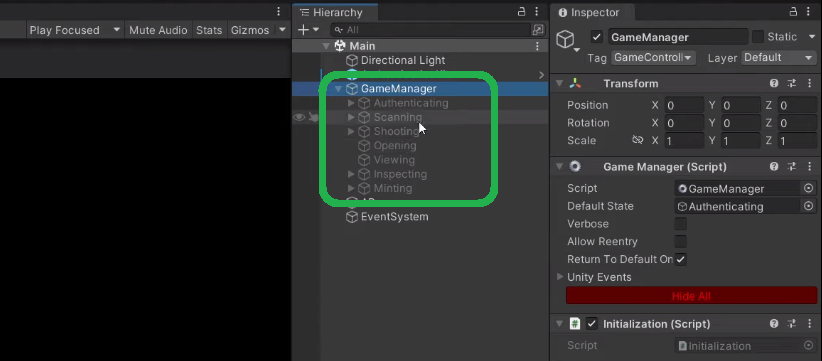
Every state comprises the suitable code that does the required actions in line with every state’s function. The names of the above states clearly point out what are their functions. For a extra detailed overview of every sport state, use the video beneath, beginning at 12:25.
Stage 4: Making a Metaverse Merchandise
Beginning at 18:47 of the video beneath, our in-house knowledgeable will present you the right way to create a metaverse merchandise. The “Opening” script takes care of the gist of making a metaverse merchandise. Nonetheless, additionally, you will have an opportunity to see how our Web3 sport will get to the stage. As such, you’ll take a better have a look at the “Scanning” and “Capturing” scripts. At 24:40, you’re going to get to see how the “MetaverseItem” prefab works with an IFPS URL:
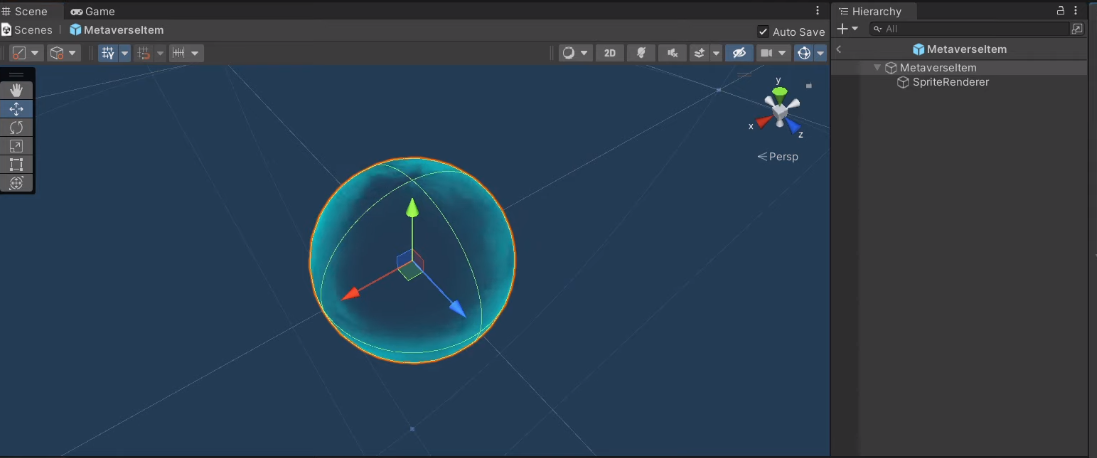
As such, you’re going to get to see how the “MetaverseItem” script makes use of the IPFS URL to get the picture URL and create the sprite.
Be aware: For the aim of this instance challenge, you need to use our IPFS URL.
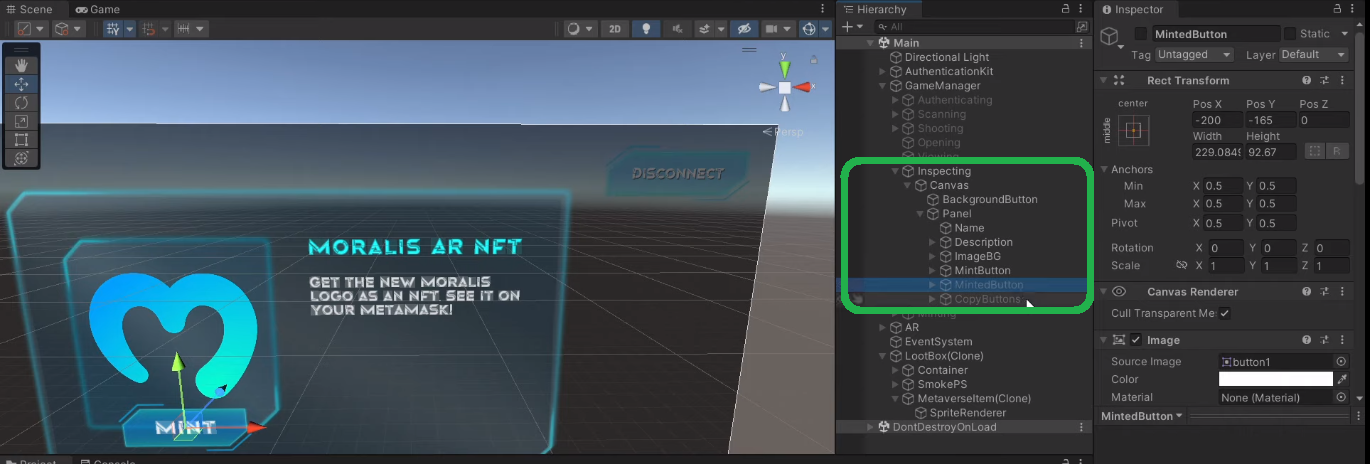
Subsequent, you’re going to get to see the small print of the “Viewing” script (31:40), which checks when the customers are tapping the metaverse merchandise that got here out of the loot field. The latter results in the “Inspecting” state:
Stage 5: Deploy Your Good Contract
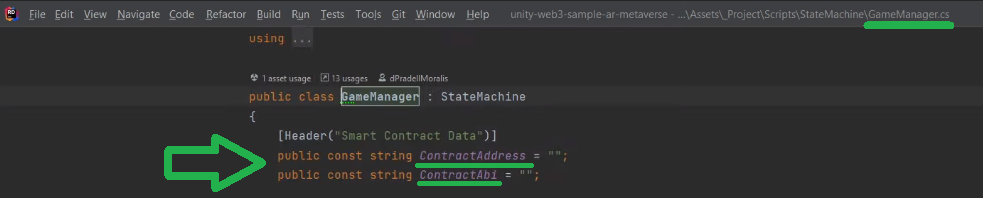
With a view to activate the “Mint” button of your Web3 augmented actuality dapp, you’ll need so as to add your good contract’s ABI and handle to the “GameManager” script:
As such, you’ll need to deploy our good contract. For detailed steerage on how to try this with Hardhat, leap to 36:39. Furthermore, listed below are the written directions you may observe.
Be aware: In case you’re accustomed to Remix, be at liberty to deploy your good contract utilizing that on-line IDE. Moreover, ensure that to have some “play” MATIC in your MetaMask. You need to use the Mumbai faucet for that function.
Stage 6: Mint an Merchandise as NFT
By this level, you’ve efficiently deployed your good contract and pasted your Web3 contract’s ABI and handle into the “GameManager” script. As such, you’re able to study extra particulars concerning the “Minting” script (57:00). Primarily, the “ExecuteMinting” operate does all of the heavy lifting by taking within the above-discussed metadata URL as a parameter. Furthermore, because of Moralis, you get to do that very simply:

Final however not least, right here’s the video tutorial:
How you can Construct a Web3 Augmented Actuality NFT Loot Field – Abstract
In right now’s article, you discovered that because of the ability of Moralis you get to create cool Web3 augmented actuality dapps with Unity. Moreover, utilizing our instance challenge, you had an opportunity to create your individual Web3 augmented actuality dapp. As such, you discovered the right way to join Unity with Web3 performance and the right way to use Hardhat to deploy good contracts. As well as, by taking a better have a look at a number of the most necessary scripts, you additionally had an opportunity to study extra about all of the important shifting components of AR video games created with Unity.
In the event you loved this instance challenge, we encourage you to go to the Moralis’ YouTube channel and the Moralis’ weblog. As an illustration, you may study to construct a Web3 role-playing sport or a Web3 MMORPG. Then again, be at liberty to discover different matters. A few of the newest articles clarify our Ethereum dapp API, the right way to construct a Web3 weblog dapp, the Ethereum Merge, or our Ethereum NFT API – which is a should for any aspiring NFT coders.
And, if you wish to turn out to be a Web3 developer quick and with confidence, we suggest Moralis Academy. That is the place to enroll in skilled blockchain improvement programs, get a customized research path and knowledgeable mentorship, and turn out to be a member of one of the crucial advancing communities within the business.
[ad_2]
Source link


