

[ad_1]
If you happen to’ve been in search of a series that’s interoperable with each Ethereum and Cosmos, odds are you’ve heard of Cronos. This – mixed with Moralis’ current announcement of the Moralis Cronos Web3 Gaming Metaverse Hackathon and Moralis’ rollout of Cronos assist – means there’s by no means been simpler to get began with Cronos growth. As such, we’ll take this text to dive deeper into the intricacies of the Cronos blockchain and methods to simply construct a Cronos dapp with Moralis!
Ensure that to join the Moralis Cronos Gaming Metaverse Hackathon now for an opportunity to win from the hackathon’s complete prize pool of $100,000! The hackathon’s registration deadline is August fifteenth!
Historically talking, the most important hurdle in blockchain growth has been Web3 backend growth. Web3 frontend growth, then again, is extra akin to conventional Web2 practices. As such, these creating Web3 initiatives would favor to concentrate on crafting an amazing frontend, and to depart the backend complexities to another person. That is the place Moralis is available in.
Moralis is without doubt one of the main platforms for Web3 growth. All Moralis customers get entry to Moralis’ highly effective backend infrastructure, that means devs received’t have to fret about their backend. Moralis gives a extra seamless developer expertise for all aspects of Web3 growth. One instance is Moralis’ web3uikit, which makes person interface (UI) growth extra accessible. As such, with Moralis, you’ll be capable to create an amazing dapp UI for all of your future initiatives with ease!
So, for those who’re seeking to construct a Cronos dapp, make certain to enroll with Moralis without cost now! We’ll be utilizing Moralis all through this information. Now, with out additional ado, let’s take a more in-depth take a look at what constructing dapps on Cronos entails!
What’s Cronos?
The Cronos community was launched in 2021, and from the beginning, it has been working parallel to the Crypto.org blockchain that powers Crypto.com’s “Pay” characteristic. Furthermore, Crypto.com has been round since June 2016 and is the group behind each aforementioned chains.
Cronos is an EVM-compatible blockchain supporting IBC or “inter-blockchain communications” networks based mostly on the Cosmos SDK. Because of this Cronos is appropriate with each Cosmos-based ecosystems and Ethereum. As such, it permits for accessible porting of Ethereum dapps and good contracts.
Cronos is fueled by “Ethermint”, which is the supply of the chance to quickly and simply port dapps and good contracts from Ethereum and different EVM-compatible chains. The chain was constructed with IBC protocol assist from its preliminary launch, contributing to its interoperability and environment friendly bridging to different IBC-enabled blockchains. Furthermore, the bottom settlement foreign money of the Cronos community is “CRO”, which is the native token of the Crypto.org chain. Moreover, CRO constitutes an integral part of each Crypto.org and your entire Cronos ecosystem.
Cronos makes use of a proof-of-stake (PoS) consensus mechanism. Because of this community validators stake part of their belongings to induce good habits whereas transactions are validated. The principle advantage of utilizing PoS is that it’s extra scalable than different options. Now, take Ethereum for instance. Ethereum applies a proof-of-work (PoW) mechanism as a substitute of PoS, which is partly the origin of the community’s congestion points, leading to excessive Ethereum fuel charges.
So, now that now we have an summary of Cronos, we will transfer on to the central a part of this text to showcase how one can construct a Cronos dapp with Moralis simply!
Easy methods to Construct a Cronos Dapp in 3 Steps with Moralis
For the remainder of this tutorial, we’ll allocate our time to point out you methods to construct a Cronos dapp. As an example simply how easy the method is, we’ll create a easy dapp the place customers can authenticate with MetaMask and sign up. As soon as logged in, customers can view their transaction historical past and accessible belongings of their Web3 wallets. Beneath, you’ll see two screenshots of the ultimate dapp illustrating what we’re working in the direction of:
Login Part:

Dashboard:

Briefly, we’ll present you methods to construct a Cronos dapp utilizing the next three easy steps:
- Setting Up Your Growth Setting
- Constructing the Login Part
- Creating the Dashboard
We’ll then dissect every step to take a more in-depth take a look at methods to construct a Cronos dapp. If you happen to would reasonably watch a video explaining the method in additional element, please watch the clip under from the Moralis YouTube channel. The video – on which this tutorial relies – exhibits methods to construct a dapp on Ethereum; nonetheless, the method is basically the identical for the Cronos community – it simply requires a couple of tweaks to make it appropriate for this ecosystem.
Step 1: Easy methods to Construct a Cronos Dapp – Setting Up Your Growth Setting
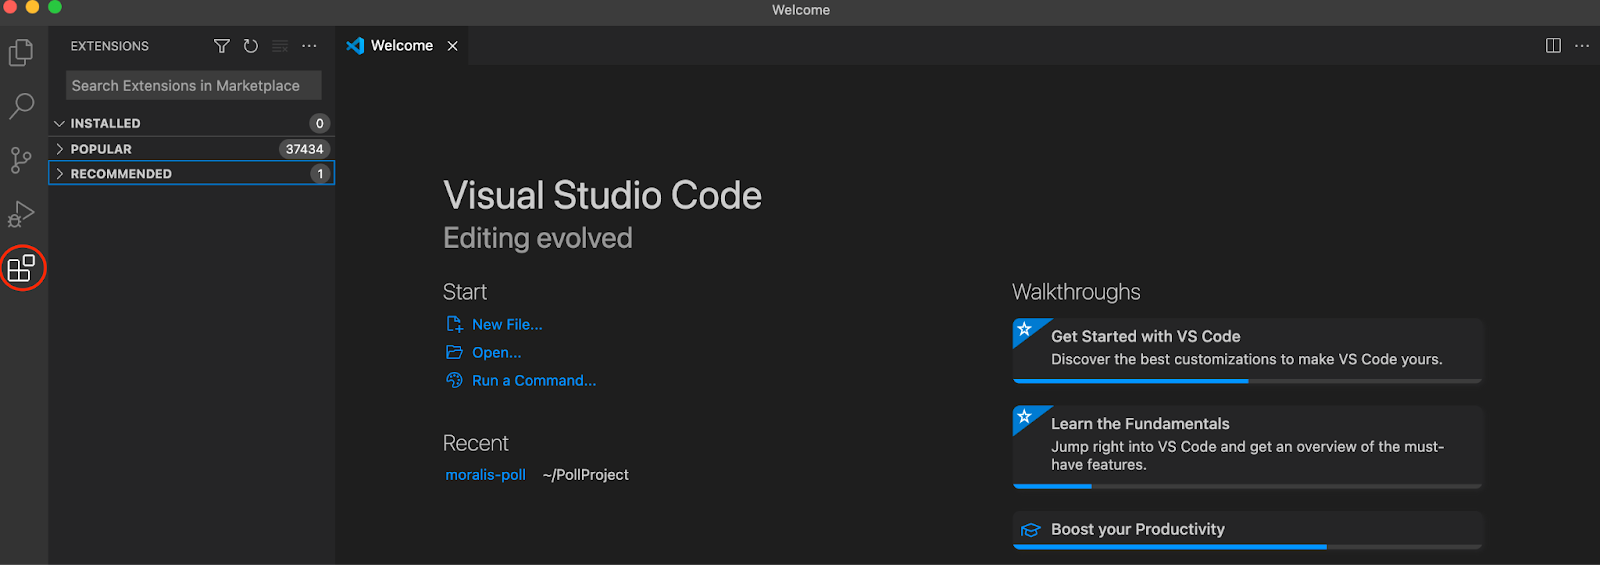
For this tutorial on methods to construct a Cronos dapp, we’ll use the IDE from (built-in growth surroundings) VSC (Visible Studio Code). So, for those who haven’t already, you want to obtain Visible Studio Code earlier than transferring ahead. Alternatively, you even have the choice to make use of one other IDE that you simply is likely to be extra acquainted with, however that’s fully as much as you.
With the IDE at hand, we’ll add a couple of extensions you possibly can set up to offer a extra seamless growth expertise. To take action, you possibly can click on on the extensions tab on the far left of the VSC interface. As soon as there, we suggest you put in the next three extensions:
- Stay Server
- ES7 React
- Solidity
After you have put in the extensions, it’s best to moreover obtain node.js, as that is vital for putting in some npm packages. Nonetheless, you could find the whole VSC setup course of on the 2:17 timestamp of the video for those who’d like additional particulars on methods to get going.
Nonetheless, that’s it for the preliminary preparations concerning the setup means of your IDE. Now, let’s discover the intricacies of buying a Moralis server in your dapp!
Making a Moralis Server
If you happen to haven’t already, you’ll must create a Moralis account, as this may permit you to arrange a server very quickly. After you have an account at your disposal, you possibly can navigate to the Moralis admin panel and click on on the “Create New Dapp” button on the left of the interface.

When you click on on this button, the web page will immediate you to decide on a growth surroundings. This alternative ought to rely in your wants and the place you propose to launch your dapp. Nevertheless, since that is solely a tutorial, we suggest selecting both the “Testnet” or “Native Dev Chain” various. As soon as you propose on launching your dapp when all the pieces is working as meant, it’s best to go for a mainnet server and select the Cronos community as one in all your choices. Lastly, all that continues to be is choosing a area, naming your server, and clicking on “Create Your Dapp”.
With a server at hand, we will transfer on to take a more in-depth take a look at how we create the login and dashboard parts of the dapp!
Step 2: Easy methods to Construct a Cronos Dapp – Constructing the Login Part
Within the following two sections, we’ll allocate our time towards implementing the login and dashboard parts. We’ll use templates from Bootstrap as a basis and make a couple of changes. For readability, we’ll divide this half into two sections – one part for every part. Nevertheless, we will start by downloading each templates from the Bootstrap webpage.
When you navigate to “getbootstrap.com“, you’ll discover the “Examples” tab on the prime of the web site. From there, you possibly can find the “Signal-in” and “Dashboard” parts and proceed by downloading each of them. With these templates at hand, we will break them down individually, beginning with the previous.

The Login Part
As soon as the login part is added to our native listing, we have to make a couple of changes because the bare-bones states of those templates aren’t excellent. As such, eradicating pointless parts from the HTML code will be a good suggestion, or maybe including the rest you’re feeling is lacking. As well as, you may wish to model these HTML parts utilizing CSS to make them look extra aesthetically pleasing.
In our case, the HTML file for the login part can be known as “index.html”. That is the place you want to add or take away HTML parts to make sure that the login part suits your wants. Nevertheless, as this depends upon your preferences, we received’t be diving deeper into this course of. As an alternative, we’ll take a more in-depth take a look at a number of the important parts used so as to add performance to the fields and buttons of the login interface. If you happen to’d prefer to study extra about including/eradicating HTML parts and styling your interface, you possibly can leap to the 27:18 timestamp within the video for a full breakdown of the login part.
As soon as you might be glad with how your login interface seems, you’ll rapidly discover that the fields and buttons don’t truly do something. Because of this, we have to add some JavaScript logic to make the weather interactive. As such, we’ll create a JavaScript file known as “predominant.js”.
What’s extra, a further important step is putting in the Moralis SDK and initializing Moralis. To put in the SDK, all you want to do is enter the next into the ”index.html” file:
<script src="https://cdn.jsdelivr.internet/npm/[email protected]/dist/web3.min.js"></script>
<script src=”https://unpkg.com/moralis/dist/moralis.js"></script>
To initialize Moralis, you possibly can merely enter the next into the ”predominant.js” file and add your server URL and utility ID:
const serverUrl = "https://xxxxx.yourserver.com:2053/server";
const appId = "YOUR_APP_ID";
login()
Within the ”predominant.js” file, we have to create a perform that takes care of the logic for authenticating customers. To make the method simpler, we’ll use Moralis, permitting us to authenticate with MetaMask utilizing only some strains of code. As such, that is what the perform may appear to be:
login = async () => {
    Moralis.authenticate().then(async perform (person) {
        console.log(person.get(’logged in’))
        person.set(”title”, doc.getElementById(’user-username’).worth)
        person.set(”e mail”, doc.getElementById(’user-email’).worth)
        await person.save();
        window.location.href = ”dashboard.html”;
    })
}
As soon as a person clicks the ”Login” button of our dapp’s UI, this perform will set off, permitting customers to authenticate themselves. After they authenticate, it can save data concerning the pockets tackle they used to signal the message, together with their title and e mail. Lastly, the perform redirects the customers to the dashboard web page.
Step 3: Easy methods to Construct a Cronos Dapp – Dashboard
The second part of our dapp is the dashboard, the place customers can see their transaction historical past and all accessible belongings. For this, we’ll change the title of the ”index” file for the Bootstrap dashboard part to ”dashboard.html”.
As soon as once more, this template’s bare-bones state isn’t aesthetically pleasing. Thus, we should observe the identical “tidy-up” course of as we did for the login part. Nevertheless, as this could rely in your explicit dapp and your preferences, we received’t be diving deeper into this course of. As an alternative, for those who want additional assist with this or just need some inspiration, you’ll discover the whole course of on the 51:06 timestamp of the video.
As soon as you might be glad with how the dashboard seems and have included all the weather you wish to show to the customers, we will add some further logic to the “predominant.js” file. As you possibly can see within the preliminary screenshot of our dapp’s dashboard, now we have a logout button on the prime proper of the interface. As such, we’ll look carefully on the “logout()” perform.

logout()
logout = async () => {
    Moralis.Consumer.logOut();
    window.location.href = ”index.html”;
}
The above is sort of an easy perform with a transparent objective that we will simply observe. All of the perform does is log off and redirect the customers to the login part. Subsequent up, now we have the “getTranascations()” perform, which is able to fetch the transaction historical past of a specific Web3 pockets.
getTransactions()
To amass data concerning a person’s transaction historical past, we will use Moralis’ Web3 API with solely a few strains of code. That is what the preliminary a part of the perform seems like for getting a person’s transaction historical past:
getTransactions = async () => {
  console.log(’get transactions clicked’);
  const choices = {chain: "rinkeby", tackle: ”0x3d6…” };
  const transactions = await Moralis.Web3API.account.getTransactions(choices);
  console.log(transactions);
}
Since we’re working with the Moralis API, fetching customers’ transaction histories turns into tremendous simple. Now, all that continues to be for the “getTransactions()” perform is to make use of the acquired data and show it to the customers. Nevertheless, for extra data on how to take action, please look carefully on the 1:14:23 timestamp. From there, you possibly can see how the information from the perform is fed into the dapp and displayed in a desk.

getBalances()
The next perform, “getBalances()”, is used to fetch knowledge concerning customers’ balances. As soon as once more, since we’re working with Moralis, we will fetch balances simply, and it solely takes a few strains of code:
getBalances = async () => {
  console.log(’Get balances clicked’);
  const ethBalance = await Moralis.Web3API.account.getNativeBalance();
  const ropstenBalance = await Moralis.Web3API.account.getNativeBalance({ chain: ”ropsten"});
  const rinkebyBalance = await Moralis.Web3API.account.getNativeBalance({ chain: rinkeby"});
}
As you possibly can see from the code above, this perform will fetch the stability for Ethereum, Ropsten, and Rinkeby tokens. Nevertheless, you possibly can add different networks or take away those you aren’t occupied with. With this data, all that continues to be is to feed the information to your dapp utilizing the same course of to that of the “getTransactions()” perform. You too can watch the video, beginning at 1:55:06, for a extra detailed description of the method.
getNFTs()
The ultimate perform we’ll be taking a more in-depth take a look at is “getNFTs()”. With Moralis’ NFT API, we will fetch a person’s NFT stability with solely a single line of code. As such, that is what the primary a part of the perform may appear to be:
getNFTs = async () => {
  console.log(’get nfts clicked);
  let nfts = await Moralis.Web3API.account.getNFTs({ chain: ’rinkeby’ });
  console.log(nfts);
}
This straightforward perform will fetch all the present person’s NFTs. All that continues to be from there’s to loop by means of every token and fetch the metadata. Nevertheless, you possibly can take a look at the video to see how that is achieved beginning at 2:04:53.
Now that’s it for this tutorial! Nevertheless, regardless that the linked video particulars creating an Ethereum dapp on the Rinkeby testnet, the method doesn’t differ a lot in the case of the Cronos chain. Accordingly, the basics would be the identical, and all you’ll must do is change a couple of parameters!
You probably have any additional questions, please try the video, as this gives a extra detailed rationalization of your entire course of. For instance, the video explains methods to arrange your native blockchain, join the completely different recordsdata within the listing, and extra!
Easy methods to Construct a Cronos Dapp in 3 Steps – Abstract
With Moralis’ current assist for the Cronos blockchain, now’s the proper time to have a look at how one can construct a Cronos dapp. What’s extra, since we’re working with Moralis, it was doable to take action within the following three steps:
- Setting Up Your Growth Setting
- Constructing the Login Part
- Creating the Dashboard
Though the video tutorial was about Ethereum growth, the method for constructing Cronos dapps with Moralis stays comparatively comparable. As such, it’s doable to make use of the identical processes and elementary fundamentals to construct a Cronos dapp following the identical three steps!

This illustrates the facility of Moralis; nonetheless, this solely scrapes the floor of the potential of working with Moralis. If you wish to study extra concerning the working system, please browse the Moralis weblog. Right here you’ll discover further thrilling content material that can assist you change into a greater Web3 developer.
For instance, you might need an curiosity in Moralis’ metaverse SDK, permitting you to create subtle metaverse initiatives. If that’s the case, you possibly can, for instance, study to construct a metaverse good contract, and even create your individual metaverse!
So, for those who’re seeking to change into a blockchain developer, enroll with Moralis proper now and start creating Web3 initiatives very quickly! What’s extra, creating an account is fully free, making it a no brainer to affix the group. Additionally, don’t overlook to affix the Moralis Cronos Gaming Metaverse Hackathon earlier than the registration deadline on August fifteenth, 2022!
[ad_2]
Source link


