

[ad_1]
The recognition of non-fungible tokens (NFTs) has already proven us that folks love proudly owning digital property. Nonetheless, relating to NFT utility, we’re simply getting began. We dare to foretell that within the upcoming years NFTs will revolutionize many industries. And, gaming is certainly one in every of them. Furthermore, as you might know, NFTs play a vital half in Web3 video games. As such, we need to present you the way to convert an NFT to an in-game merchandise. We’ll do that by taking up an instance undertaking, the place we’ll mint an NFT after which use that NFT as a power-up. Whereas this will likely sound like a particularly difficult feat, we guarantee you that it’s lots easier than you might assume. You see, the Web3 stack got here a great distance within the final couple of years. Thus, there at the moment are many helpful Web3 improvement instruments.
Transferring ahead, you’ll get to transform an NFT to an in-game merchandise utilizing Unity, Hardhat, and Moralis. Hardhat is a improvement setting that makes creating, compiling, and deploying good contracts very straightforward. As such, it additionally simplifies minting NFTs. In spite of everything, we’d like good contracts for that. Nonetheless, it’s Moralis (a.ok.a. Firebase for crypto) that allows you to use Unity to create killer dapps (decentralized purposes). Due to the Moralis’ SDK, you get to include Web3 authentication effortlessly. Moreover, utilizing the final word NFT API that Moralis supplies, you additionally convert an NFT to an in-game merchandise with out breaking a sweat.
If that sounds fascinating to you, be certain that to create your free Moralis account and observe our lead. Although, earlier than we offer you an opportunity to get your palms soiled, let’s do a fast demo of our instance Web3 recreation.
Our Instance Web3 Recreation with Energy-Ups – Demo
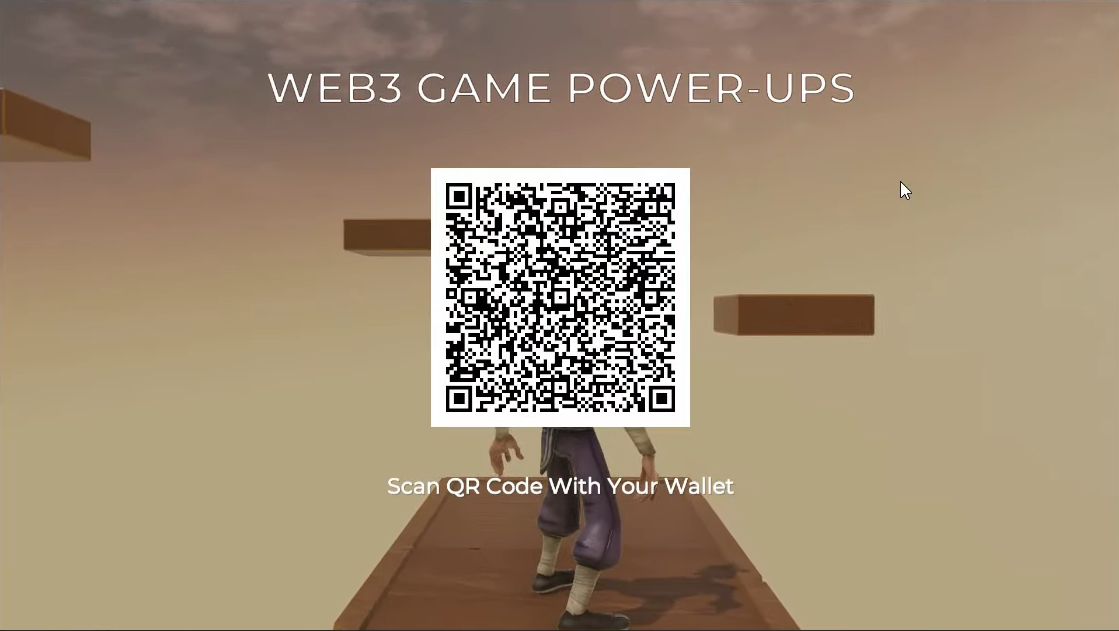
As with most dapps, our instance Web3 recreation, during which we convert an NFT to an in-game merchandise, begins with authentication:

Therefore, customers must click on the “join” button first. After clicking the button, our instance recreation shows a QR code. Thus, gamers get to make use of their favourite cell Web3 wallets, e.g. MetaMask, to proceed:
As soon as the gamers scan the code, in addition they want to substantiate their authentication of their wallets:
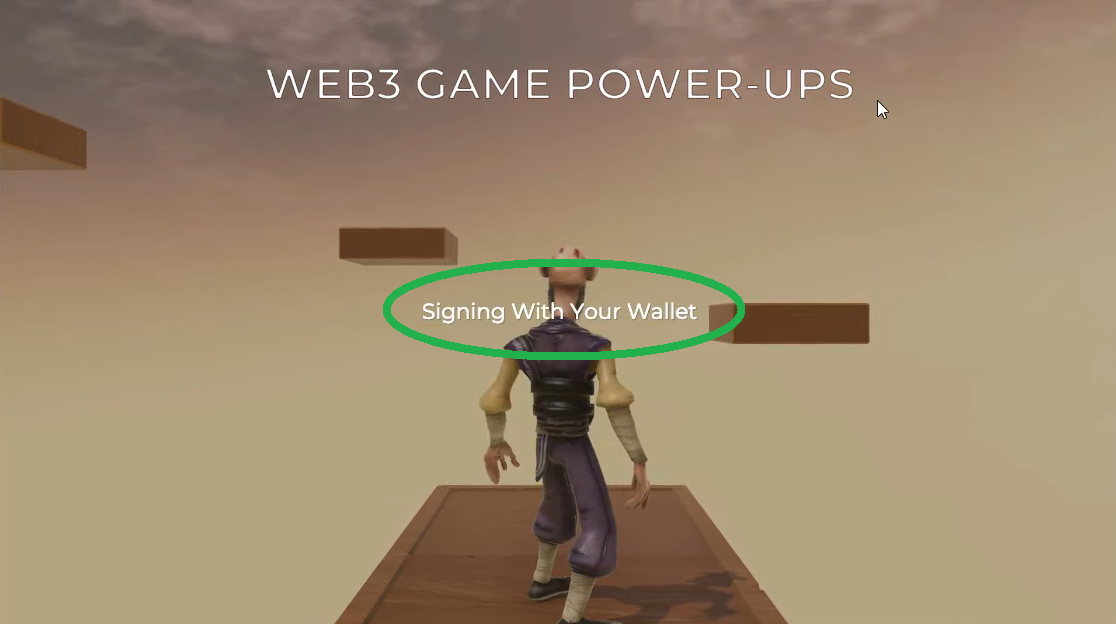
Then, they lastly get to regulate the sport character. Furthermore, as you possibly can see within the screenshot above, there are some platforms in entrance of the character. And, the objective is to leap to these platforms. Nonetheless, in its common state, the character doesn’t have sufficient energy to make the soar:
So, that is the place power-ups come to play. In the event you ever performed Tremendous Mario, you understand how superior power-ups are.
Convert an NFT to an In-Recreation Merchandise – On-Chain Energy-Up
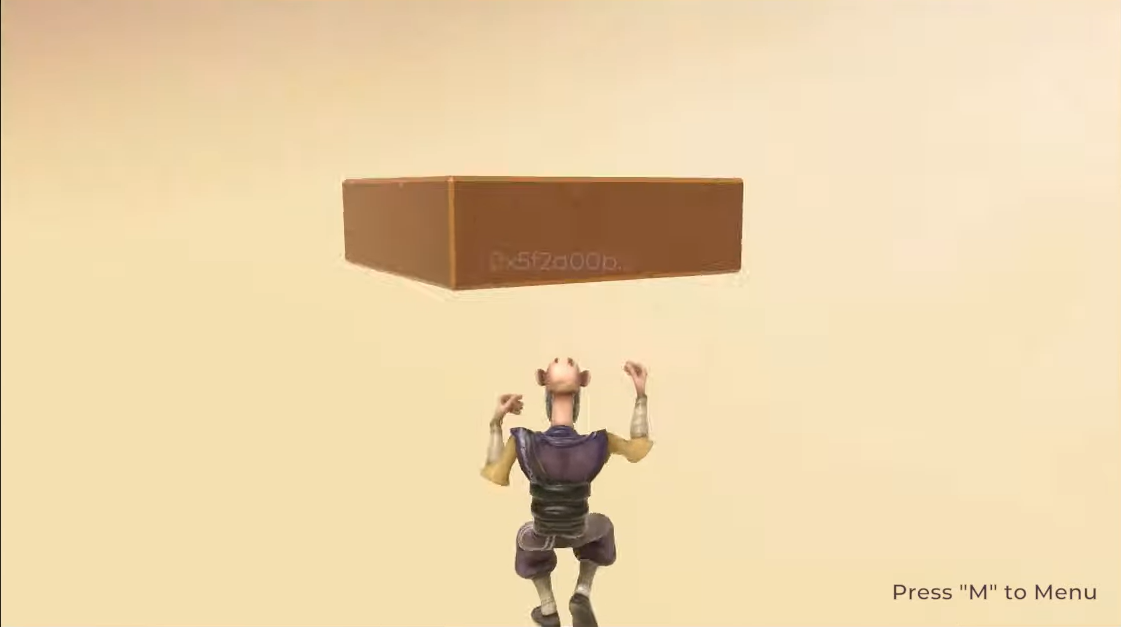
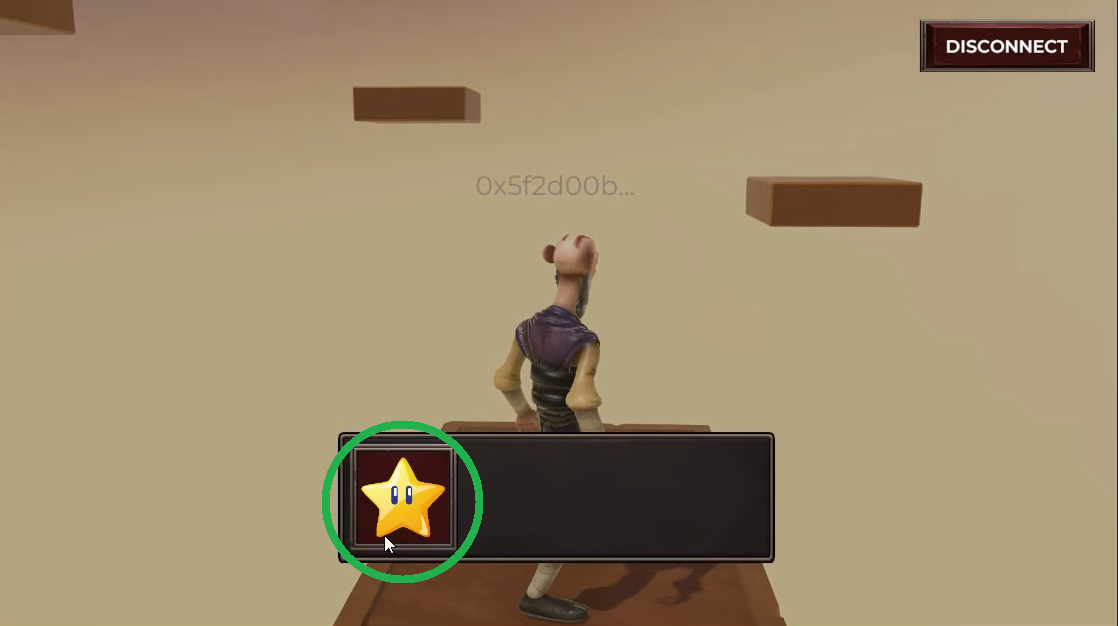
On that word, gamers can hit “M”, the place they’ve one power-up. Nonetheless, that is no common power-up – in our case, it’s an NFT. That is an NFT that we are going to convert into an in-game asset. As soon as contained in the menu, gamers must click on on the ability up merchandise:
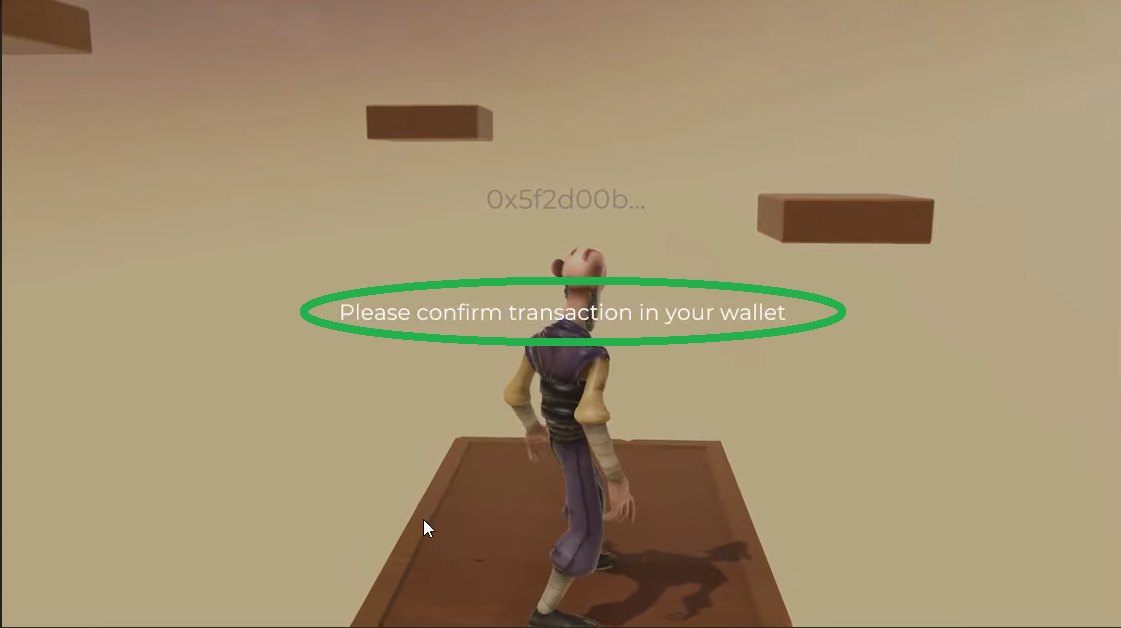
And, because the merchandise is an NFT, after clicking it, gamers additionally want to substantiate an on-chain transaction utilizing their wallets:
This transaction is the place we convert an NFT to an in-game merchandise. As soon as gamers verify the above transaction, their character routinely will get upgraded for twelve seconds:
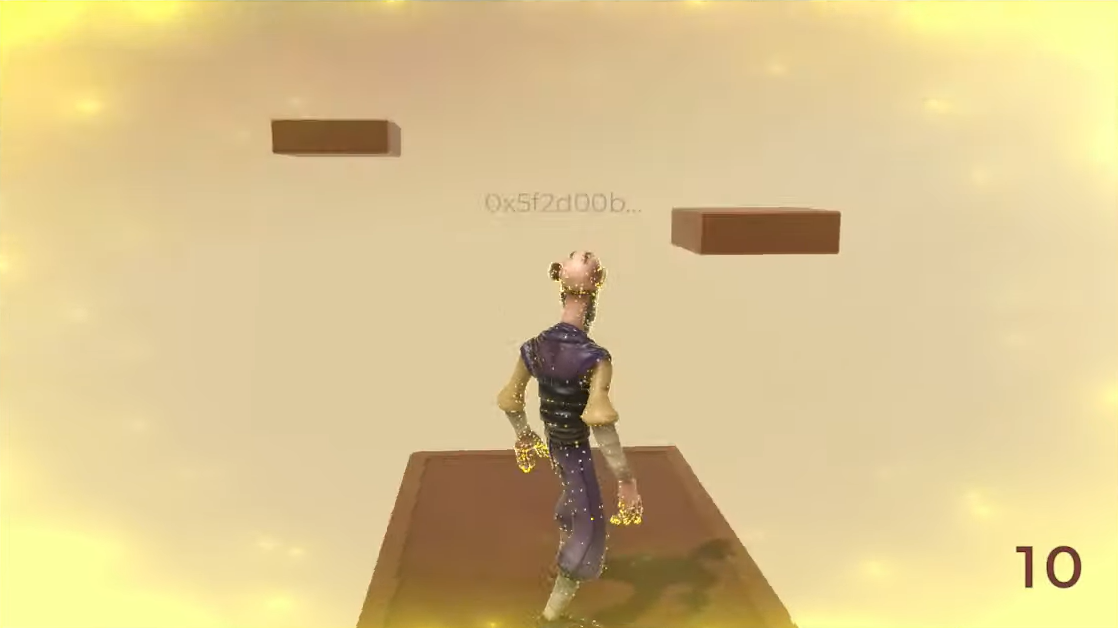
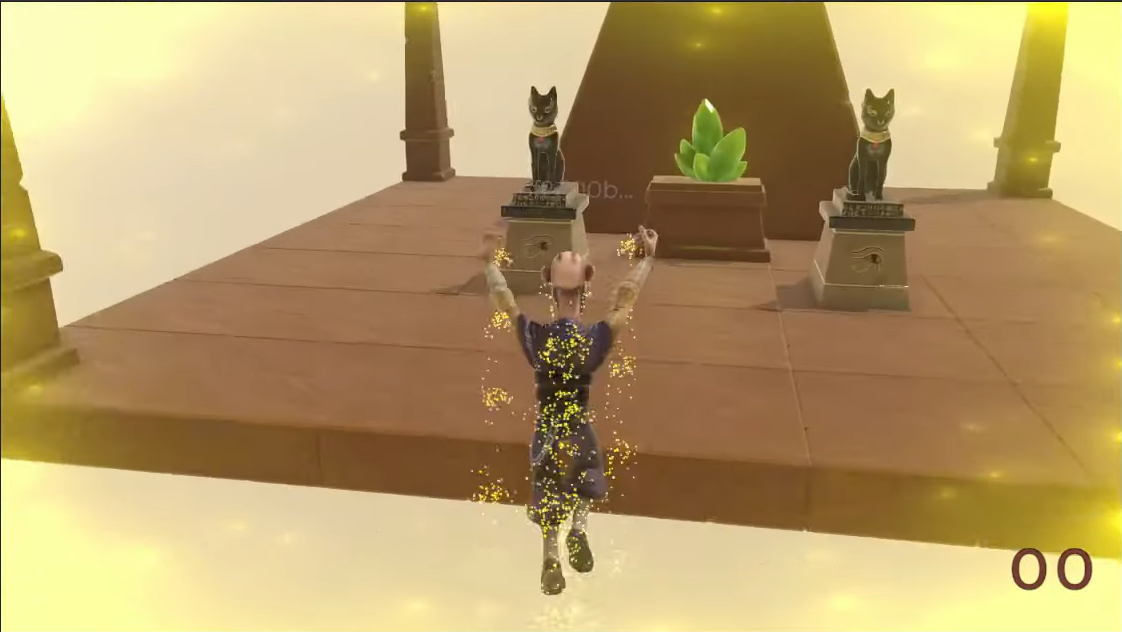
Moreover, as you possibly can see within the above picture, our instance recreation additionally has some visible results, which point out that the power-up has been utilized. Furthermore, there’s a counter within the bottom-right nook, which exhibits the variety of seconds remaining on the power-up. As such, that is the time that gamers have to leap between the platforms. Therefore, expert gamers can get all the best way to the highest, which is the objective of our instance recreation:
After all, there are much more options we may embrace in our instance recreation. Nonetheless, the aim of this tutorial is to show you the way to convert an NFT to an in-game merchandise. And, the above-presented options cowl that facet. So, in case you discover our instance dapp fascinating, be certain that to roll up your sleeves and create your individual occasion of it.
Within the following sections, we’ll sort out at present’s instance undertaking in six phases. First, we’ll have a look at the undertaking construction to give you a broader imaginative and prescient earlier than specializing in particular options. Second, we’ll present you the way to full the preliminary Moralis setup. That is the place you’ll acquire your Moralis dapp’s credentials, which will probably be your gateway to Web3 performance. Third, we’ll present you the way to use Hardhat to deploy a slightly easy ERC721 contract. Then, we’ll mint an instance NFT utilizing our “NFT Unity Minter”. Subsequent, you’ll learn to get the NFT attributes in Unity. Lastly, we’ll present you the way to use these attributes as a power-up.
Mission Construction Overview
Begin by visiting our undertaking’s GitHub web page, the place you get to clone the code or obtain the ZIP file:

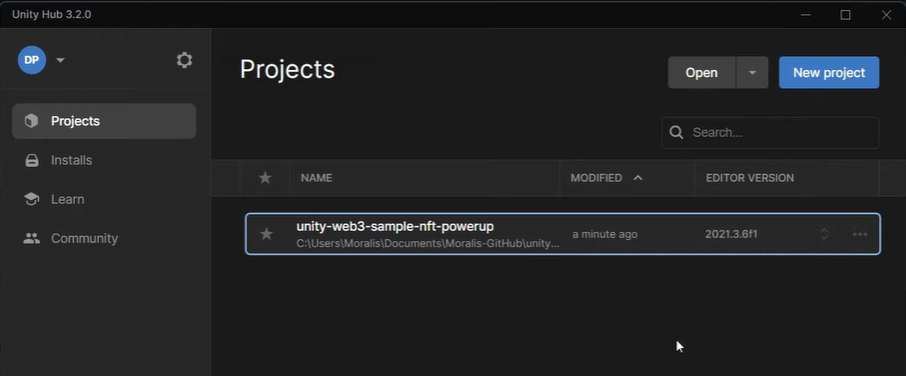
Subsequent, open your Unity hub and open the folder with the undertaking, after which open the undertaking:
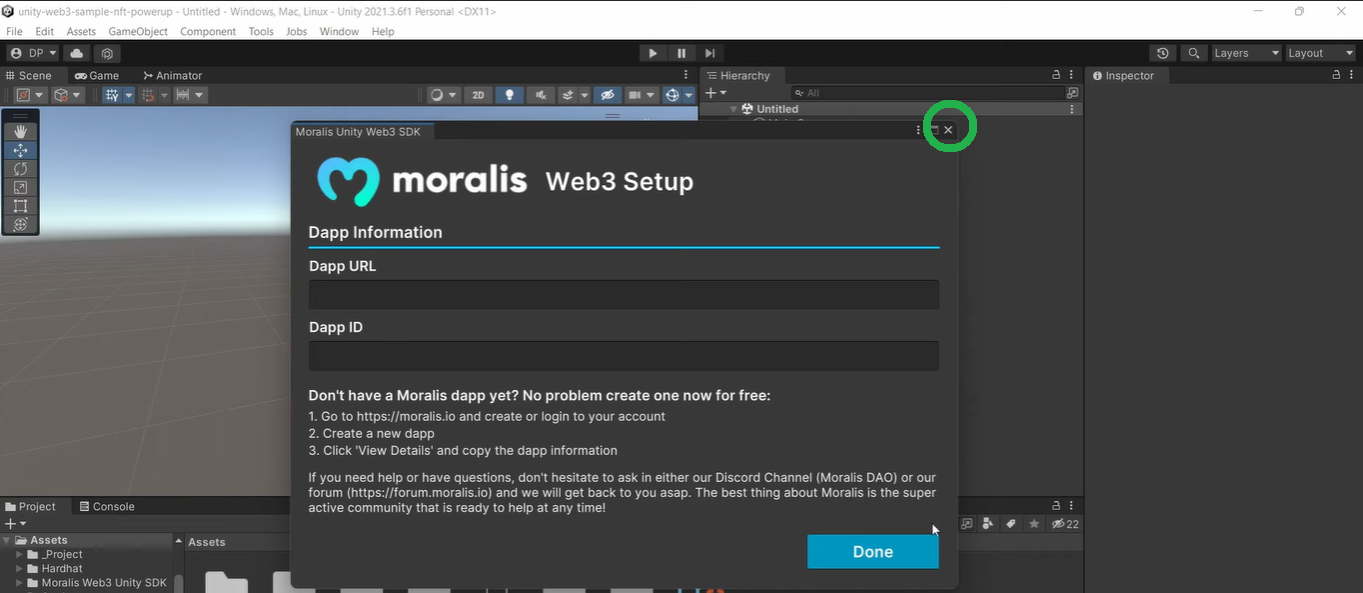
While you open the undertaking, you will notice the “Moralis Web3 Setup” window by default. You may shut that window for now, as we’ll first check out the construction of the undertaking:
Notice: For a extra detailed undertaking construction overview, use the video on the backside of the article, beginning at 5:15. That is additionally the place you get to be taught extra in regards to the particular impact throughout power-up (as offered within the demo above).
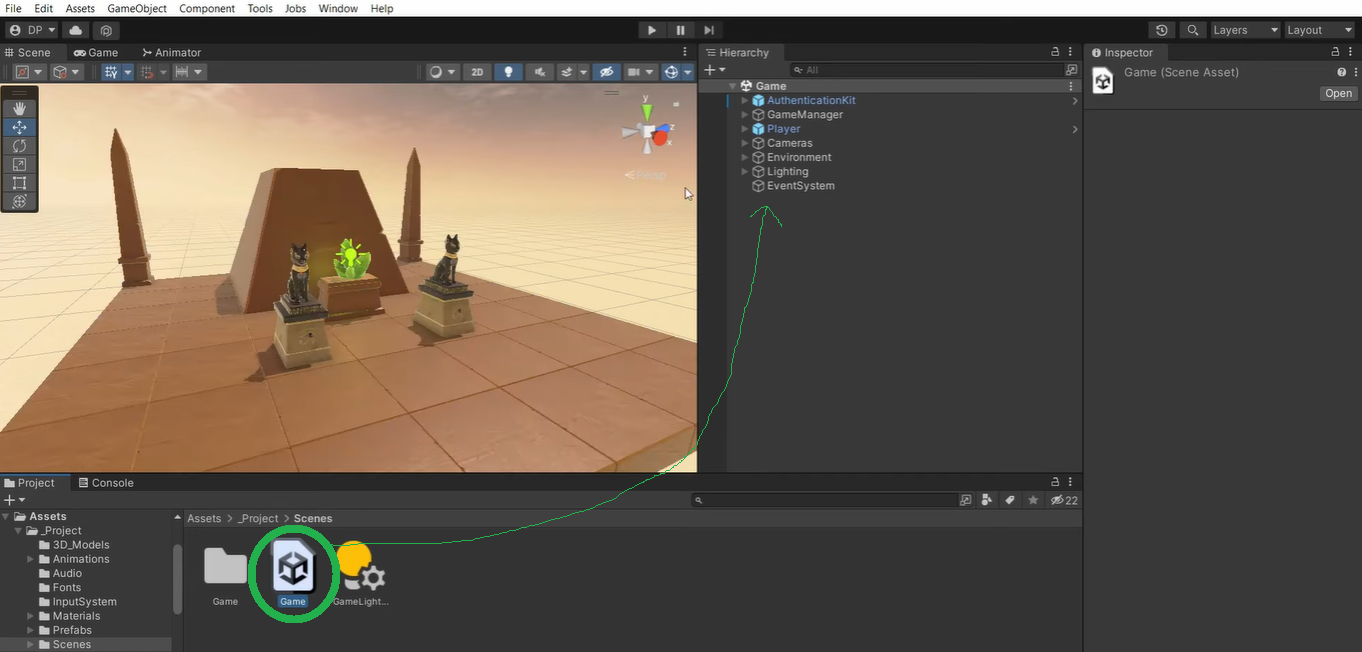
Contained in the “_Project” folder, are all of the property concerned on this instance Web3 recreation. That is additionally the place you could find the “Scenes” folder:

Furthermore, contained in the “Scenes” folder, you’ll find the “Recreation” scene. Open it:
Trying on the “Recreation” scene hierarchy, you possibly can see “AuthenticationKit” on prime. The latter takes care of Web3 authentication. Subsequent, there’s “GameManager”, during which we use a state machine to undergo all the sport states:
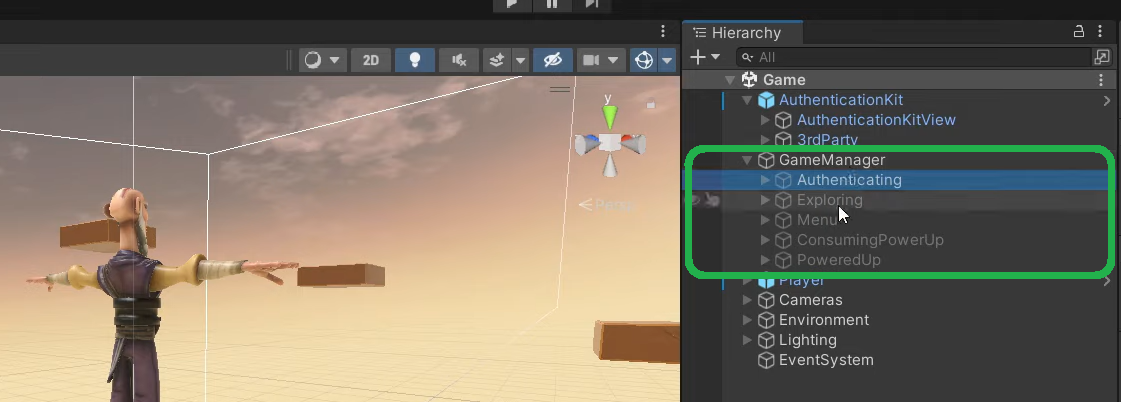
As you possibly can see within the screenshot above, as soon as gamers authenticate with their wallets, the sport prompts the “Exploring” recreation state. When the gamers press the “M” button, they activate the “Menu” state. Furthermore, if the gamers click on the merchandise, the “Consuming PowerUp” state takes issues over. That is the place the sport obtains the NFT’s attributes. And, as soon as the gamers verify the transaction, the “PoweredUp” recreation state takes place.
Preliminary Moralis and Unity Setup
Now that you understand the gist of our instance undertaking, it’s time to finish the preliminary setup. As such, that you must create your Moralis dapp and replica its credentials into the “Moralis Web3 Setup” window in Unity. Nonetheless, since we closed that window above, we have to first reopen it:
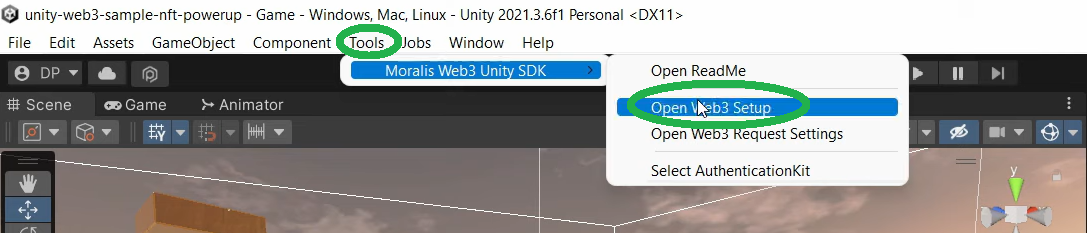
The “Moralis Web3 Setup” window supplies you with easy three-step directions. Although, to help you additional, observe these steps:
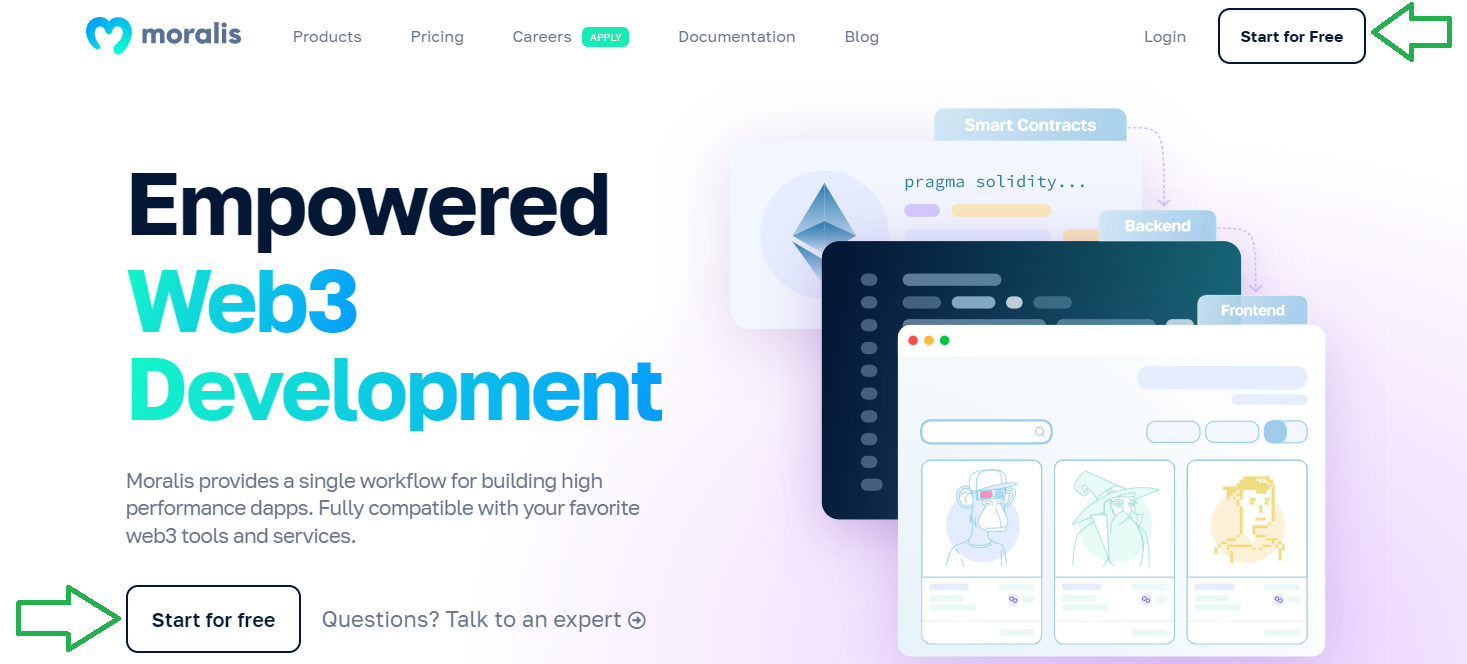
- Create your free Moralis account or log in to your present one:
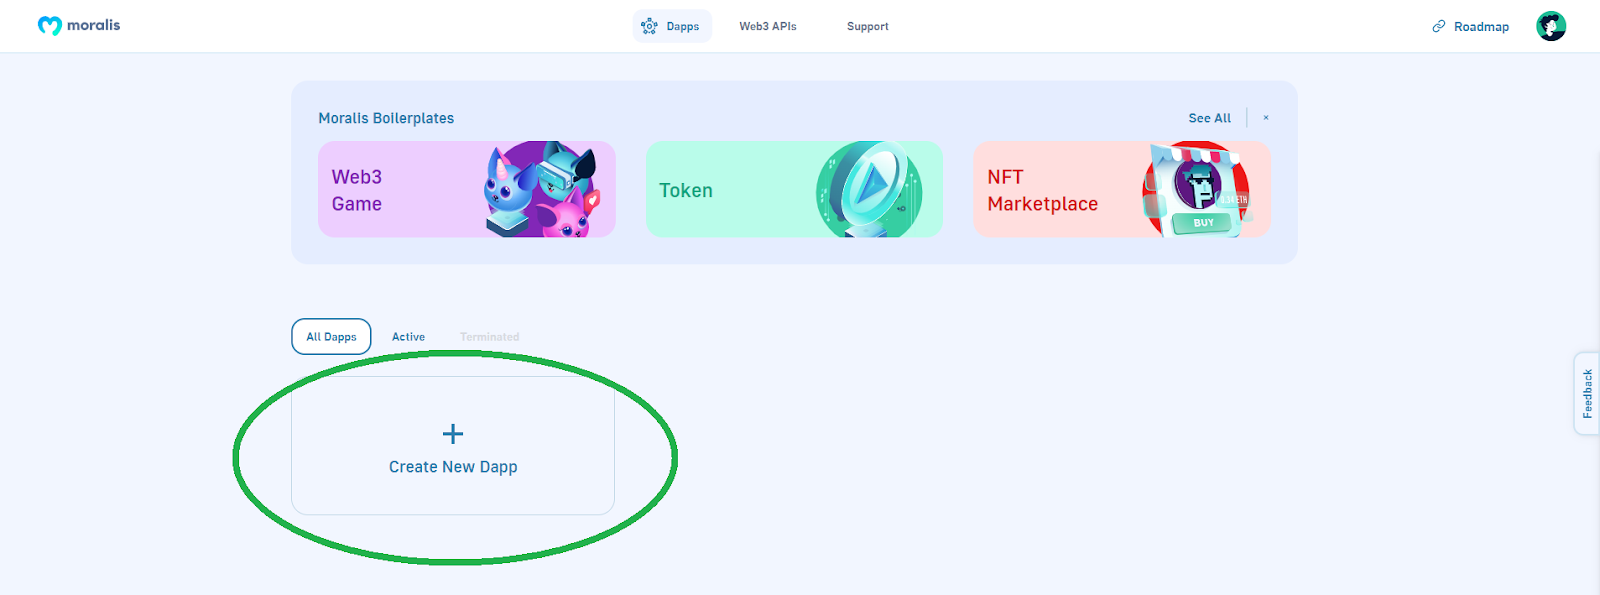
- Inside your Moralis admin space, that you must create a brand new dapp. You do that by clicking the “Create New Dapp” button:
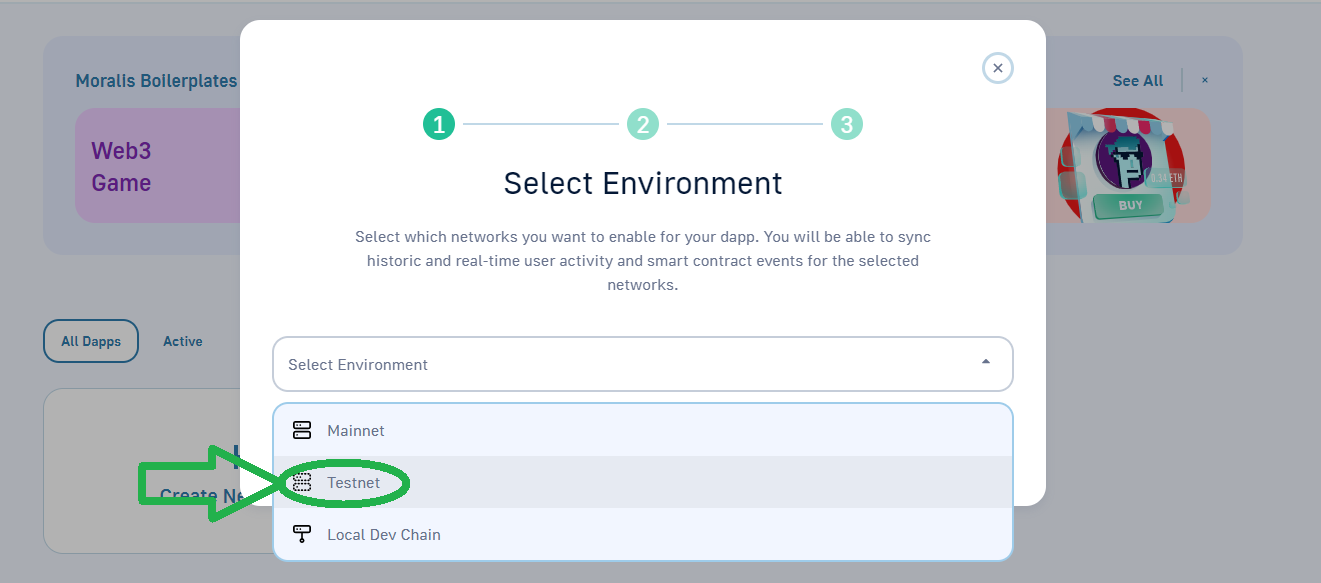
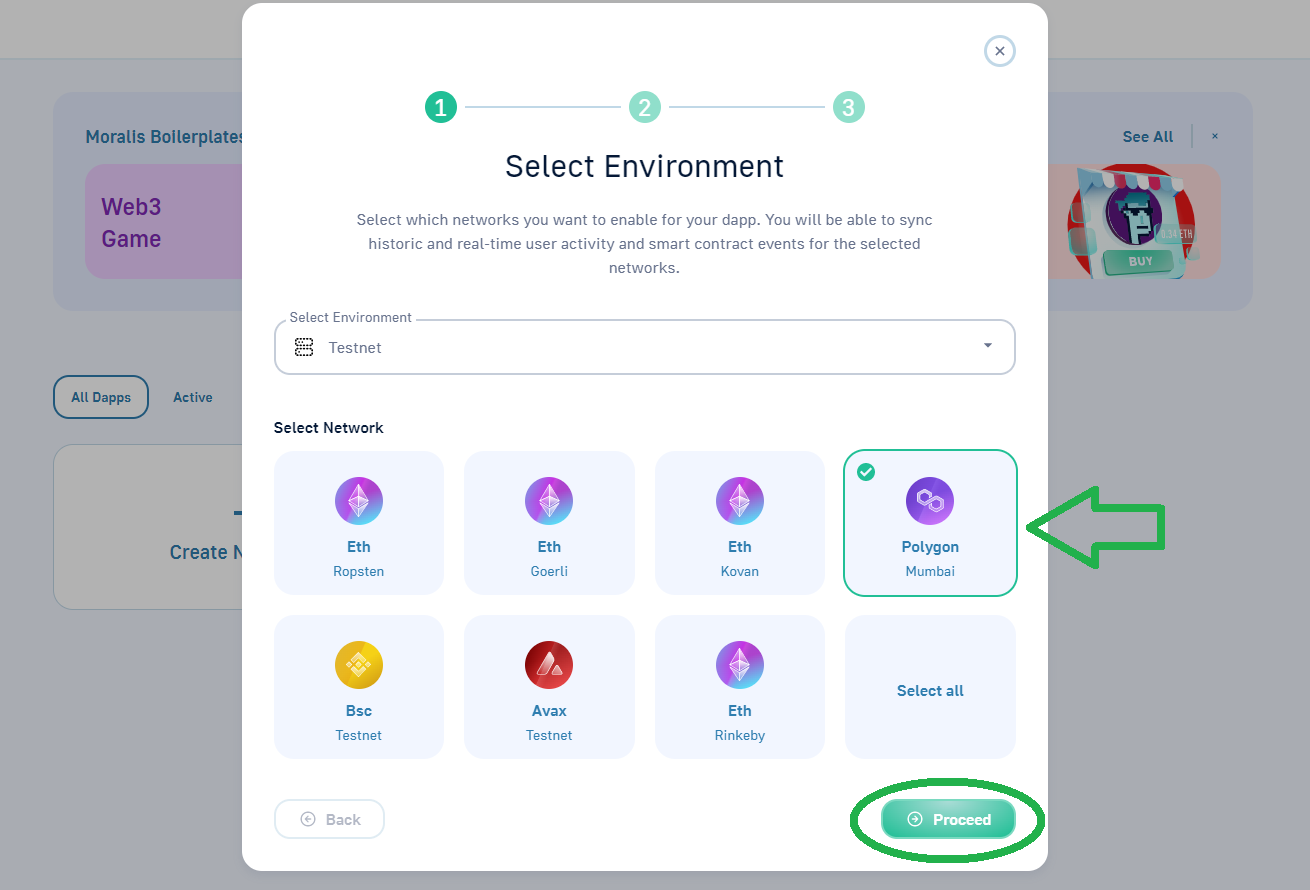
- Within the pop-up window, choose your setting. When engaged on instance initiatives, use the “Testnet” choice:
- Subsequent, that you must choose the chain you need to concentrate on. We suggest utilizing “Polygon Mumbai”. To maneuver on, click on the “Proceed” button:
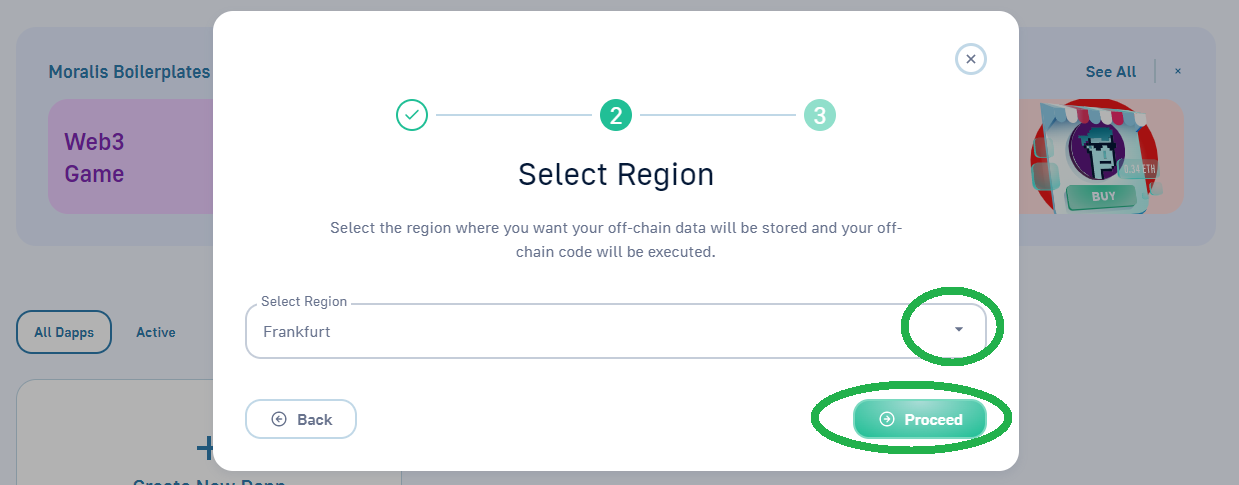
- Now that you must choose your area. You do that by selecting the town from the given choices that’s closest to your precise location:
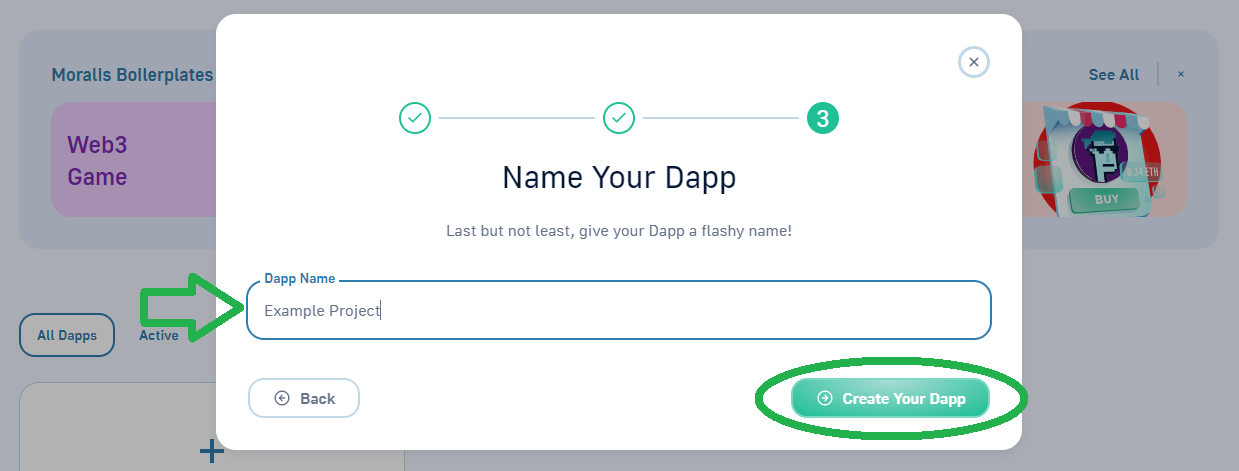
- Subsequent, you get to call your dapp. This may be something you need. With the identify in place, spin your dapp by clicking the “Create Your Dapp” button:
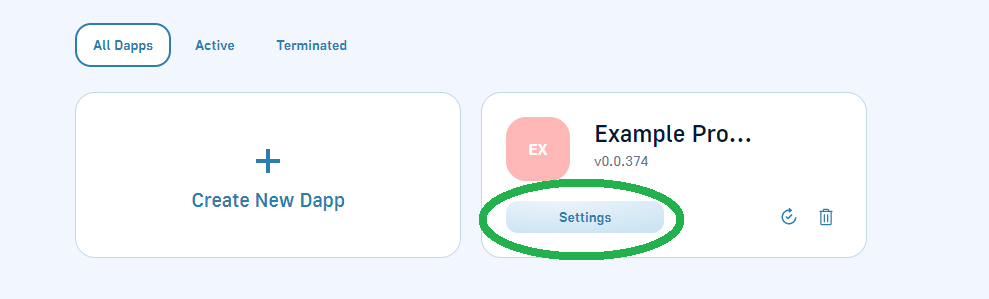
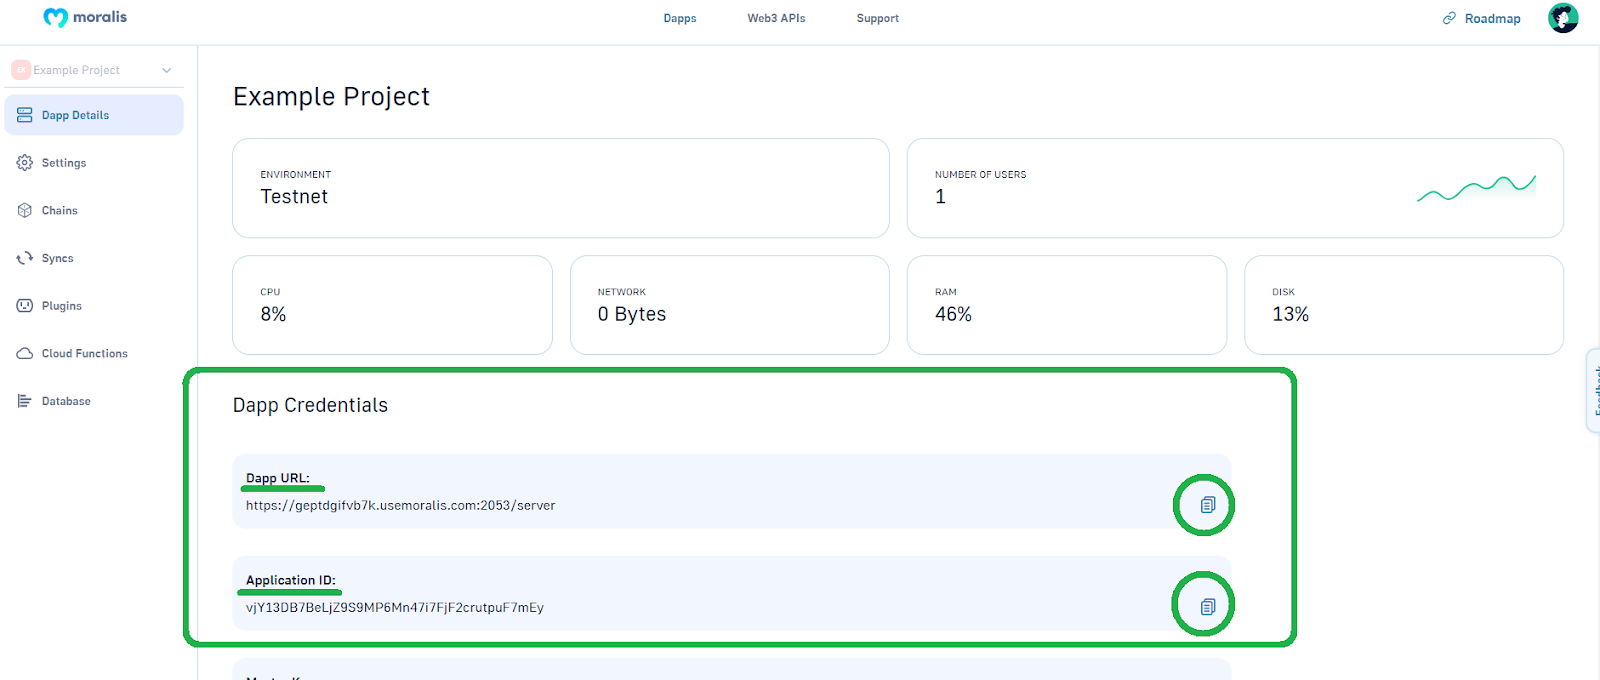
- As soon as your dapp is reside, you get to acquire its credentials (URL and ID) through the “Settings” button:
- Use the “copy” icons to repeat your dapp URL and ID:
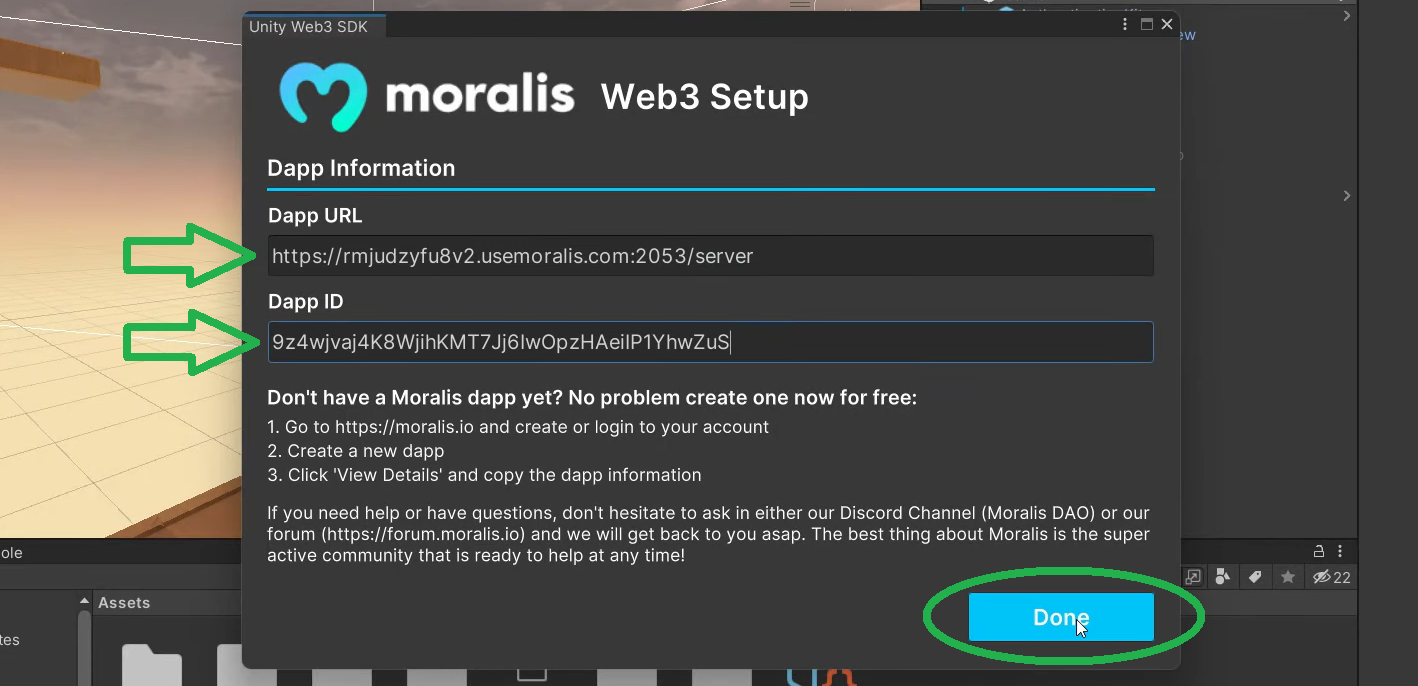
- Lastly, paste the above-copied credential into Unity and click on “Accomplished”:
With the preliminary setup beneath your belt, it’s time to learn to use Hardhat to deploy good contracts.

Utilizing Hardhat to Deploy an ERC721 Sensible Contract
By this level, you already know that good contracts are accountable for minting NFTs. As such, if we need to convert an NFT to an in-game merchandise, we have to deploy a wise contract. To make this as simple for you as attainable, we created a set of directions that cowl all of the steps that you must full. You may find this file inside “Belongings > Hardhat”:
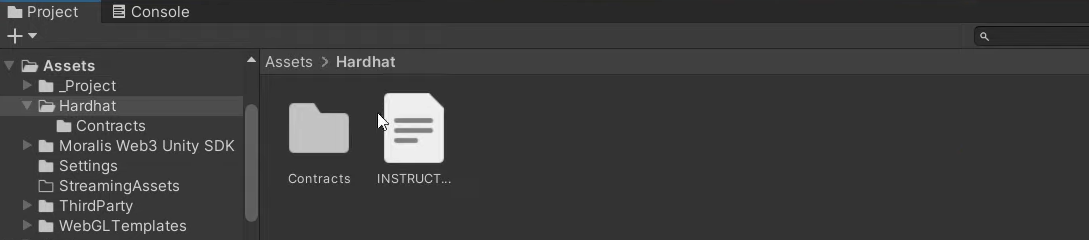
Apart from the directions, that is additionally the place you’ll discover our contract (contained in the “Contracts” folder). If you wish to observe together with our in-house professional as he goes by all of the steps, use the video under, beginning at 12:28. He’ll present you the way to set up Hardhat, create a brand new Hardhat undertaking, and the way to apply the required tweaks to the template information. Furthermore, you’ll additionally learn to acquire the Mumbai community URL, your Polygonscan API key, and your personal key (21:00). You will have these particulars contained in the “hardhat.config.js” file.
Moreover, to cowl the transaction charges associated to the deployment of your good contract, you’ll want some “check” MATIC. Fortunately, you may get MATIC for the Mumbai community totally free utilizing Polygon Faucet (22:53). With the whole lot in place, you’ll get to deploy your good contract utilizing “npx hardhat run scripts/deploy.js –community mumbai” command. Your terminal will give you your good contract deal with, which you need to use with Polygonscan (testnet). There, you may get all the main points concerning your ERC721 good contract, together with its ABI (25:02).
Mint an Instance NFT
As promised above, we’ll use our NFT Unity minter to simply mint an instance NFT. For particulars on the way to use this useful gizmo, use our “mint a Unity NFT” information or the video under, beginning at 25:50. After all, there are different methods to mint NFTs; nonetheless, utilizing our minter dapp could be very straightforward. All-in-all, you’ll find yourself with an NFT that has “length” and “motion” attributes:
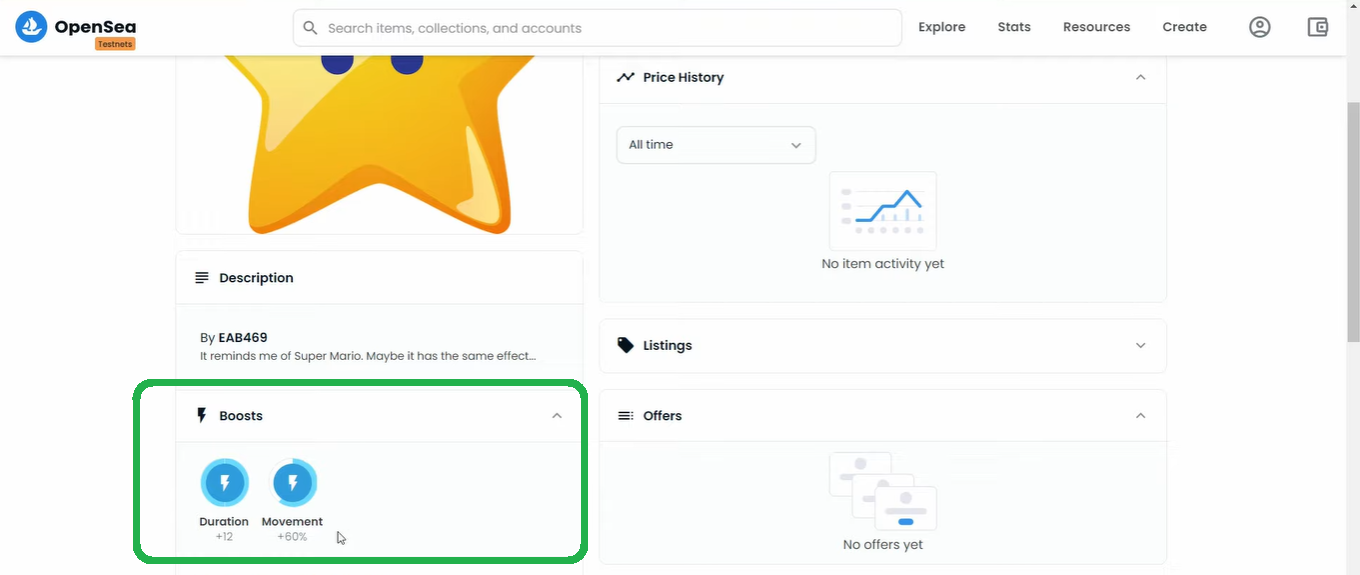
We’ll now use these attributes in Unity, to present our in-game character a lift. As such, the NFT attributes play an essential function relating to utilizing NFTs as power-ups.
Convert an NFT to an In-Recreation Merchandise – Code Walkthrough
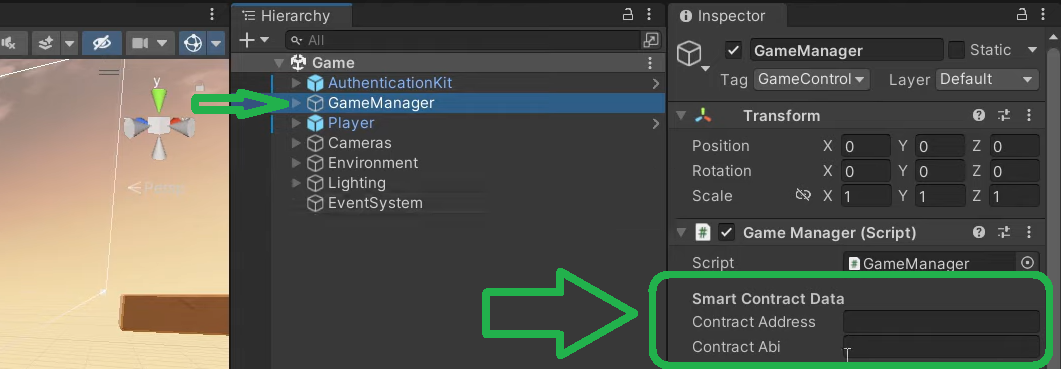
In the event you’ve adopted the above directions, you now have the whole lot in place to finish the ultimate two phases. So, to transform an NFT to an in-game merchandise, that you must get the above-minted NFT’s attributes first. As such, return to the “Unity Web3 Pattern NFT Powerup” undertaking in Unity. Use “GameManage” and paste the good contract particulars (33:51):
Beginning at 35:30, you’ll have an opportunity to take a better have a look at the “Menu” script. That is the place the code obtains and makes use of the NFT attributes through different scripts. Furthermore, it’s the “InventoryItem” script that assigns NFT attributes to the in-game power-up values.
Use NFT Attributes as a Energy-Up
To get your NFT’s attributes, you solely needed to paste in your good contract’s particulars. Furthermore, you additionally had an opportunity to be taught in regards to the code that ensures the whole lot runs easily. Nonetheless, to make use of NFT attributes as a power-up, we have to convert an NFT to an in-game merchandise. We’ve already carried out a giant a part of this conversion above. Although we nonetheless must execute the on-chain transaction, which can even set off the “GoToConsumingPowerUp” perform.
Yow will discover the main points within the “ConsumingPowerUp” script (46:22), which is accountable for protecting the interplay with our good contract. That is the place the “ExecuteConsiming” takes within the token ID and does its trick. Due to the Moralis’ SDK and “ExecuteContractFunction”, a single line of code does a lot of the heavy lifting. Furthermore, that is additionally the place we name the “devour” perform from our good contract, which triggers the burning of the NFT in query. As such, the on-chain transaction that takes place after gamers click on the merchandise of their stock burns the token. Thus, it additionally deletes the merchandise from the menu and prompts the “PoweredUp” recreation state. Therefore, it’s the “PoweredUp” script that lastly makes use of our NFT’s attributes.
Final however not least, right here’s the video tutorial we’ve been referencing by the article:
The right way to Convert an NFT to an In-Recreation Merchandise – Abstract
Utilizing at present’s instance undertaking you had an opportunity to learn to convert an NFT to an in-game merchandise. You had been in a position to make use of our instance undertaking to do that very simply. Moreover, you additionally had an opportunity to make use of Hardhat to deploy your individual good contract. This half was slightly essential because it enabled you to be taught in regards to the features that allow you to add attributes to NFTs and even burn NFTs. Nonetheless, you additionally had an opportunity to be taught in regards to the traces of code that convert an NFT to an in-game merchandise. As such, now you can tweak our instance undertaking so as to add extra options and use different NFTs as power-ups. After all, it’s also possible to create your individual Web3 video games with that form of NFT performance.
In the event you loved this instance undertaking, we encourage you to go to Moralis’ Web3 YouTube channel and Moralis’ Web3 weblog. These retailers supply a ton of tutorials and on-point explanations of varied crypto points. In reality, they’re the platforms that may show you how to change into a Web3 developer totally free. Nonetheless, if you wish to go full-time crypto sooner slightly than later, then you definitely ought to think about taking a extra skilled method. In that case, enrolling in Moralis Academy is likely to be the appropriate path for you.
[ad_2]
Source link


